24 Summer Gel Nail Designs for Long-Lasting Glam
Summer is the perfect time to express your creativity through your nails! With vibrant colors, fun patterns, and eco-friendly options, gel nails can provide the long-lasting glam we all desire.
Whether you’re hitting the beach, attending a garden party, or simply enjoying a sunny day outside, your nails can elevate your entire look.
Let’s dive into 24 fabulous summer gel nail designs that not only look amazing but also align with sustainable beauty practices. Each design offers a unique flair and charm—perfect for anyone looking to add a bit of glam to their summer! Get ready to be inspired and pampered with some DIY care tips to ensure your nails look fabulous all season long.
1. Ocean Waves
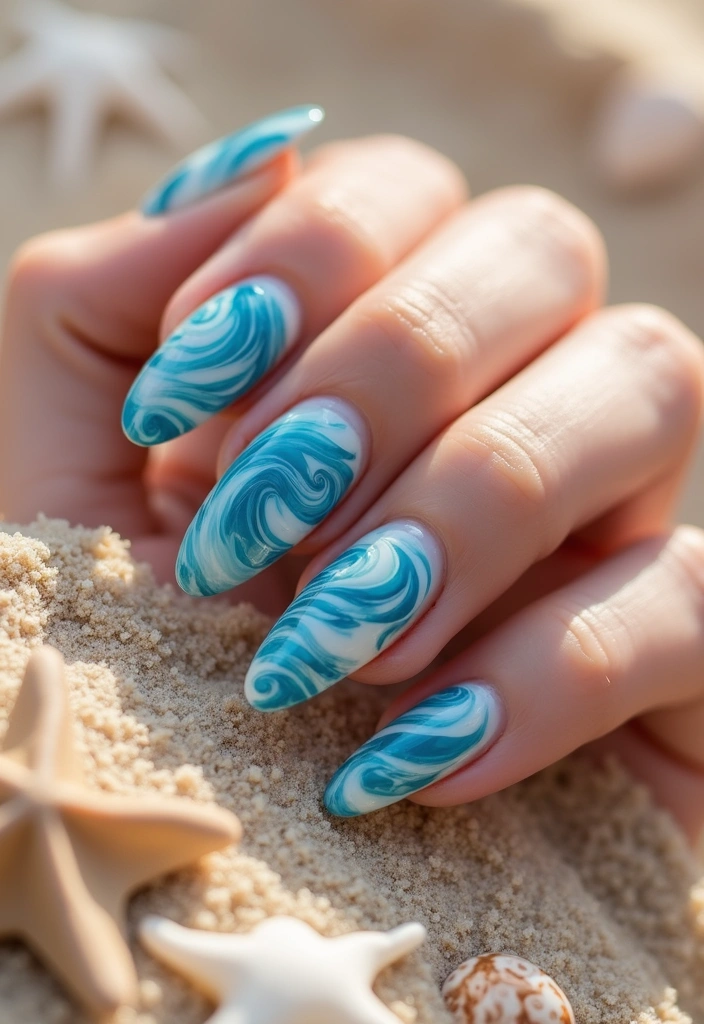
Bring the beach to your fingertips with the stunning ocean waves design! This manicure features a soft gradient of blues and whites, mimicking the soothing waves of the sea.
To create this look, apply a pale blue base coat, then use a sponge to dab a deeper blue and white to create the wave effect. Finish with a glossy topcoat for that wet look.
This design not only captures the essence of summer but also allows you to connect with nature.
DIY Care & Tips:
– Use eco-friendly gel products to minimize your environmental footprint.
– Keep nails strong and healthy by applying cuticle oil regularly.
– Opt for a vegan top coat to stay aligned with sustainable beauty practices.
2. Tropical Paradise
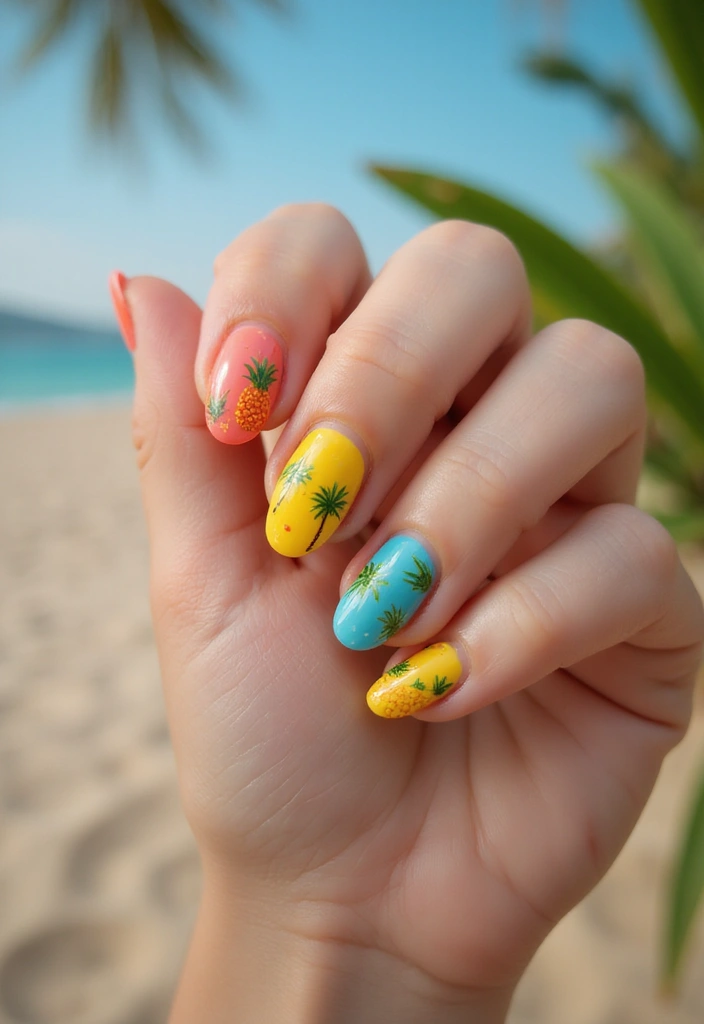
Dive into the tropical vibes with a dazzling tropical paradise design! Think bright greens, pinks, and yellows alongside fun palm tree and pineapple motifs.
Start with a vibrant yellow base, then add hand-painted palm trees and tiny pineapples on a few accent nails. The combination of colors and playful designs will surely turn heads at any summer gathering.
These colors are not only eye-catching but also represent the lush tropical landscapes many dream of visiting during the summer.
DIY Care & Tips:
– Always ensure to prep your nails properly by buffing and cleaning to help the gel adhere better.
– Use a base coat that strengthens your nails to prevent breakage.
– Consider eco-friendly nail paints that are chemical-free.
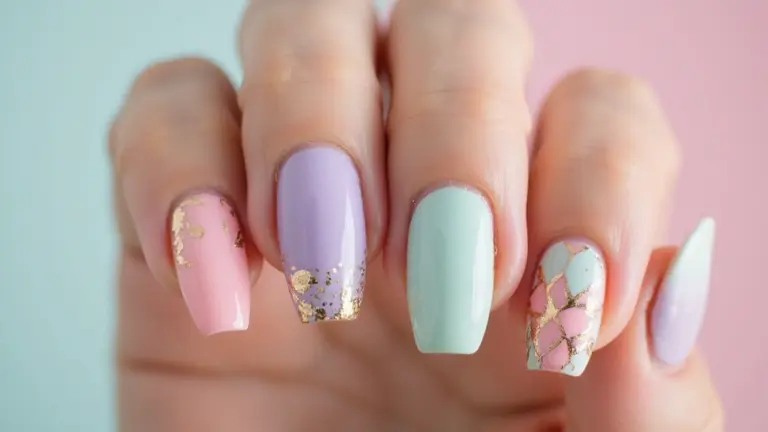
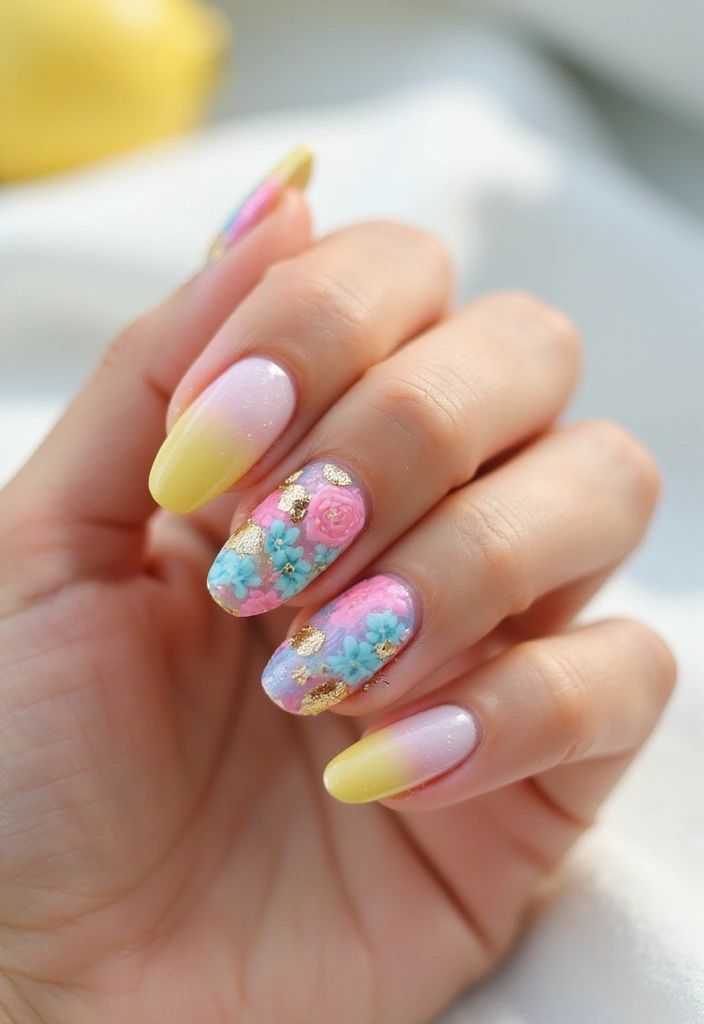
3. Floral Chic
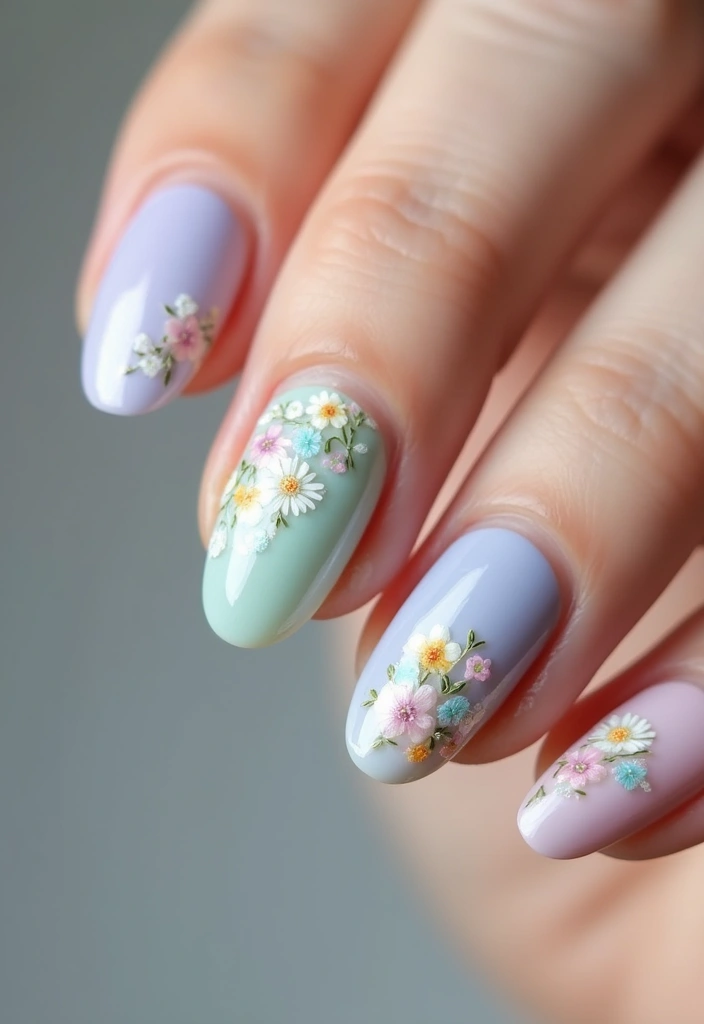
Embrace the beauty of summer blooms with a floral chic design! This look involves a soft pastel base adorned with delicate flower decals or hand-painted floral designs.
Choose light pink, lavender, and mint green as your base colors, and create simple flowers using a fine brush or nail dotting tool. A touch of gold or silver accents can add a touch of glam.
This design is perfect for wedding guests or any garden event while giving your nails a fresh and elegant look.
DIY Care & Tips:
– Make sure to apply a good quality topcoat to keep your floral designs intact.
– Hydrate your cuticles with a natural oil for a polished finish.
– Regular nail care will ensure your designs last longer.
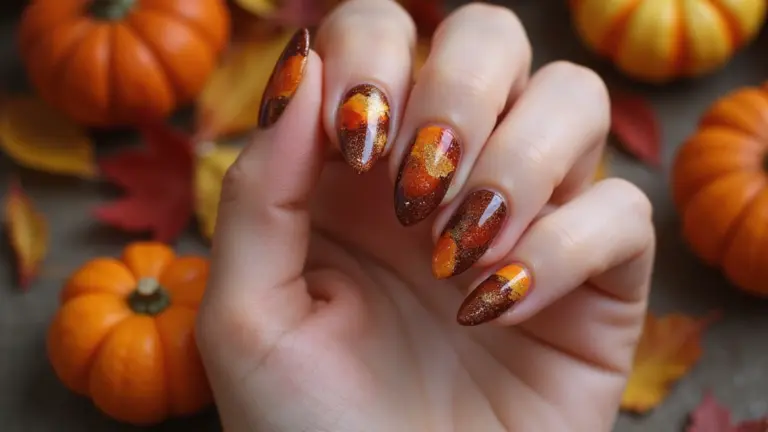
4. Sunset Ombre
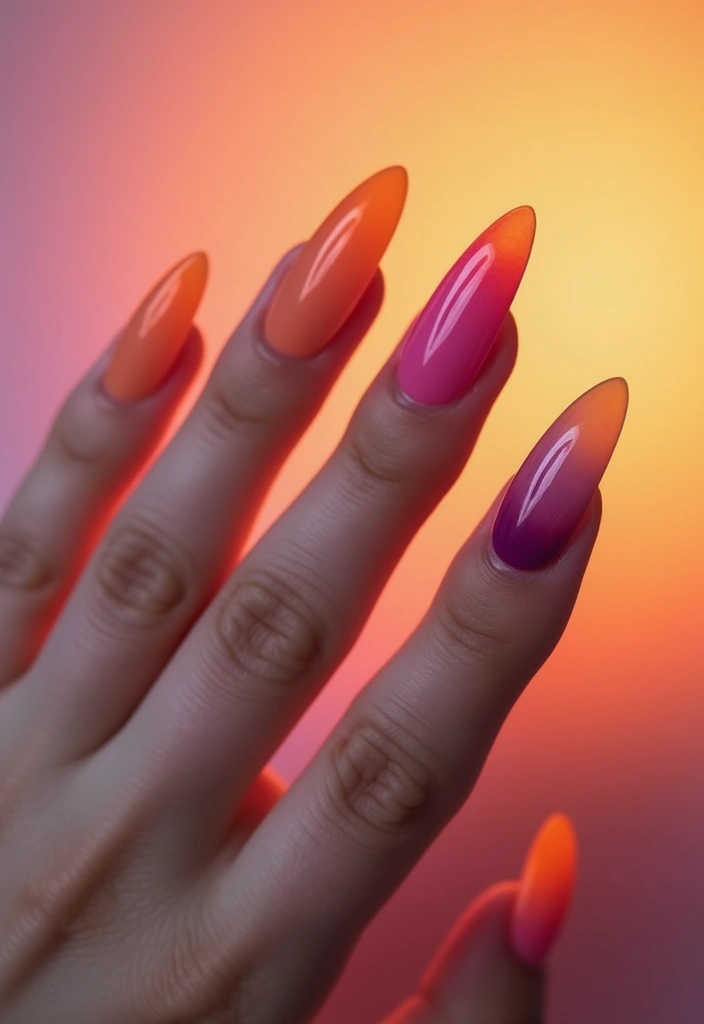
Capture the essence of summer sunsets with a sunset ombre gel nail design. This look combines warm colors like orange, pink, and purple to mimic the breathtaking sky at dusk.
Start by applying a white base coat to make the colors pop. Use a sponge for blending the orange, pink, and purple for that beautiful ombre effect.
This design is not only beautiful but also a great way to transition from day to night!
DIY Care & Tips:
– Always allow each layer to dry to prevent smudging when applying the next color.
– Apply a nourishing base coat to protect your nails from discoloration.
– Use an eco-friendly remover to keep your nail care sustainable.
5. Minimalist Stripes
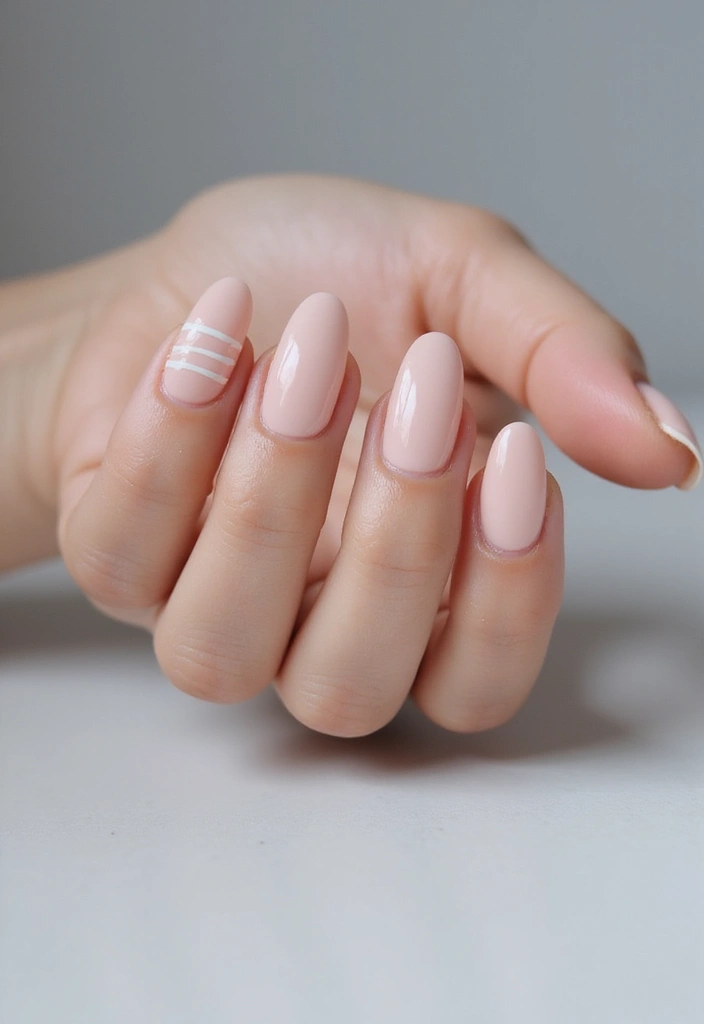
For those who love a simple yet chic look, minimalist stripes are the way to go. This design uses a soft base color, like beige or pale pink, with clean white or gold stripes.
These stripes can be done vertically or horizontally, depending on your preference. This design is perfect for everyday wear and adds a trendy flair to your nails.
Not only is it easy to achieve, but it also matches effortlessly with any outfit.
DIY Care & Tips:
– Use nail striping tape for precision when creating stripes.
– Keep nails moisturized to prevent breakage and maintain shine.
– Opt for cruelty-free gel products for a guilt-free glam.
6. Colorful Geometric
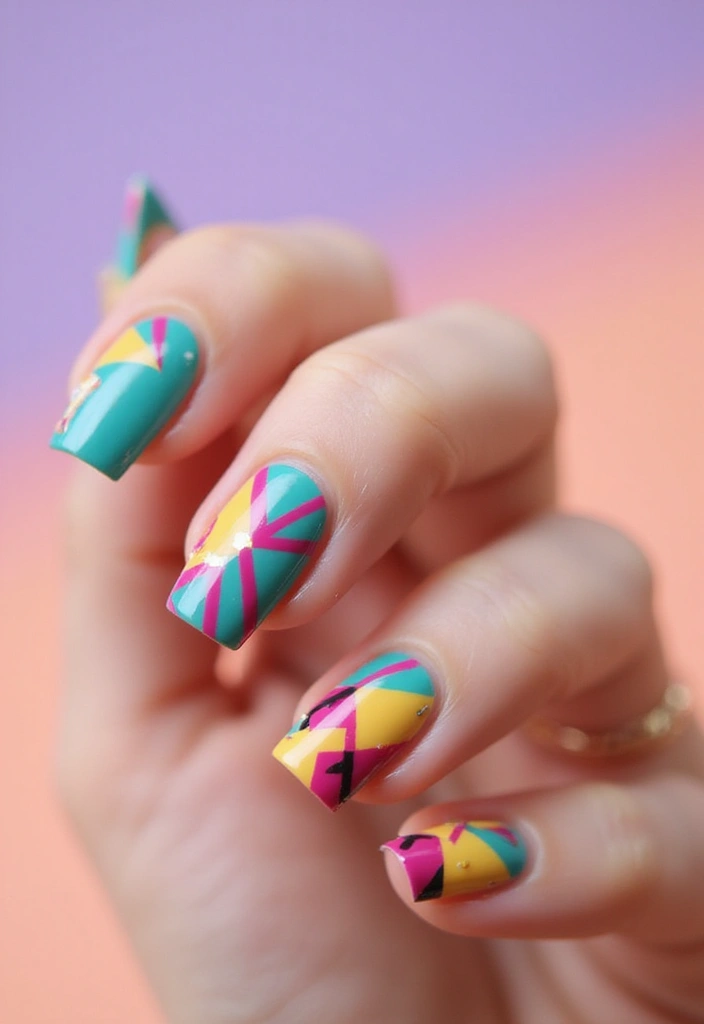
Add a playful twist to your summer nails with a colorful geometric design! This trend involves using bold, contrasting colors layered in various patterns.
Choose colors like turquoise, fuchsia, and lemon yellow for a vibrant summery feel. Use tape to create sharp lines and ensure your shapes stay clean. This design allows for endless creativity and personalization.
The geometric patterns can be as simple or intricate as you desire, making it a great choice for both beginners and nail art aficionados.
DIY Care & Tips:
– Invest in quality gel tools to achieve the best results.
– Keep nails short for a more playful, youthful look with geometric patterns.
– Always apply a topcoat to seal the design and add longevity.
7. Fruit Fusion

Celebrate summer’s bounty with a fruit fusion nail design! This cheerful manicure features bright colors and playful fruit designs like watermelons, lemons, and cherries.
Choose a base color like a sunny yellow or light green, then use nail art pens or brushes to add fruit details to accent nails. The fruity theme is perfect for picnics or beach days, instantly brightening your mood!
DIY Care & Tips:
– Use a matte finish topcoat for a fun twist on the traditional shine.
– Make sure to maintain your nails by hydrating them daily.
– Choose non-toxic, eco-friendly gel colors that are safe for your nails.
8. Glitter Glam
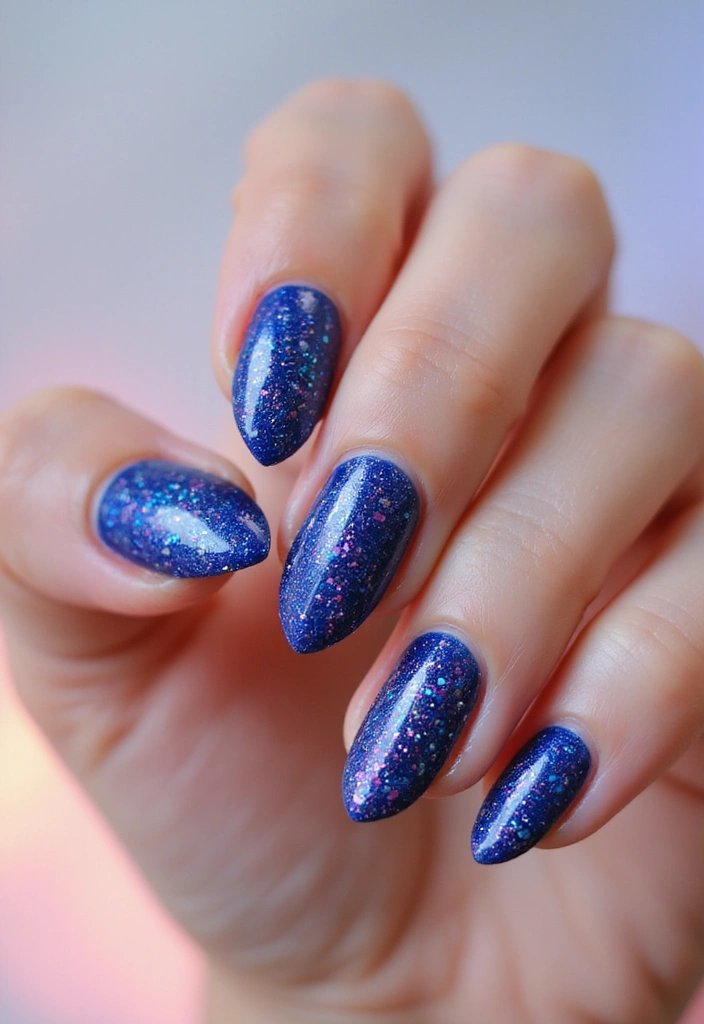
Who doesn’t love a little sparkle? Glitter glam nails are perfect for making a statement this summer. Choose a funky base color and layer a glitter top coat for instant glam!
You can use glitters in various sizes for a more textured effect. This design is perfect for summer parties and events where you’ll want your nails to shine!
You can even create a gradient effect with glitter by applying more at the tips and fading it towards the cuticle.
DIY Care & Tips:
– Apply a peel-off base coat for easy glitter removal.
– Remember to buff your nails before applying gel to ensure a smooth surface.
– Keep your glitter gel polish in a cool place to maintain its consistency.
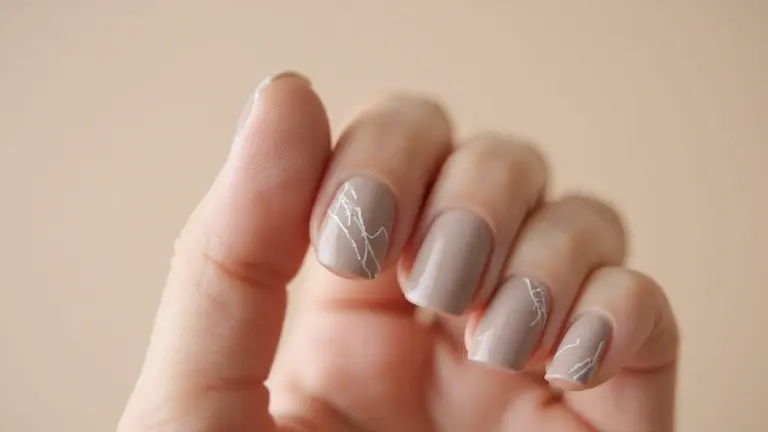
9. Marble Magic
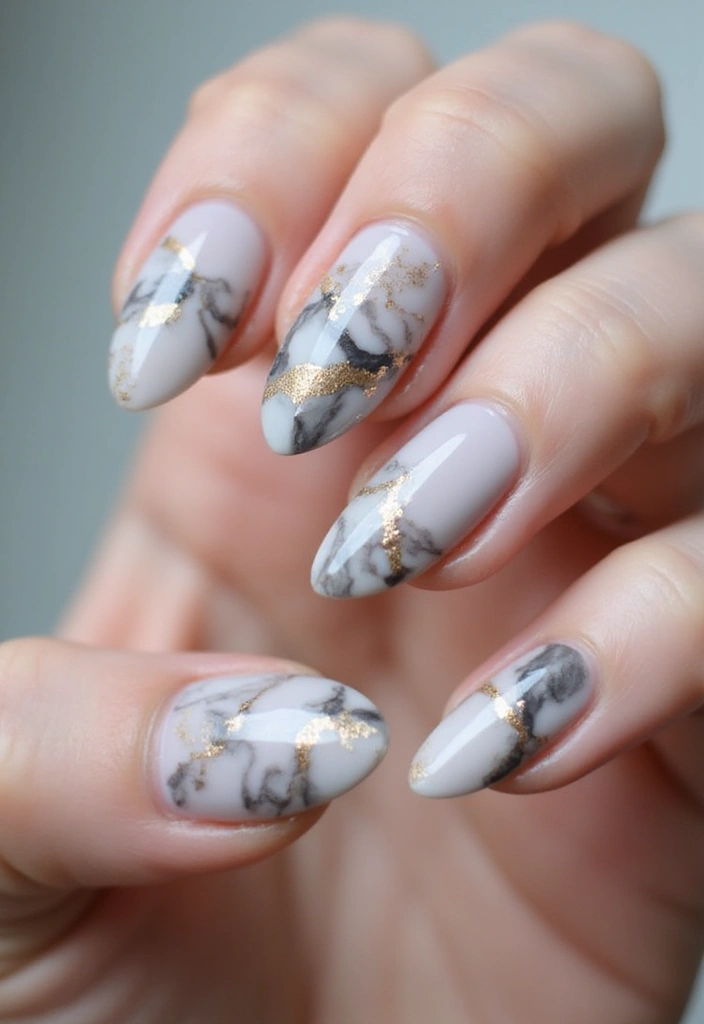
Get trendy with a marble magic design that mimics the elegant look of marble stone. This sophisticated style features swirls of white, gray, and hints of gold or rose gold for a luxurious feel.
To achieve this, drop each color onto a wet base coat and swirl together using a toothpick or nail art brush. The result is a unique pattern on each nail!
This design pairs beautifully with any outfit, making it versatile for various occasions from day to night.
DIY Care & Tips:
– Ensure your nails are well-prepped to avoid chipping.
– Use a matte top coat for a modern twist on the marble effect.
– Regularly moisturize your nails and cuticles to keep them looking healthy.
10. Seashell Delight
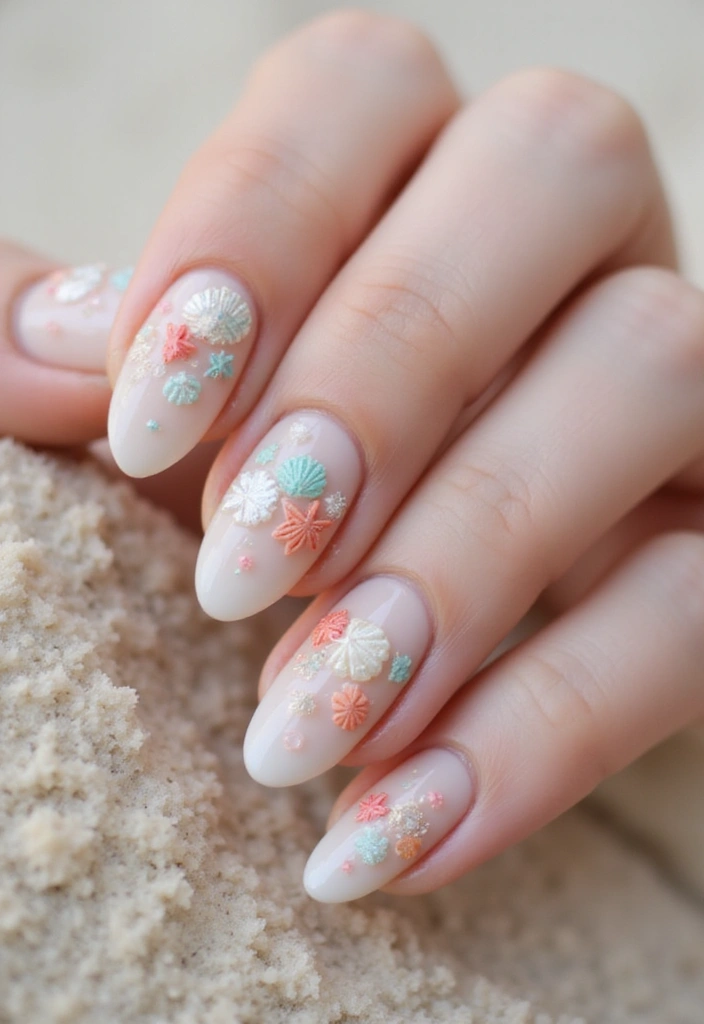
Transport yourself to the beach with a seashell delight design. This look features a soft sand-colored base adorned with intricately detailed seashells and starfish.
Use nail art brushes to paint shells in shades of white, pink, and gold. The delicate details create an elegant look perfect for beach outings or vacations.
This design not only embodies summer but also gives your nails a unique flair that showcases your love for the ocean.
DIY Care & Tips:
– Use a strong base coat to prevent staining from colored gel polish.
– Make sure to apply a top coat to protect your artwork.
– Keep nails trimmed to maintain a neat look, especially when incorporating detailed designs.
Dive into summer vibes with your nails! A seashell delight not only brings the beach to you but also showcases your love for the ocean, one delicately painted nail at a time.
11. Abstract Art

Express your inner artist with abstract art nails! Using a mix of colors, this design allows you to unleash your creativity with freeform shapes and lines.
Choose two to three complementary colors for a cohesive look and use a brush to create fun splatters, swirls, or lines on each nail. This design is playful and truly one-of-a-kind.
Ideal for those who want to stand out, abstract art nails reflect a personal style that is both modern and fun.
DIY Care & Tips:
– Use a clear base coat to help colors pop.
– Always let your layers dry between colors to prevent smudging.
– Consider a light buffing of your nails for a smoother application surface.
12. Tie-Dye Fun
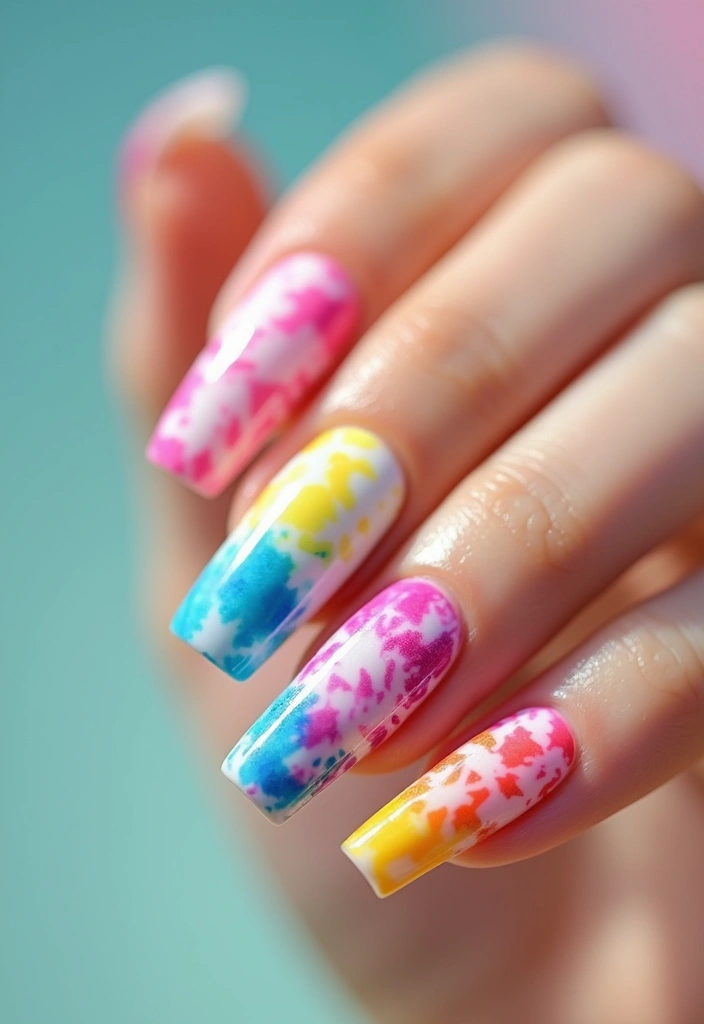
Relive the 70s with a tie-dye nail design that screams summer! This vibrant style utilizes swirls of bright colors like pink, blue, and yellow to create a fun and laid-back look.
Start with a white base and use a sponge to dab on colors in a circular motion, blending as you go. The swirling effect gives each nail its own unique design, perfect for expressing individuality.
DIY Care & Tips:
– Use a quick-dry top coat to keep your nails looking fresh without long wait times.
– Keep a clean-up brush handy to wipe away any excess polish around the cuticles.
– Moisturize your hands regularly to maintain a healthy appearance.
13. Boho Dreams

Channel your inner bohemian with a boho dreams nail design! This style features earthy tones combined with intricate patterns like feathers and arrows.
Utilize colors such as deep teal, burnt orange, and cream to create a harmonious look. You can use hand-painting techniques or stencils for precision. This design is perfect for those who love a relaxed vibe.
DIY Care & Tips:
– Be patient when creating detailed designs; let each layer dry completely.
– Maintain hydration in your cuticles for a polished finish.
– Choose eco-friendly polishes that are gentle on your nails.
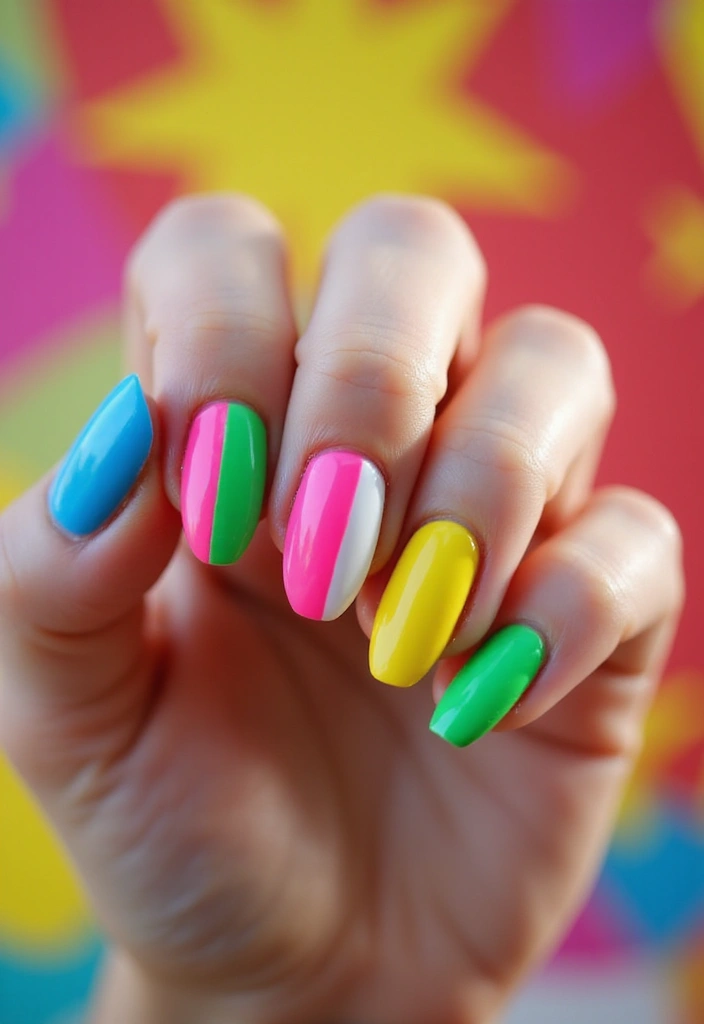
14. Neon Brights
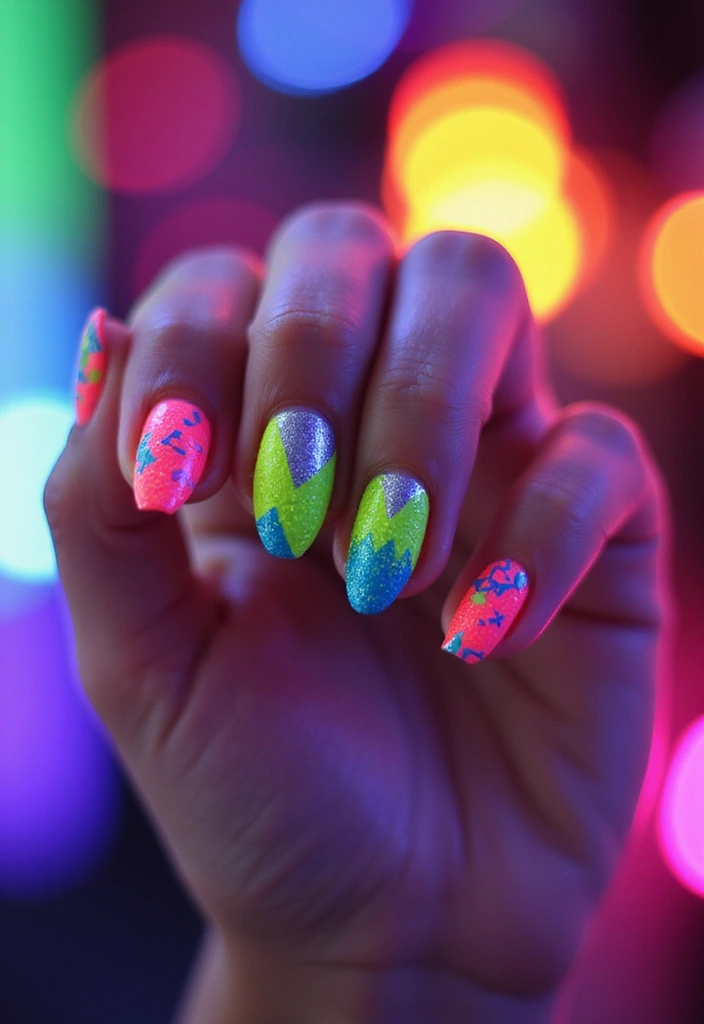
Make a bold statement with neon bright nails! These nails use vibrant, eye-catching colors that are perfect for summer fun.
Choose colors like neon pink, green, and yellow for a striking look. Consider adding a matte finish for a modern touch or mixing with glitter for an extra sparkle. Neon nails are perfect for parties, festivals, and all things fun!
DIY Care & Tips:
– Always apply a base coat to prevent staining from bright colors.
– If using neon shades, ensure you apply a good quality top coat to enhance longevity.
– Use a fan or quick-dry product to speed up the drying process for fresh nails in no time.
15. Edgy Matte
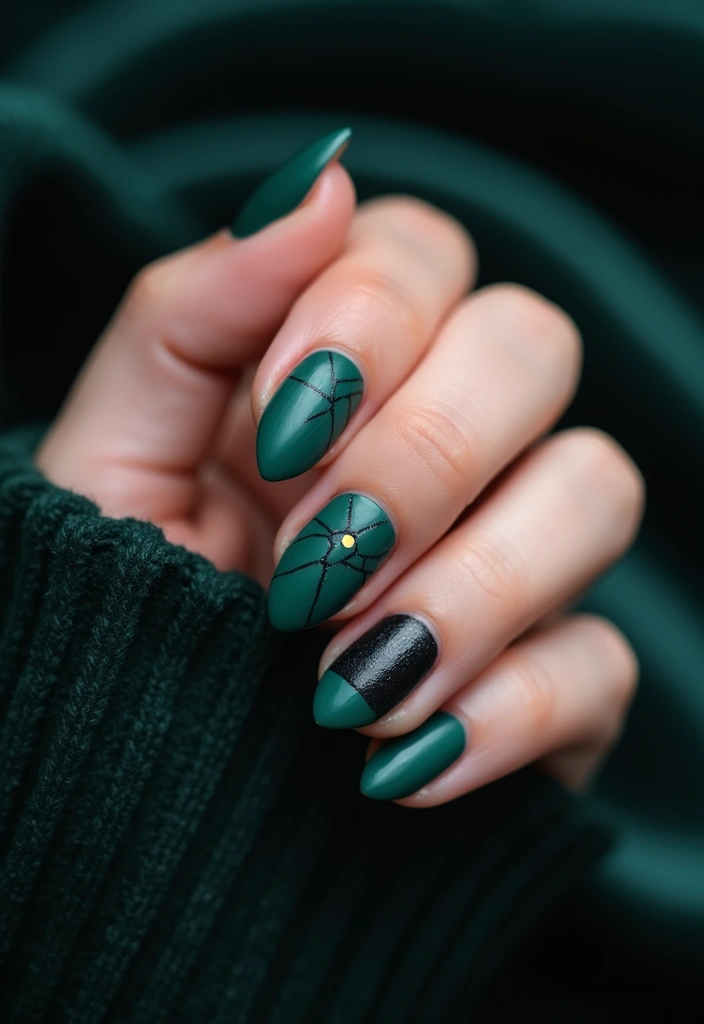
If you’re looking for something a bit more edgy, try the matte finish! This trend combines dark colors with a matte top coat for a chic, sophisticated look.
Colors like deep burgundy, forest green, or even black will stand out beautifully with this finish. The matte effect makes the nails look modern while still being super classy.
Perfect for nights out or special occasions where you want to look bold yet elegant.
DIY Care & Tips:
– Always use a base coat to protect your natural nails.
– Be careful while removing matte polish; it can chip more easily than shiny finishes.
– Rehydrate your nails and cuticles often to maintain their health.
16. Starry Nights
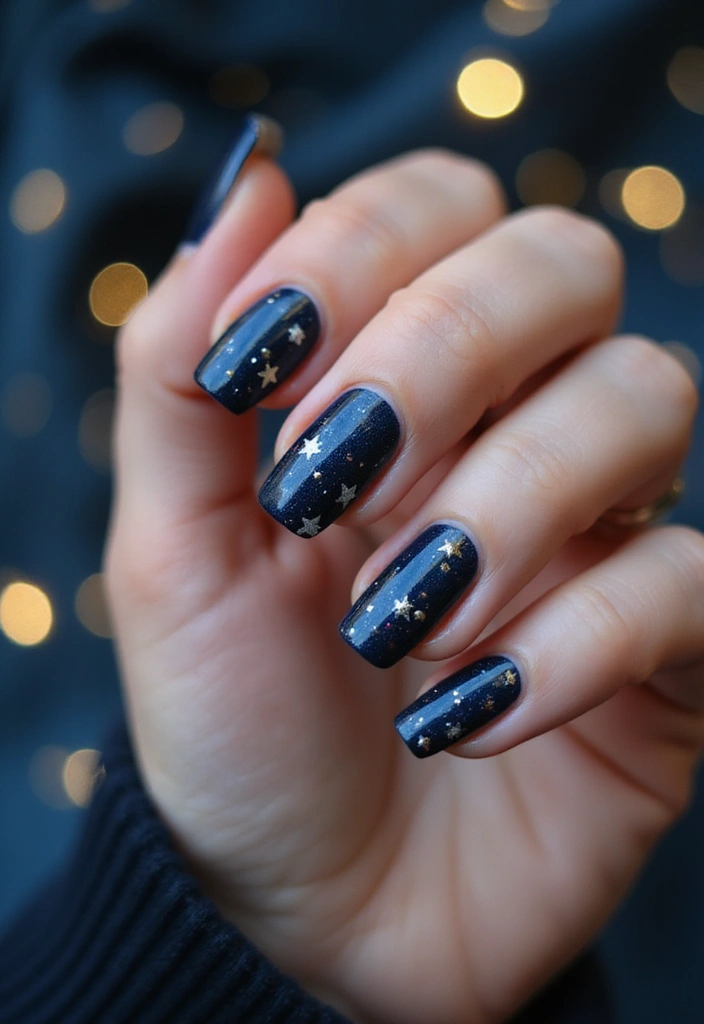
Capture the nighttime sky with starry nights nails! Use a deep navy or black base and add tiny silver or gold stars for a magical effect.
To achieve this look, you can either use nail stickers or go for a hand-painted approach for more personalized stars. This design gives off a celestial vibe perfect for summer nights under the stars.
DIY Care & Tips:
– A glossy top coat can help give the stars a brighter finish.
– Ensure the base is completely dry before adding stars to avoid smudging.
– Regularly maintain your nail health for the best appearance.
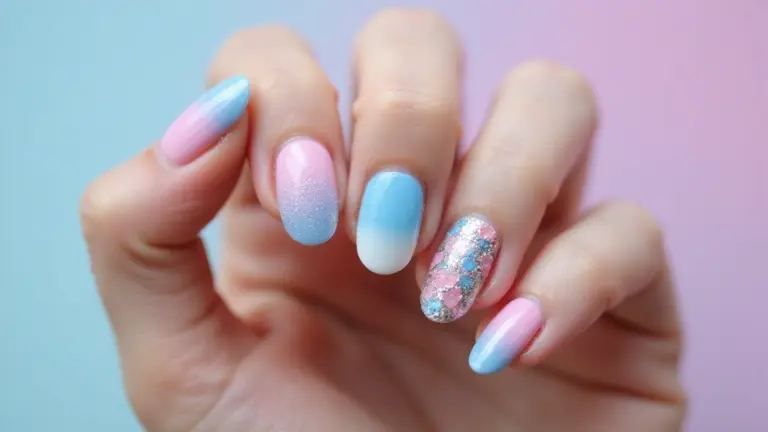
17. Shimmering Mermaid
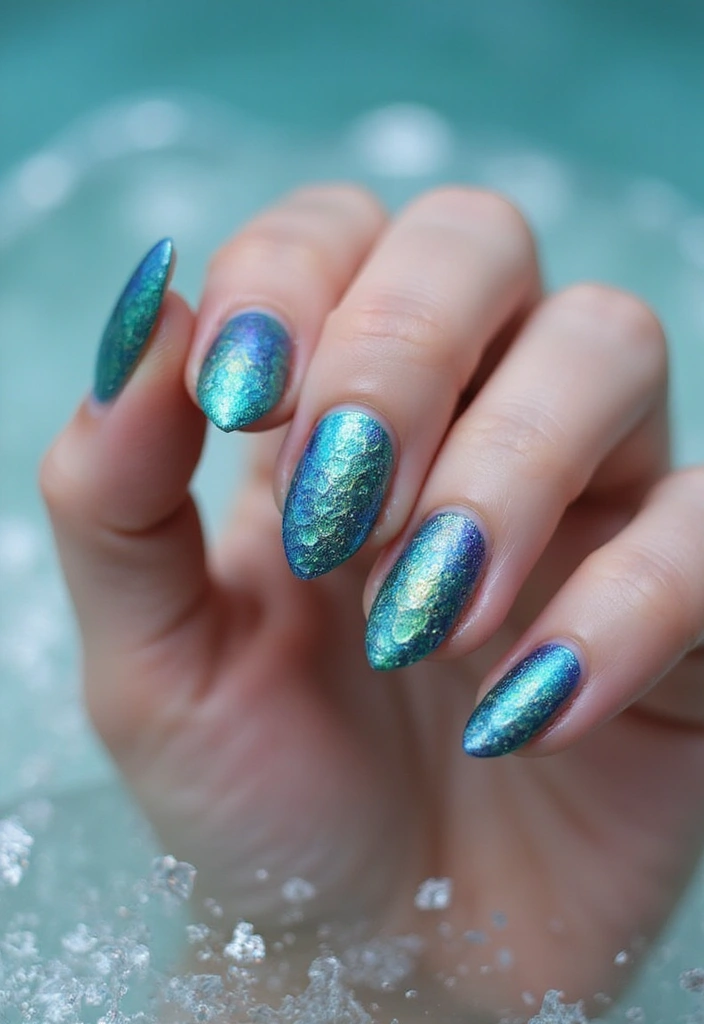
Embrace the magic of the ocean with a shimmering mermaid design! This look features iridescent colors and scales to mimic mystical mermaid tails.
Use a blend of aqua, purple, and soft pinks mixed with glitter to create a scale-like effect. This design is perfect for anyone who loves the ocean and wants a whimsical touch to their nails!
DIY Care & Tips:
– Apply a good-quality base coat for extra shine and longevity.
– Use a fan brush to apply glitter and achieve the scale effect easily.
– Regularly hydrate your nails to keep them from drying out.
Unleash your inner mermaid! With just a splash of aqua, purple, and glitter, you can create a whimsical nail design that brings the magic of the ocean to your fingertips. Dive into DIY care and let your nails shine!
18. Delicate Lace

For a sophisticated touch, consider a delicate lace design. This manicure can feature a light pastel or nude base with intricate lace patterns painted on top.
Use a fine brush to create ornate lace designs that add elegance and charm. This style is perfect for special occasions or a refined summer look.
DIY Care & Tips:
– Take your time with the lace details; precision makes a big difference.
– Ensure to seal with a top coat to protect your artwork.
– Keep your nails well-groomed to enhance the delicate lace effect.
19. Color Block Party
Bring on the fun with a color block party design! This playful look uses bold, contrasting colors on different sections of each nail.
Choose colors like hot pink, bright blue, and sunny yellow for a joyful vibe. Simply tape off sections of your nails to create sharp lines and fill in with your chosen colors. It’s a trendy and youthful design perfect for the summer!
DIY Care & Tips:
– Use a good quality top coat to smooth out the design and protect the colors.
– Consider using a quick-dry polish to minimize waiting time.
– Remember to keep nails short and well-shaped for the best appearance.
20. Simple Polka Dots

You can’t go wrong with a classic polka dot design! This timeless style is easy to create and adds a playful twist to your nails.
Use a pastel or light-colored base and add evenly spaced dots in a contrasting shade. It’s simple yet charming, making it perfect for casual summer outings.
You can play with different sizes for added interest or keep it uniform for a classic feel.
DIY Care & Tips:
– Use a dotting tool for uniform dots.
– Always allow each layer to dry before applying dots to avoid smearing.
– Keep your nails well-trimmed for a clean look.
21. Custom Art

Show off your personality with custom art on your nails! Whether it’s a special quote, a favorite character, or an abstract piece, this design truly represents you.
You can either paint it by hand or use decals for precision. Custom art allows for endless creativity, making it a fun task to express yourself.
This personalized touch is a great conversation starter at summer gatherings!
DIY Care & Tips:
– Seal your custom art with a top coat to protect it.
– Consider a peel-off base coat for easy removal later.
– Keep your nails healthy for the best display of your unique art.
Your nails are a canvas—let your personality shine! Custom art is not just a design; it’s a conversation starter that showcases your unique style and creativity. So grab those brushes or decals and let your imagination run wild!
22. Sunflower Delight
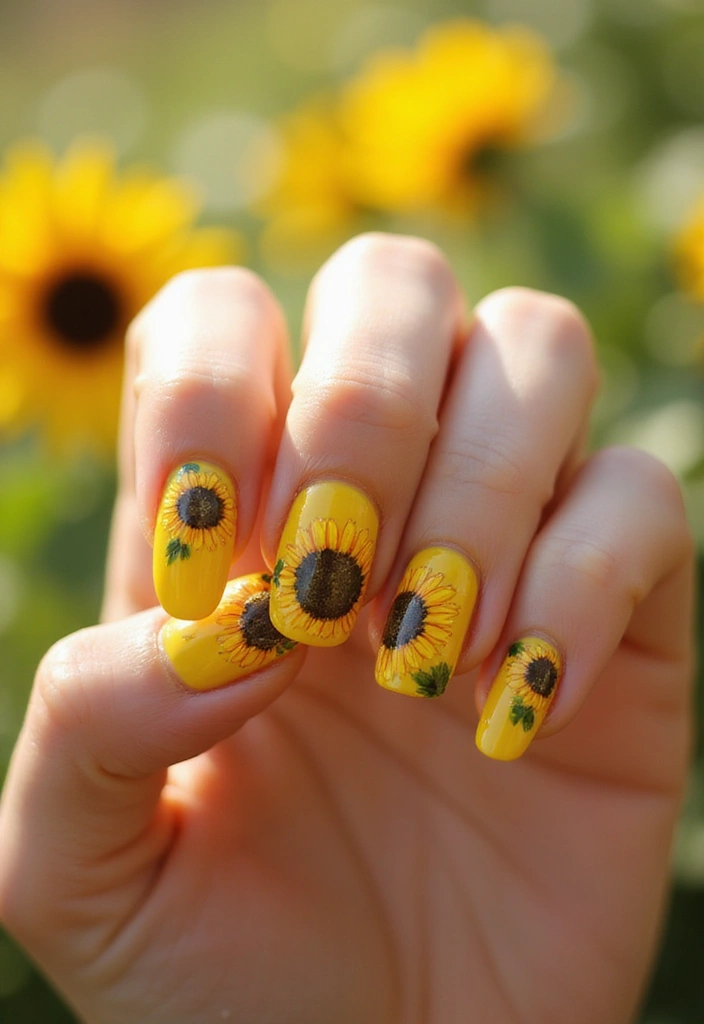
Channel the warmth of summer with a sunflower delight design! This look features a bright yellow base with hand-painted sunflowers for a cheerful effect.
Use a fine brush to create petals and center details, making each nail look vibrant and fresh. The sunflower design is perfect for embodying the essence of summer and positivity.
DIY Care & Tips:
– Apply a good base coat to protect your nails from staining.
– Use a matte top coat for a unique finish that contrasts beautifully with the bright yellow.
– Regularly care for your cuticles for an overall polished look.
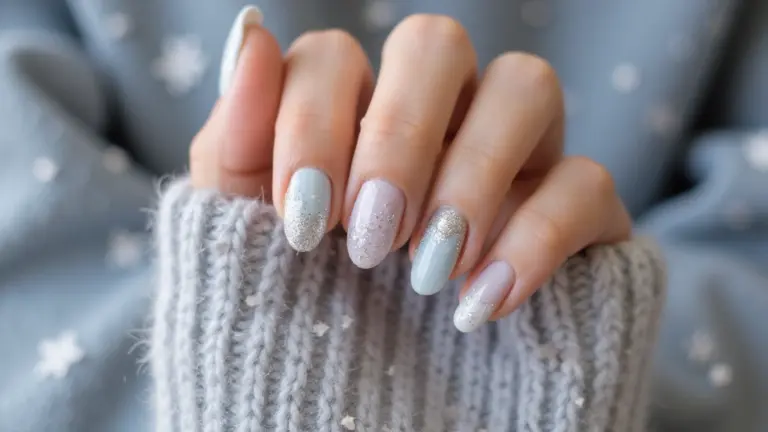
23. Gradient Glitter

For those who love sparkle, gradient glitter nails are a must-try! This design uses a base color that gradually transitions into glittery tips.
Start with a solid color at the base and lightly dust glitter towards the tips, blending as you go. This design gives a fun, festive feel and is perfect for summer nights out.
DIY Care & Tips:
– Use a good-quality glitter polish to achieve the best results.
– Seal with a top coat to keep the glitter in place and maintain shine.
– Ensure your nails are clean and dry before application for smooth results.
Add a little sparkle to your summer nights! Gradient glitter nails are not just a design; they’re a mood. Blend your favorite colors with shimmer for a glam look that’s all about fun and creativity!
24. Cool Marble with Gold Accents
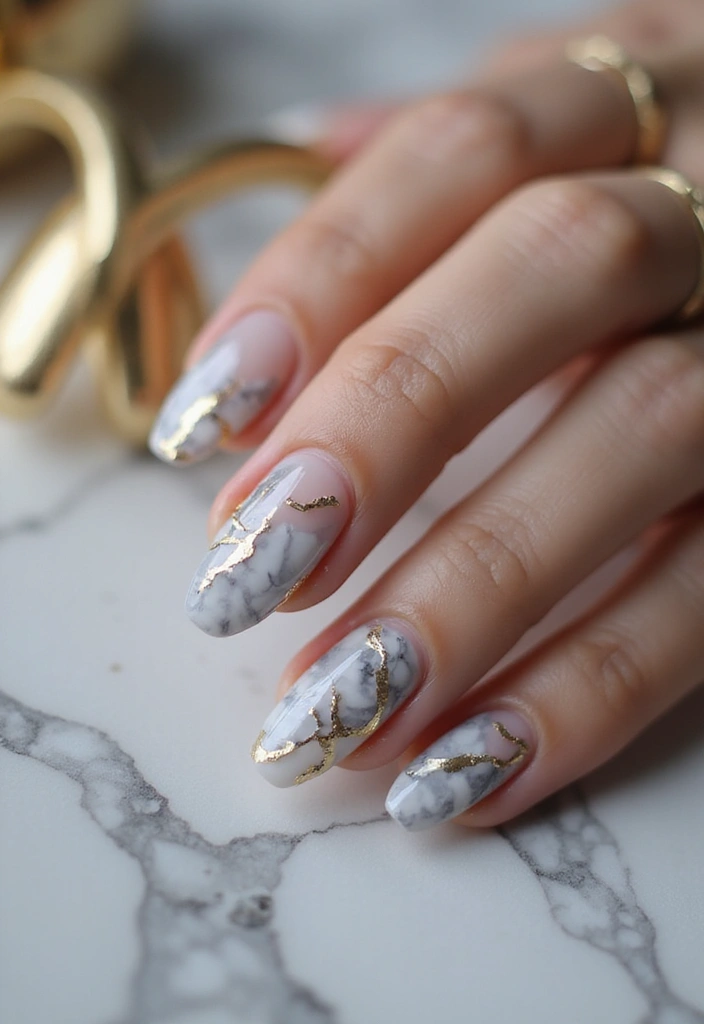
Finish off with a cool marble design featuring gold accents for a touch of luxury. This trendy design uses a mix of dark and light tones with gold lines to create an elegant marble effect.
Using a nail art brush, add gold lines that mimic the veins of the marble for a sophisticated look. This design is perfect for any occasion, adding a touch of glam without being overly flashy.
DIY Care & Tips:
– Allow your marble design to dry completely before applying the top coat to prevent smudging.
– A high-quality top coat will help enhance the marble and gold finish.
– Keep your nails well-maintained for the best overall look.
Conclusion
With these 24 stunning eco-friendly gel nail designs, you’re all set to flaunt long-lasting glam this summer! Whether you’re feeling vibrant, subtle, or somewhere in between, there’s a design for every mood and occasion.
Remember to embrace sustainable practices in your nail care and enjoy creating your own unique styles. Which design are you excited to try first? Share your DIY nail creations and tips for others! Let your creativity shine this summer.
Frequently Asked Questions
What Are Some Eco-Friendly Options for Summer Gel Nail Designs?
If you’re looking to go green this summer, you can opt for eco-friendly gel nail polishes that are free from harmful chemicals like formaldehyde and toluene. Many brands now offer vegan and cruelty-free options that still provide the vibrant colors and long-lasting effects you desire. Plus, you can incorporate natural nail care routines to keep your nails healthy while being environmentally conscious!
How Can I Make My Gel Nails Last Longer During the Summer?
To ensure your gel nails remain stunning throughout the summer, start by using a strong base coat to protect your nails. Additionally, avoid exposing your hands to excessive moisture and heat. Regularly apply nail oil to keep your cuticles hydrated and prevent peeling. And don’t forget to reapply a top coat every few days to maintain that fresh, glossy finish!
What Are Some Easy DIY Tips for Maintaining Gel Nails at Home?
Maintaining gel nails at home is easier than you think! Start with a gentle cleanser to wash your hands and nails without stripping the polish. You can also use a nail buffer to smooth out any imperfections. Remember to keep your nails moisturized with cuticle oil, and avoid using your nails as tools to prevent chipping. Lastly, always be cautious with activities that could cause damage!
Can I Create Custom Designs on My Gel Nails at Home?
Absolutely! Creating custom designs on your gel nails can be a fun and rewarding DIY project. You can use nail art brushes, dotting tools, or even stencils to achieve intricate patterns. Don’t be afraid to mix colors and styles, and consider using water decals or stickers for a quick and easy way to personalize your look. Just make sure to seal your design with a top coat for longevity!
What Are Some Trending Summer Nail Art Ideas for 2023?
This summer, trending nail art ideas include vibrant tropical designs featuring palm trees and fruits, as well as elegant marble effects for a chic look. You can also try abstract art or minimalist stripes for a modern twist. Don’t forget about playful options like tie-dye and glitter gradients to make a bold statement this season!