28 Easy Glazed Finish Tutorials for Shiny Nails
Get ready to elevate your nail game with our collection of 28 easy glazed finish tutorials for shiny nails!
From quick at-home manicures to stunning gel nail art techniques, these ideas are perfect for anyone looking to add a glossy touch to their nail routine.
Whether you’re a DIY veteran or just starting out, these tutorials offer something for everyone. You’ll be amazed at how simple it can be to create professional-looking manicures right in the comfort of your home!
1. Classic Glossy Finish
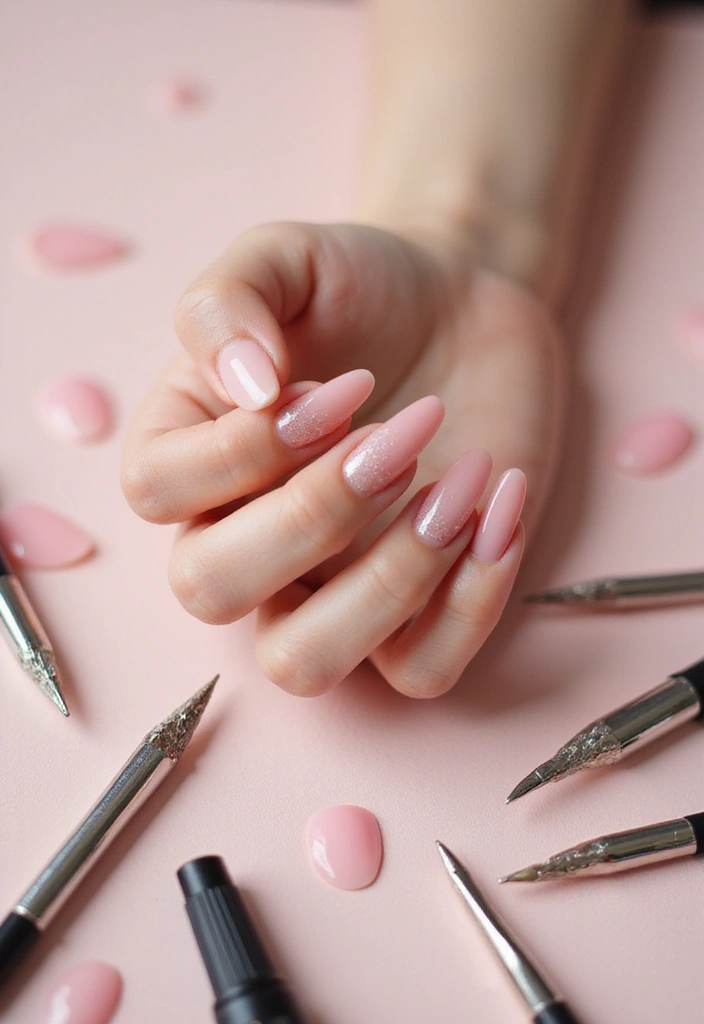
The classic glossy finish is a timeless choice that never goes out of style.
To achieve this look, start with a clear base coat to protect your nails. Follow up with two coats of your favorite nail polish, ensuring even coverage. Finish with a high-gloss topcoat to seal in the color and add that irresistible shine.
For extra longevity, cure your nails under a UV lamp if you’re using gel polish.
Key Tips:
– Always let each coat dry completely before applying the next.
– Invest in a quality topcoat for the best results.
– Consider using long-lasting gel polishes for a durable finish.
2. Iridescent Glaze
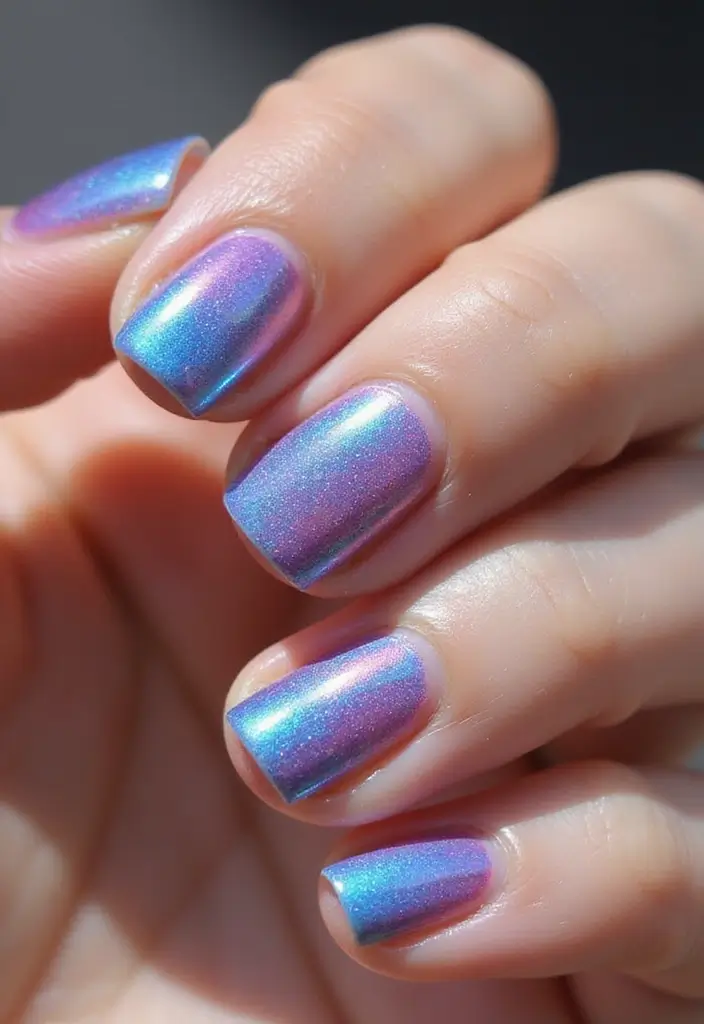
Iridescent nails are all about that magical color shift!
Start by applying a base coat of white polish for an opaque look. Once dry, apply an iridescent top coat that reflects different colors depending on the light. This technique creates a stunning effect, perfect for events or a night out.
Try layering different shades for an even more unique finish.
Key Tips:
– Use a sponge to dab on the iridescent top coat for a more blended effect.
– Experiment with different colors beneath for varied results.
– Seal with a clear top coat for ultimate shine and protection.
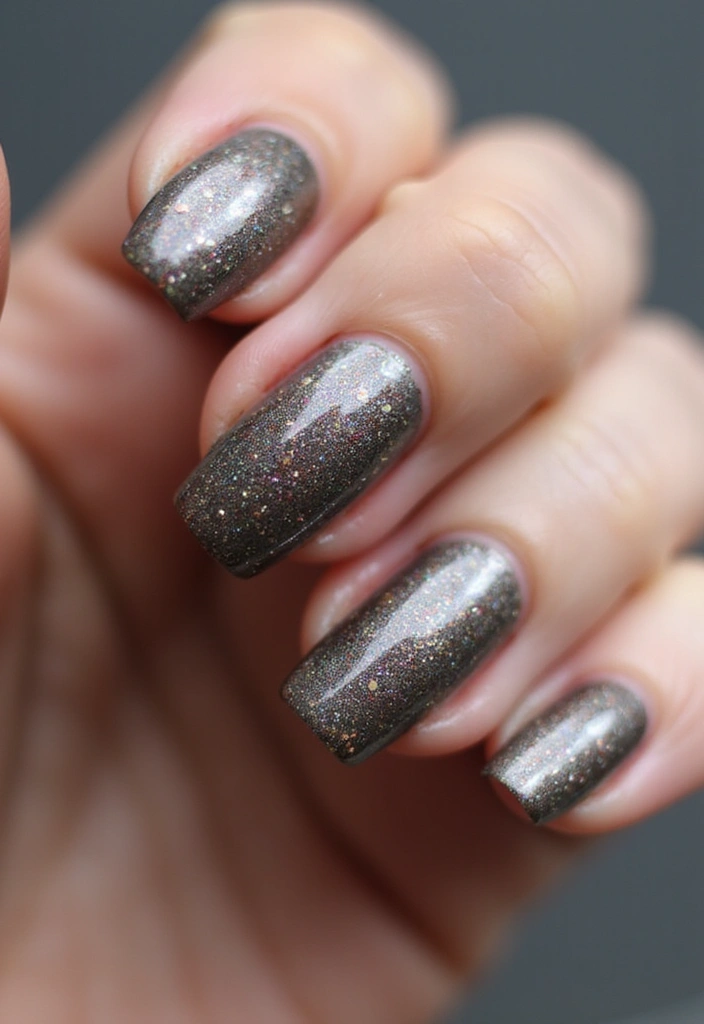
3. Holographic Finish
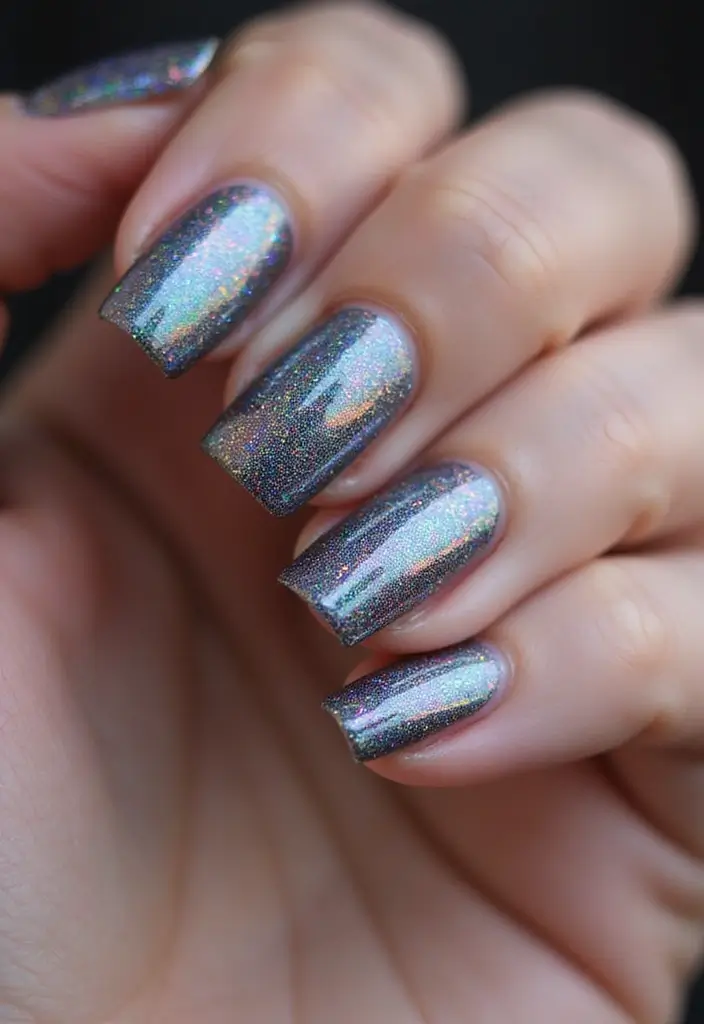
Bring the party to your nails with a holographic finish!
Start with a base coat, then apply a holographic nail polish. These polishes have tiny, reflective particles that create a rainbow effect. Perfect for adding some sparkle to your everyday look!
You can also layer a clear holographic top coat over your favorite colors for a more customized shine.
Key Tips:
– Apply in thin layers for an even holographic effect.
– Make sure to cap the edges to prevent chipping.
– Use a matte top coat underneath for a unique contrast.
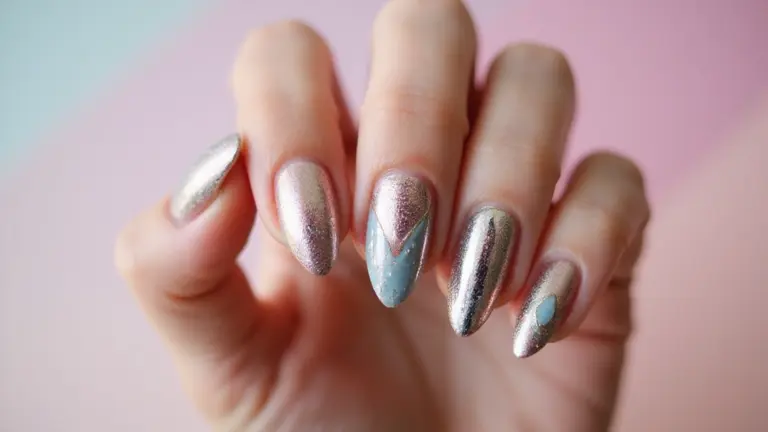
4. Mirror Finish

Achieving a mirror finish gives your nails a chic, reflective look that’s sure to turn heads.
Begin with a base coat to prevent staining, then paint your nails with a high-shine chrome polish. After the polish dries, apply a glossy top coat to seal the look.
This technique is perfect for special occasions or when you want to feel extra glamorous!
Key Tips:
– Use a soft brush to avoid streaks during application.
– A UV lamp can help cure gel formulas for a more intense shine.
– Keep nails at a shorter length for a more polished appearance.
5. Colorful Glaze
Who said glazed nails have to be neutral? Bring some fun with colorful glazes!
Start by picking a bold nail polish color and applying a clear glaze over it. This technique enhances the vibrancy of the underlying color while giving it that glossy finish. You can mix and match colors for a playful look.
Consider using contrasting shades for different nails for added creativity.
Key Tips:
– Choose colors that complement each other for a cohesive look.
– Apply multiple layers of glaze for deeper color intensity.
– Finish with a top coat for a longer-lasting shine.
6. Matte to Gloss Transition
Mixing textures can give your nails a unique edge.
Start with a matte base coat, and once dry, apply a glossy top coat only on specific areas for a stylish contrast. This look combines the sophistication of matte with the shine of gloss, creating a chic, modern style.
You can use tape to create clean lines or fun shapes for a playful touch.
Key Tips:
– Ensure the matte polish is completely dry before applying gloss.
– Use nail tape for sharp lines or designs.
– Consider using nail art brushes for detailed work.
7. Glitter Glaze
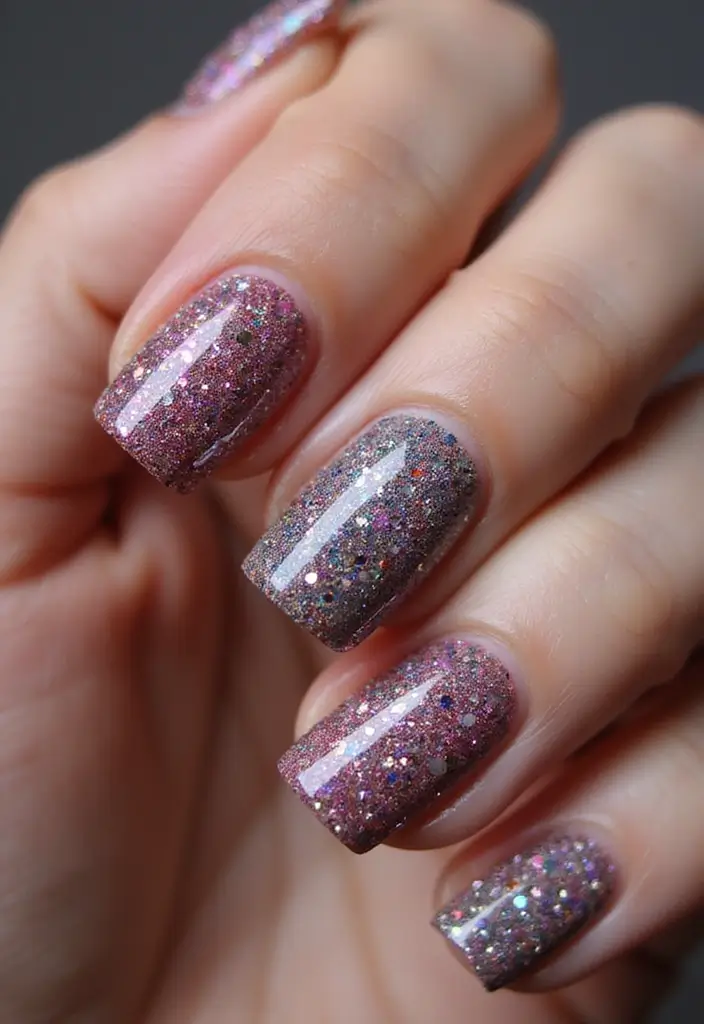
Glitter nails are a fun way to sparkle and shine!
Start with a base coat and apply a layer of glitter polish. For a more polished look, use a clear glaze on top to smooth out the surface and enhance the sparkle.
Layering different colors of glitter can create a stunning effect and add depth to your nails.
Key Tips:
– Use a makeup sponge to get more glitter on the nails for better coverage.
– Seal with a top coat to prevent chipping and enhance shine.
– Consider using fine glitter for a more sophisticated look.
8. Ombre Glazed Nails
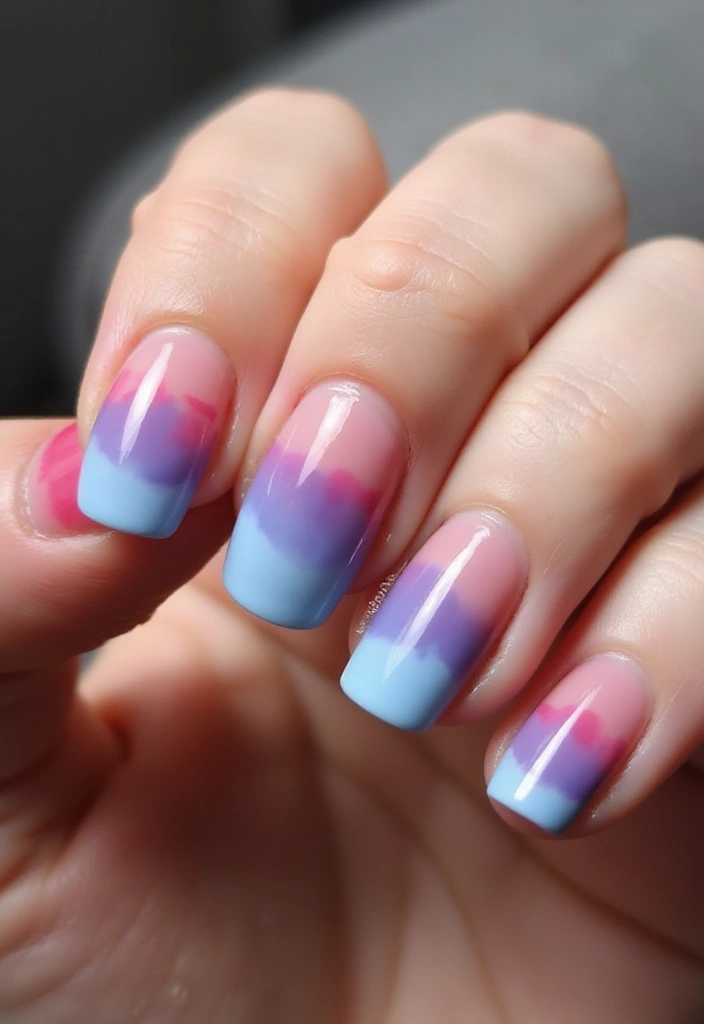
Ombre nails are a trendy way to combine colors while keeping a glossy finish.
Choose two complementary colors and apply them in a gradient effect. Start with a base of one color, then blend the second color from the tips towards the cuticle. Finish with a glossy top coat to seal the look and add shine.
This style is playful and gives a chic vibe, perfect for any occasion.
Key Tips:
– Use a makeup sponge to help blend the colors seamlessly.
– Allow each layer to dry thoroughly before applying the next.
– Consider using a glitter polish to add a stunning ombre effect.
9. Floral Glazed Design
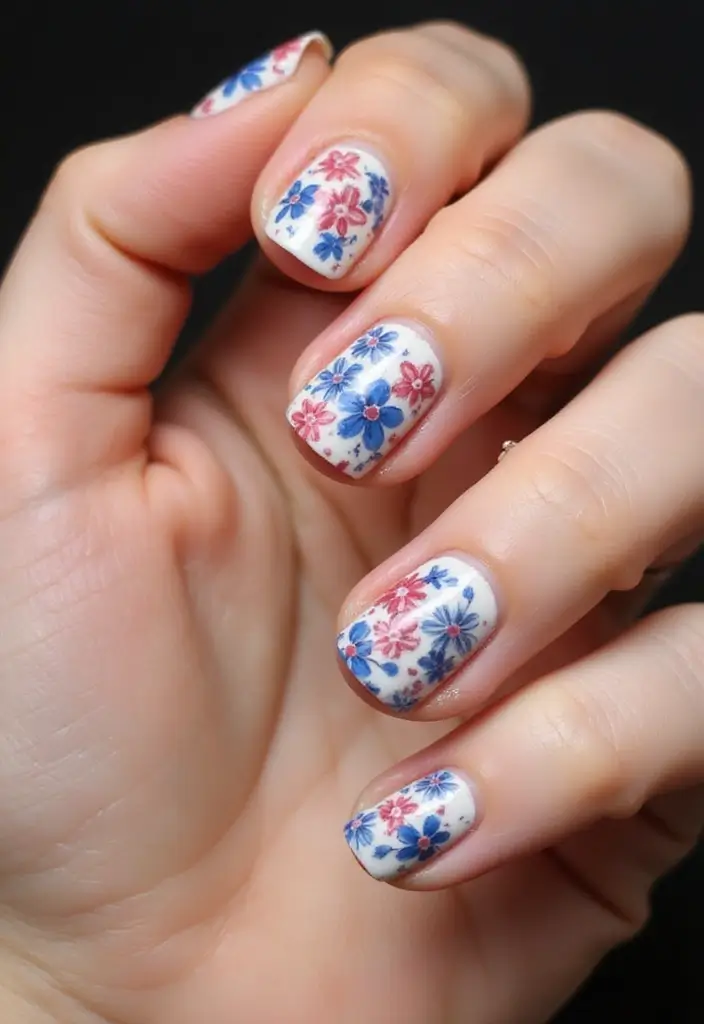
Floral designs are perfect for adding a touch of elegance and femininity to your nails.
Start with a clear base coat and paint delicate floral patterns in your favorite colors. After the flowers are dry, apply a clear glaze to add a glossy finish and bring the design to life.
These designs can be simple or intricate depending on your skill level, making them versatile for any occasion.
Key Tips:
– Use a fine nail art brush or dotting tool for detailed designs.
– Practice on paper before painting on your nails.
– Get creative with colors and flower types for unique designs.
10. Geometric Glaze
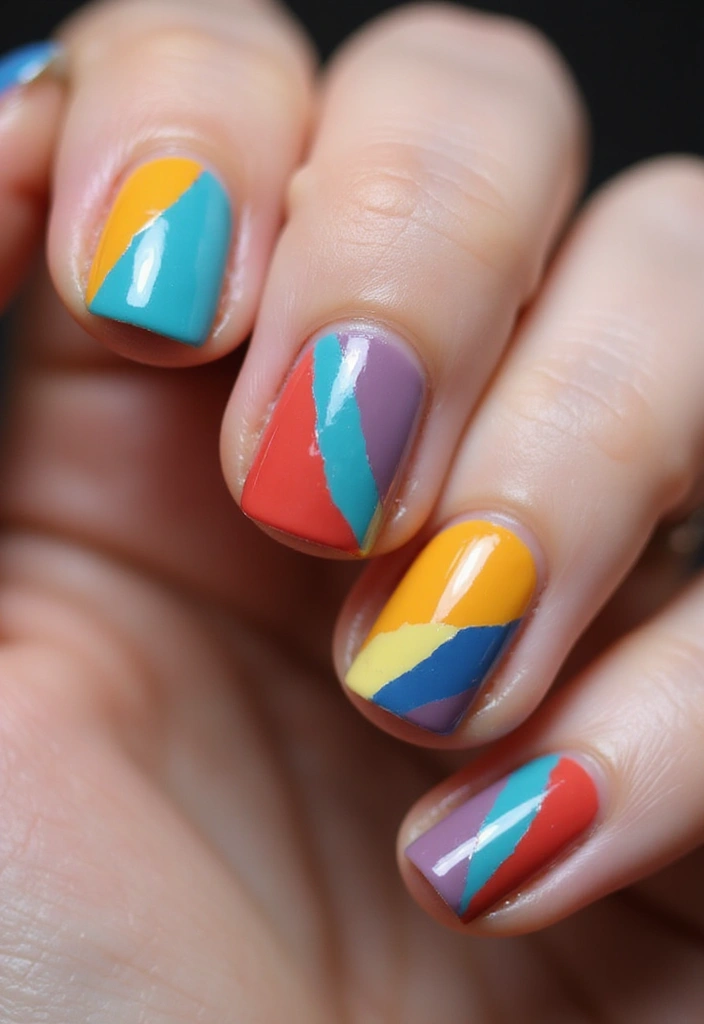
Geometric patterns are trendy and modern, perfect for making a statement!
Start with a base coat of your favorite color and then use tape to create geometric shapes. Once your polish is dry, fill in the shapes with different colors and finish with a clear glaze for a smooth finish.
This technique allows for endless creativity while keeping your nails looking chic.
Key Tips:
– Use nail tape for clean lines and sharp angles.
– Be patient and let each layer dry before proceeding.
– Experiment with different color combinations for exciting results.
Unleash your creativity with geometric glaze! Sharp lines and bold colors make your nails a canvas for self-expression. Remember, patience is key – let each layer dry for a flawless finish!
11. Marble Glaze Finish
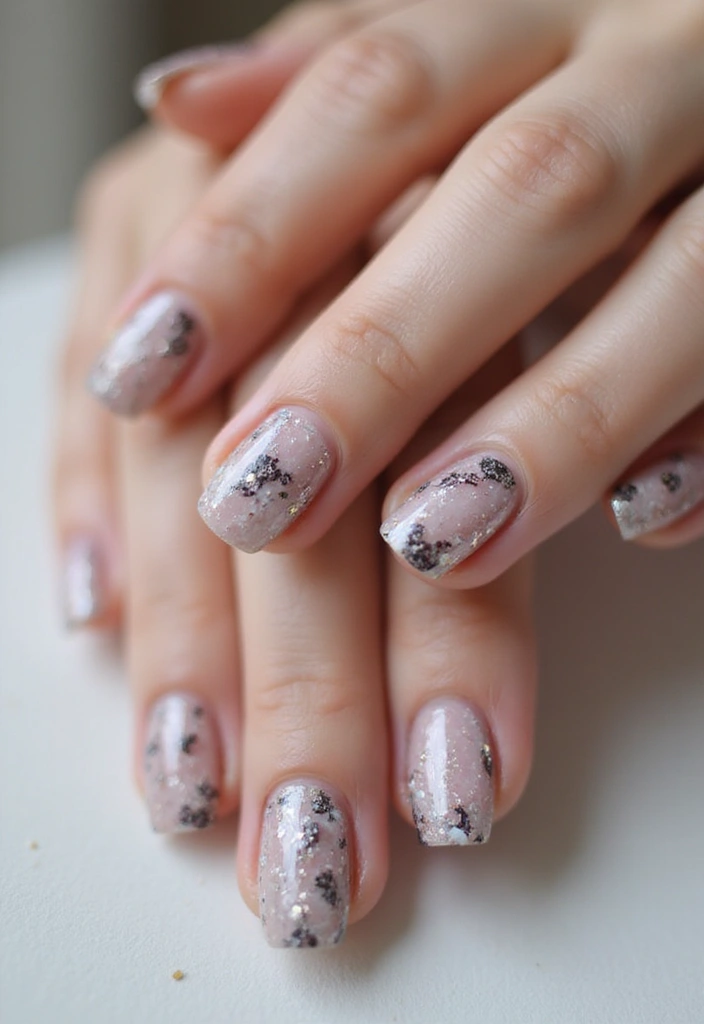
Marble nails are elegant and chic, giving a luxurious feel to your manicure.
To achieve this look, start with a white base coat. Then, use a thin brush or a nail art tool to create marble effects using gray and black polishes. Finish this look with a glossy top coat to enhance the marble’s beauty.
This technique can be a little tricky but offers a stunning result that looks professionally done.
Key Tips:
– Use a dotting tool to create random swirls and lines for a natural marble look.
– Experiment with colors for a unique twist on the classic look.
– Keep your strokes light for a more delicate design.
12. Neon Glaze
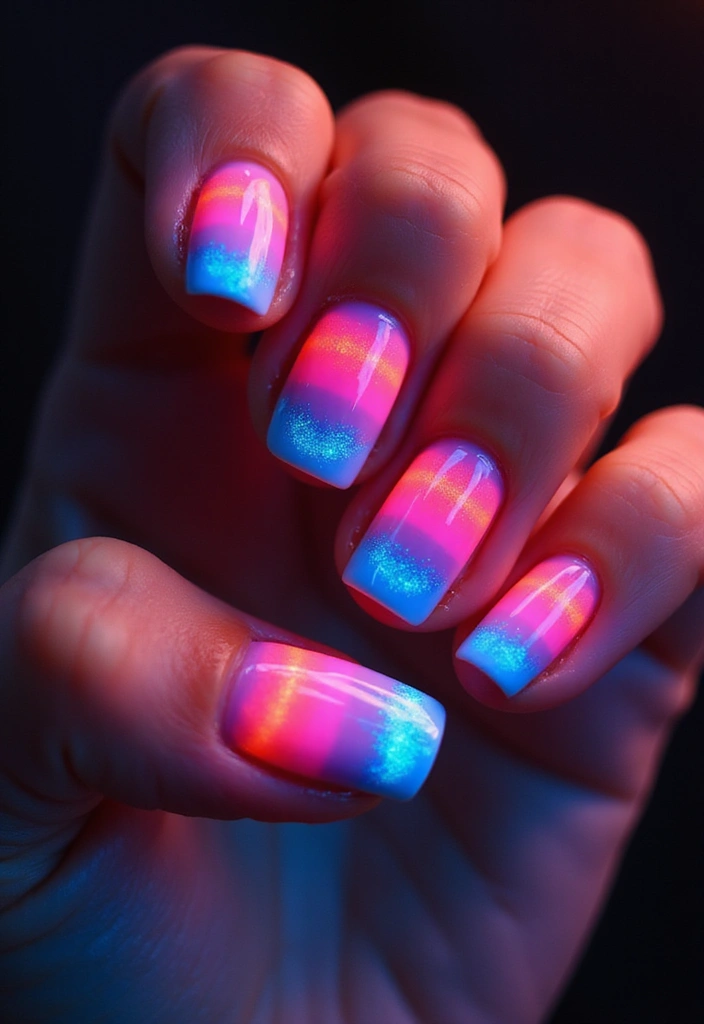
Neon colors are all the rage and perfect for a fun, eye-catching look!
Apply a bright neon polish as your base coat. Once it’s dry, add a clear glaze on top to enhance the shine and intensity of the color. This look is fantastic for summer parties or festivals, making your nails pop!
You can also mix neon shades for a vibrant ombre effect.
Key Tips:
– Make sure to apply a base coat to avoid staining your nails.
– Use multiple coats for a more vibrant neon look.
– Consider matte neon polish for a different, trendy vibe.
Dare to be bold! Neon nails not only brighten your look but can make any summer gathering unforgettable. Add a clear glaze for that extra shine and watch your creativity shine just as bright!
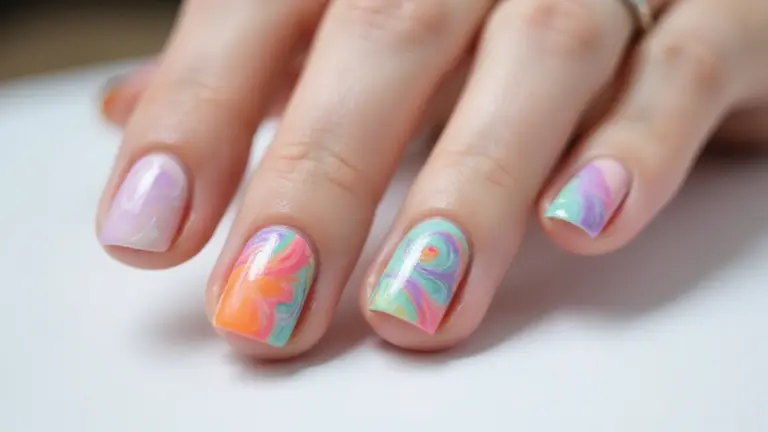
13. Watercolor Technique
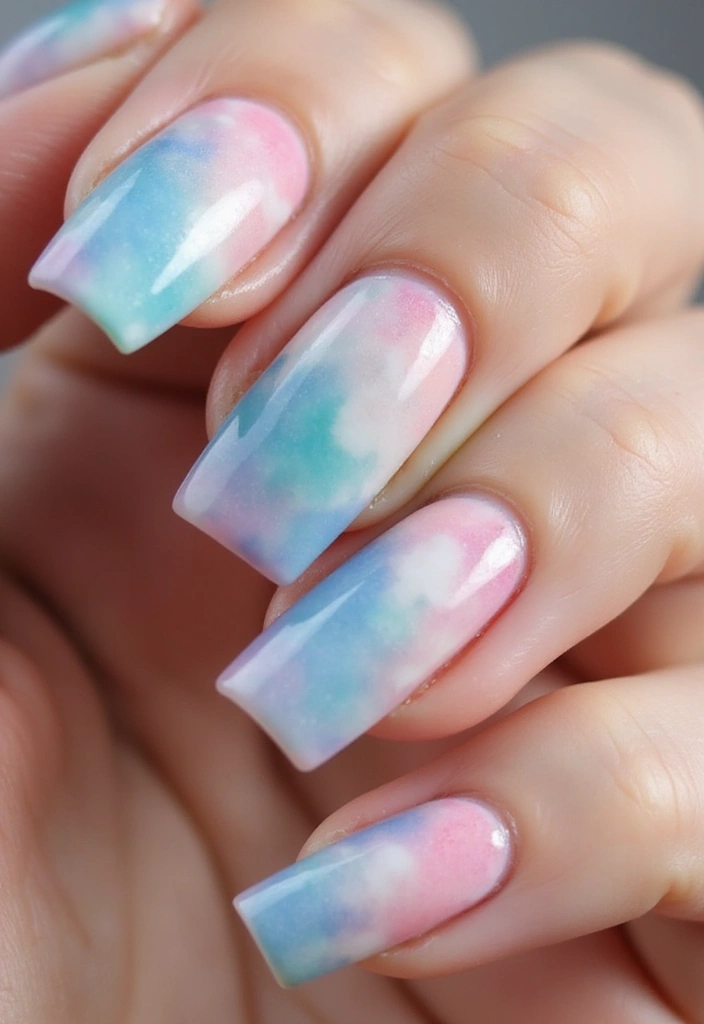
Watercolor nails are a fun way to incorporate soft, blended colors into your manicure.
Using a clear base coat, apply different shades of polish using a brush or sponge to mimic the watercolor effect. Once the colors are blended and dried, add a clear glaze for added shine. This look is especially beautiful for spring and summer!
You can experiment with different colors for unique designs.
Key Tips:
– Use a sheer polish for a light, delicate look.
– Blend colors while they’re still wet for a softer effect.
– Seal with a top coat to maintain the finish.
14. Cookie Glaze Nails

Inspired by sweet treats, cookie glaze nails are playful and delicious!
Choose a warm brown base to mimic cookie dough, then use light-colored polishes to create cookie ‘chips’.
Finish with a shiny top coat for that baked finish! This style is quirky and perfect for those who want a dash of fun on their nails.
Key Tips:
– Use a dotting tool to make chip shapes for a more realistic look.
– Play around with different colors for ‘funfetti’ nails.
– Always seal with a top coat for shine and protection.
15. Frosted Glaze
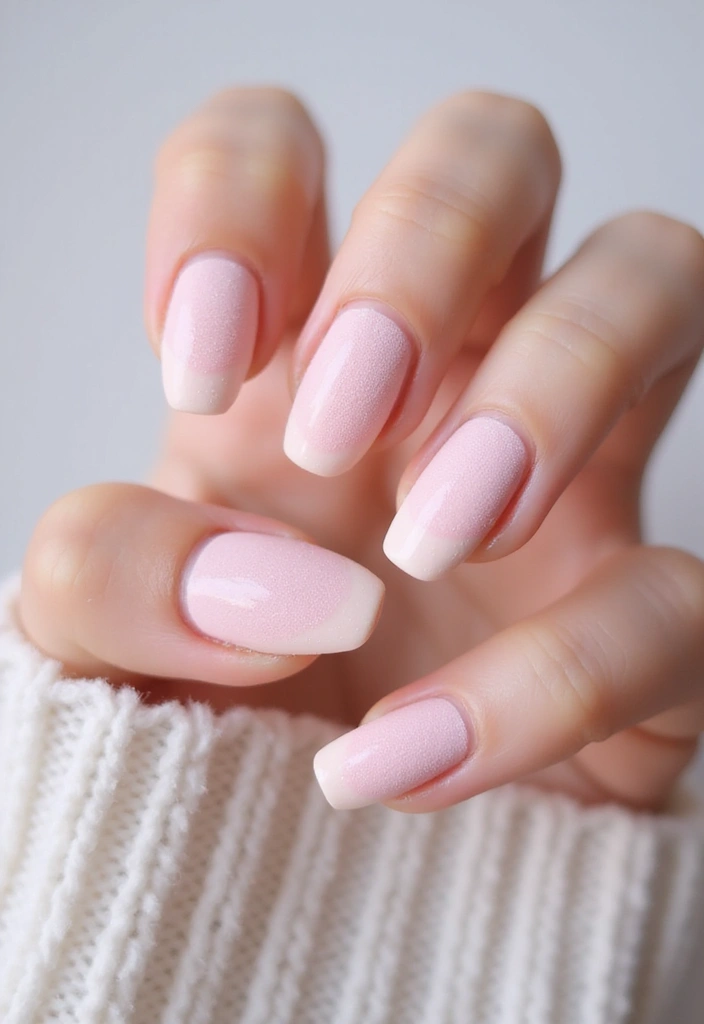
Frosted nails add a cool and refreshing touch to your manicure.
Start with a light pastel base coat, then add a frosted top coat for a soft, matte finish. This style is perfect for those who want a chic yet subtle look.
You can mix and match different pastel shades for an even more playful vibe.
Key Tips:
– Apply a clear base coat to protect your nails before starting.
– Use a light hand when applying the frosted coat for a more delicate finish.
– Consider adding glitter for a touch of sparkle!
16. Stained Glass Effect
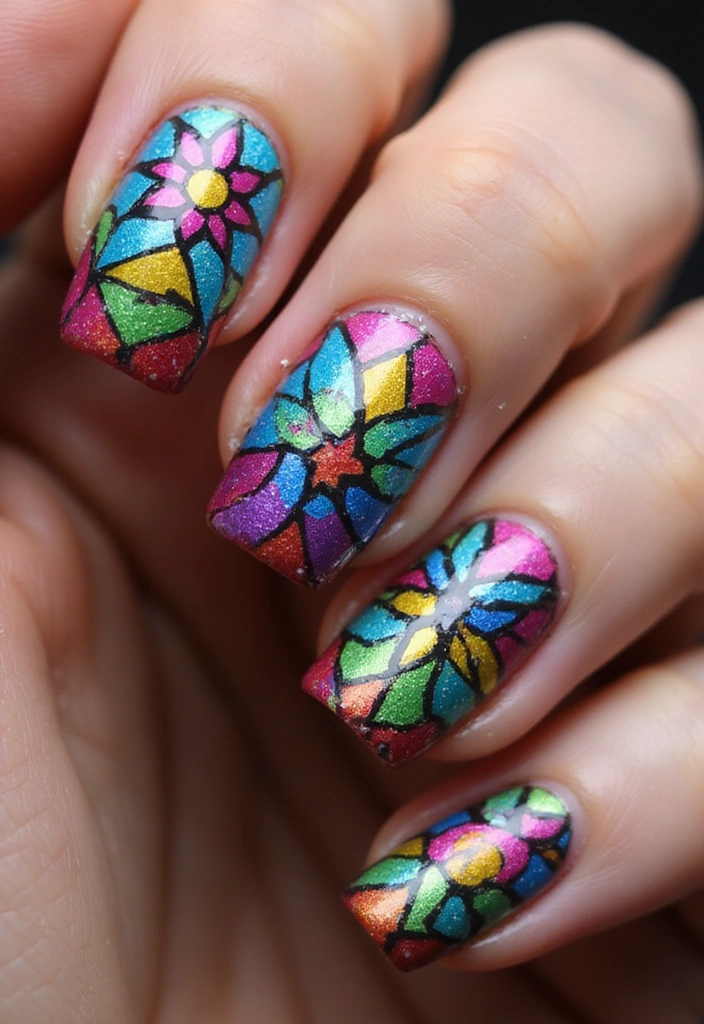
Stained glass nails offer an artistic and colorful twist!
Start with a black base coat, then use colored polishes to create geometric shapes. Once dry, apply a glossy top coat to give the look a polished finish. This technique is playful and perfect for special occasions or when you want something unique.
You can use multiple colors to create a vibrant stained glass effect.
Key Tips:
– Use nail tape for precise lines and shapes.
– Keep your colors bright to mimic real stained glass.
– Finish with a thick top coat to enhance shine.
17. Candy Swirl Nails
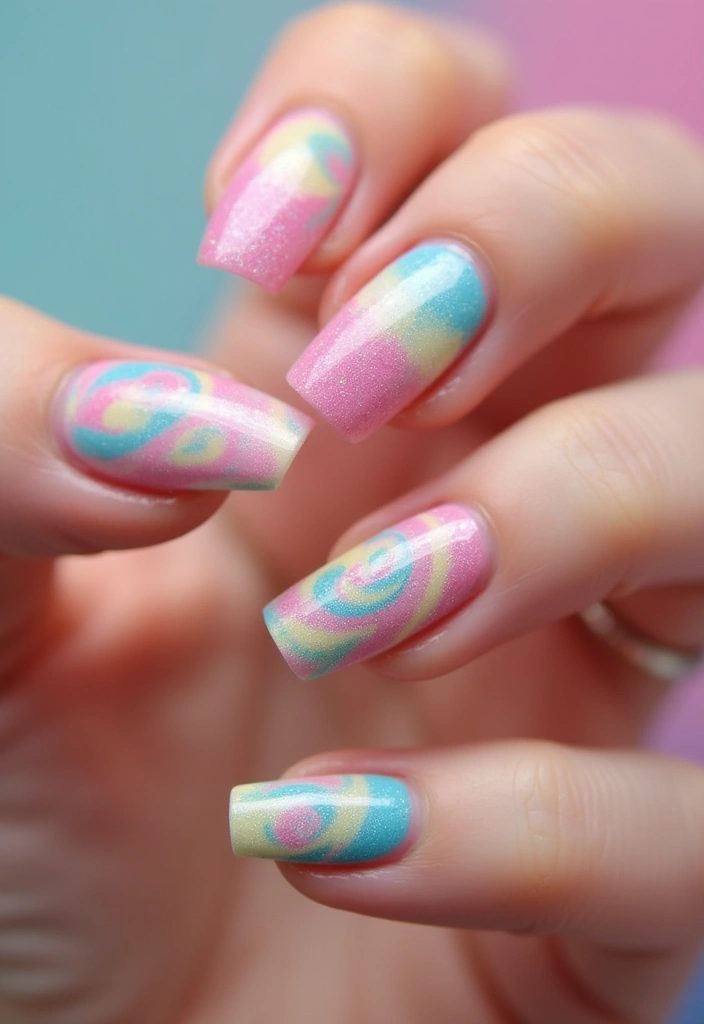
Channel your inner child with candy swirl nails!
Start with a white base coat, then use a thin brush to create swirls of pastel colors. Once you’re satisfied with the design, seal it with a glossy top coat. This fun style is perfect for summer or any playful occasion!
You can mix multiple colors or even add glitter for extra sweetness.
Key Tips:
– Use thin brushes for precision and control.
– Blend the colors while the polish is still wet for a smooth transition.
– Consider using a matte top coat for a different vibe.
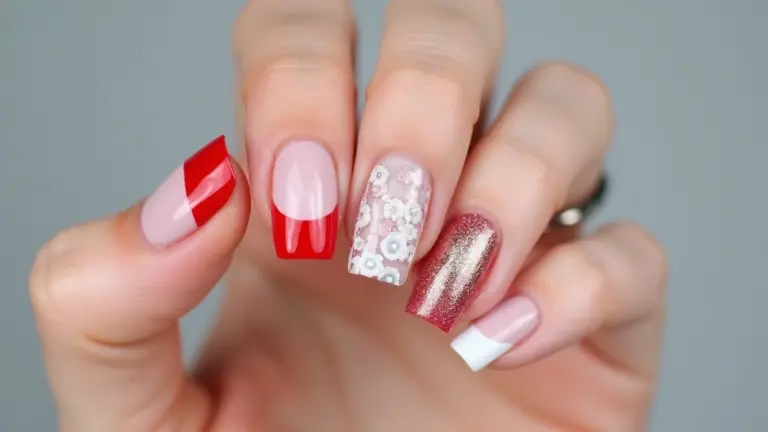
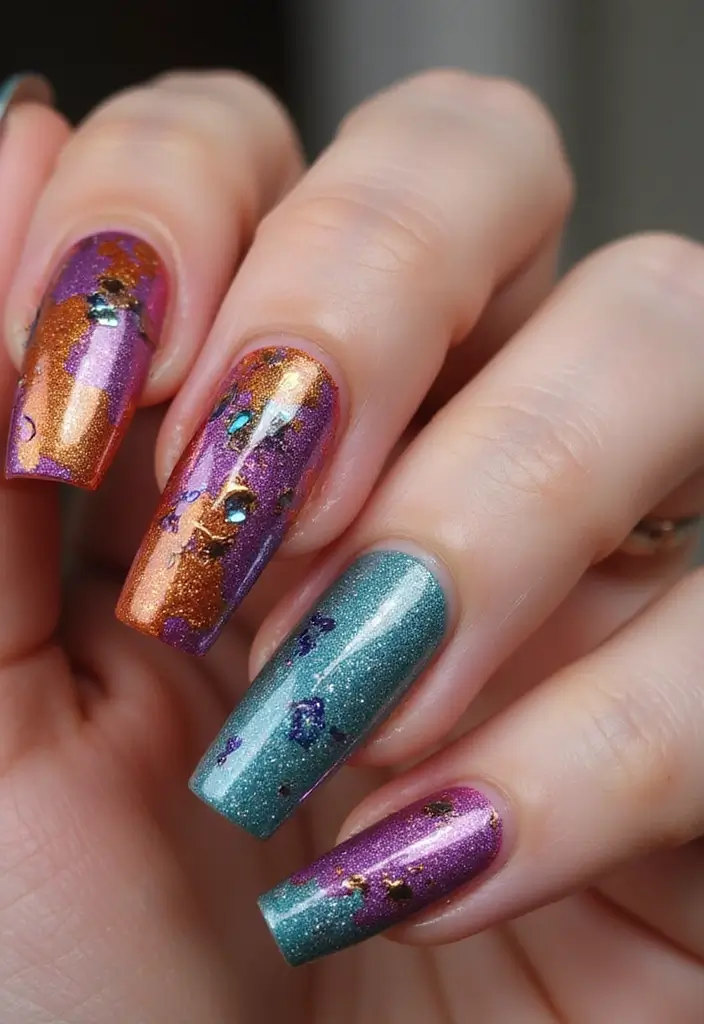
18. Jewel-Toned Glaze
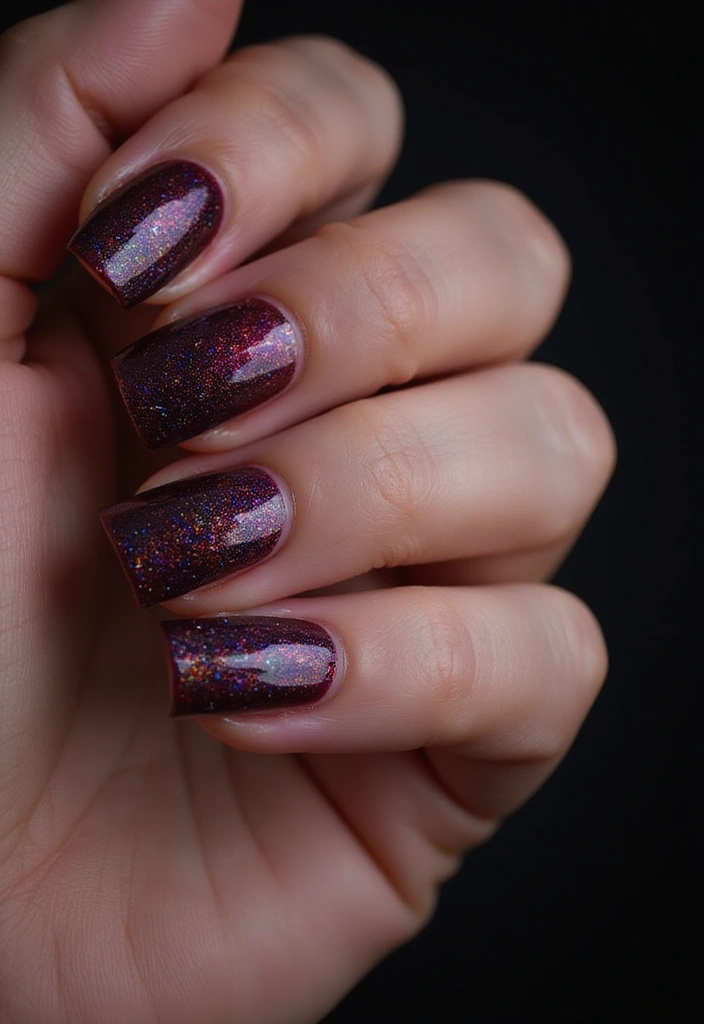
Jewel-toned nails are luxurious and elegant, making them perfect for classy events.
Choose deep colors like emerald green, sapphire blue, or ruby red for your base coat. Finish with a shiny glaze to enhance the richness of the colors. This glamorous style is sure to make a statement wherever you go!
Consider using a gold or silver accent nail for added sparkle.
Key Tips:
– Apply two coats for richer color depth.
– Use a high-quality top coat for a lasting shine.
– Get creative with nail art accents for a glamorous touch.
19. Whimsical Character Nails
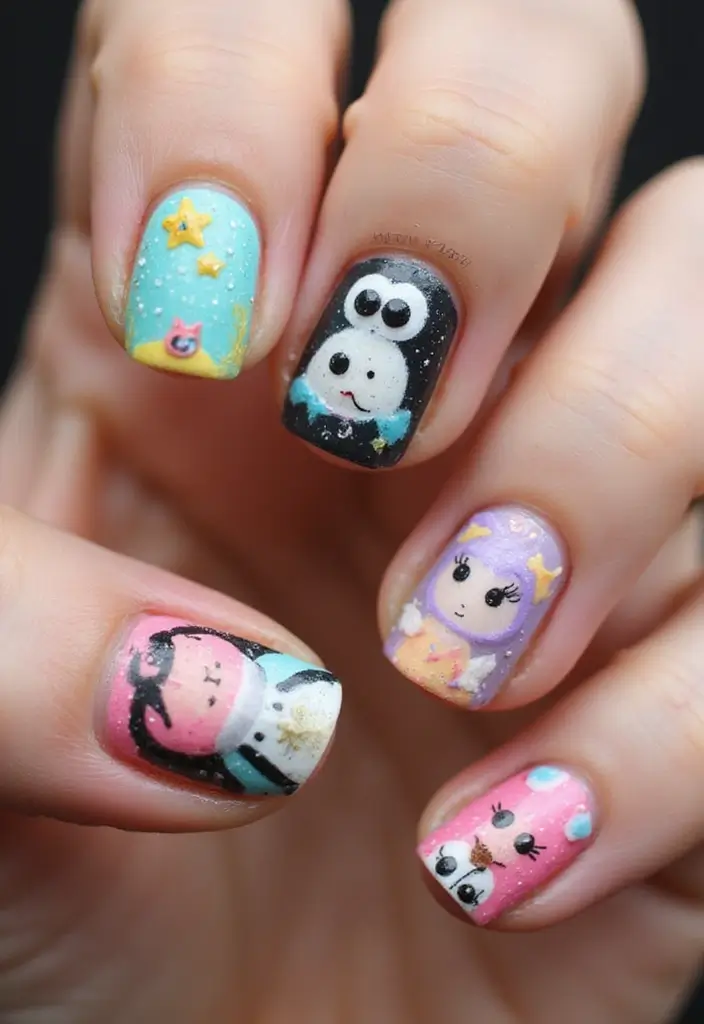
Bring your favorite characters to life with whimsical character nails!
Start with a base coat in a neutral shade, then paint characters or motifs inspired by your favorite shows or movies. Finish with a glossy top coat to ensure durability and shine.
This playful design is perfect for young nail art enthusiasts or anyone wanting a fun touch.
Key Tips:
– Use a fine brush for detailed character designs.
– Get inspiration from online tutorials for different characters.
– Seal your designs with a thick top coat for longevity.
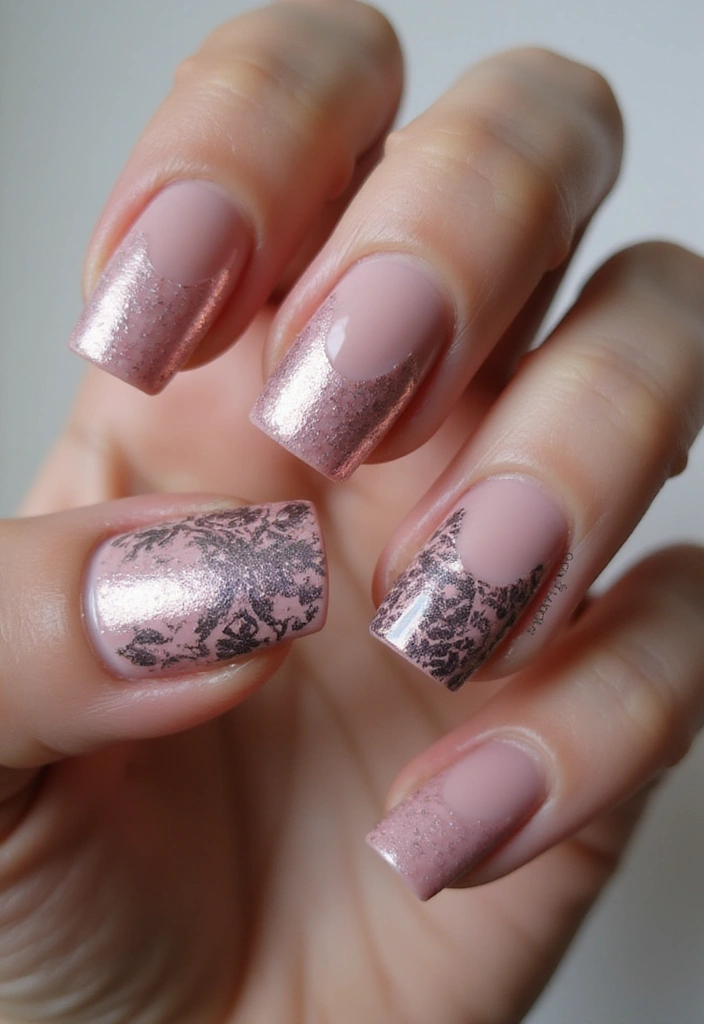
20. Vintage Lace Nails
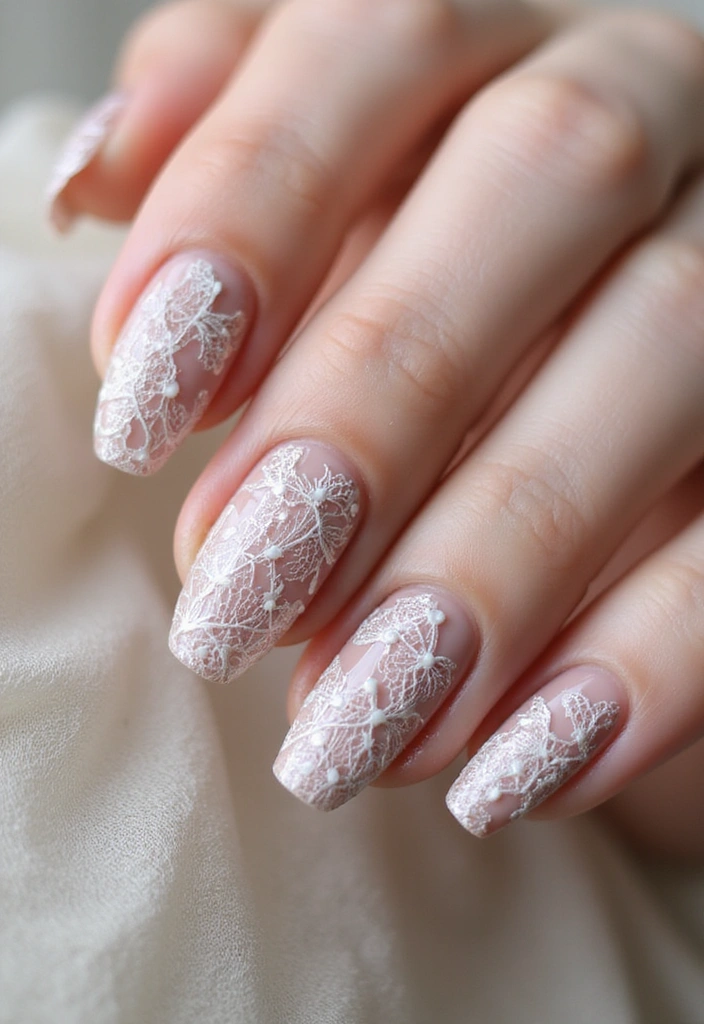
Vintage lace nails bring an elegant, sophisticated touch to your manicure.
Start with a nude or pastel base coat and use a thin brush to create lace patterns in white or cream. Once your design is completed, add a glossy top coat for a polished finish.
This style works beautifully for weddings or formal events, providing a delicate touch.
Key Tips:
– Use nail tape to help outline your lace patterns.
– Practice your lace designs on paper before applying.
– Finish with a glossy top coat to enhance the lace effect.
21. Reflective Foil Nails
Foil nails are trendy and eye-catching, perfect for those who love a bit of glam!
Apply a base coat and once dry, add pieces of metallic foil in random patterns. Finish with a glossy top coat to seal in the foil and enhance the shine. This look is great for special occasions when you want to stand out.
The mix of textures gives your nails a futuristic feel.
Key Tips:
– Use nail glue to apply the foil for better adherence.
– Experiment with different foil colors for a unique look.
– Seal thoroughly with a top coat to prevent lifting.
Dare to shine! Reflective foil nails are your ticket to a glamorous look that’s perfect for any occasion. Remember, a little foil can turn your DIY nail art into a showstopper!
22. Textured Glaze
Textured nails bring a modern twist to the traditional glossy finish.
Opt for a textured nail polish as your base, such as a sugar or sand finish, and once dry, apply a clear glaze on top to smooth out the texture while keeping that unique feel. This look is perfect for someone looking to stand out!
The combination of textures offers a chic, sophisticated style.
Key Tips:
– Use a thick top coat to maintain the texture underneath.
– Play around with different textured polishes for varied looks.
– Consider pairing with matte nails for an interesting contrast.
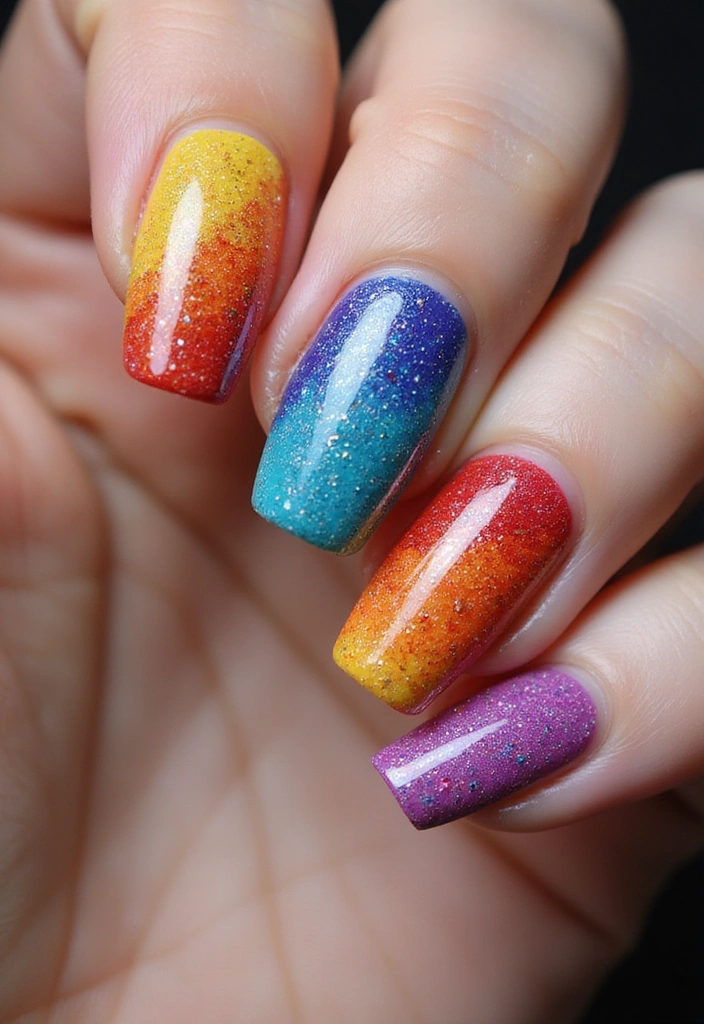
23. Gradient Glitter Glaze
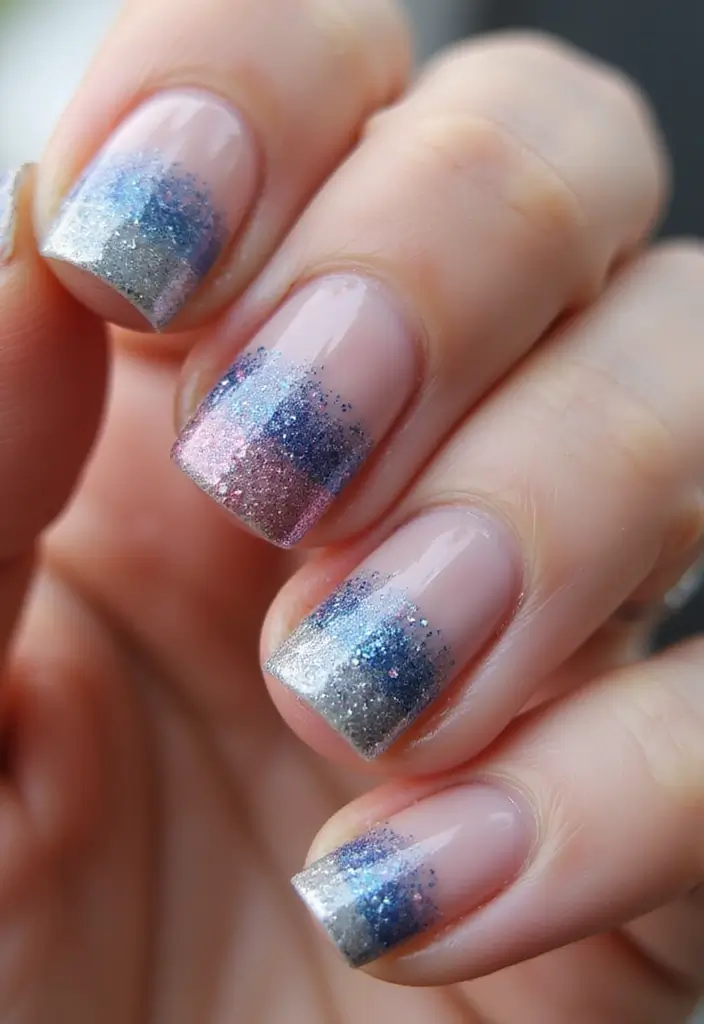
Bring the sparkle with a gradient glitter glaze!
Choose a base color and apply a fine glitter polish toward the tips of your nails, gradually decreasing the amount as you go down. A glossy top coat will seal everything in and provide that shiny finish. This style is festive and perfect for parties!
You can use different colors of glitter for a fun effect.
Key Tips:
– Use a sponge for more precise glitter application.
– Let each layer dry before moving on to prevent smudging.
– Seal thoroughly for a lasting shine.
24. Ombre Glitter Finish

Ombre glitter nails provide a perfect blend of sophistication and fun.
Start with a solid base color, then apply glitter polish from the tips, gradually blending down towards the base. Finish with a clear glossy top coat to enhance the shine and keep the glitter in place. This look is fabulous for festive occasions!
Consider using contrasting colors for a unique twist.
Key Tips:
– Apply in thin layers for a more seamless ombre effect.
– Use a makeup sponge for a smooth blend.
– Don’t forget to seal with a top coat for durability.
25. Summer Breeze Nails
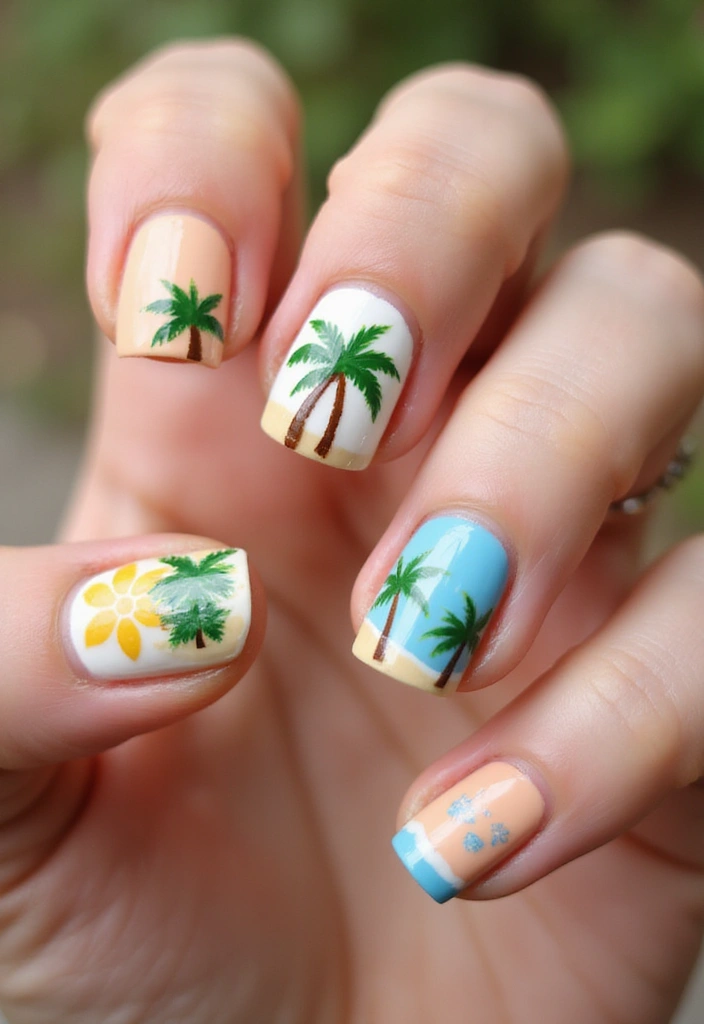
Capture the essence of summer with breezy nail designs!
Start with a nude or soft pastel base coat. Then, create palm tree or beach-inspired designs using a fine brush. Finish with a glossy top coat to add shine and protect your designs. This look is perfect for those warm sunny days!
Consider using bright colors for a more vibrant style.
Key Tips:
– Use nail tape for straight lines and clean designs.
– Practice your designs on paper first for better results.
– Seal with a thick top coat to keep your artwork safe.
26. Animal Print Glaze
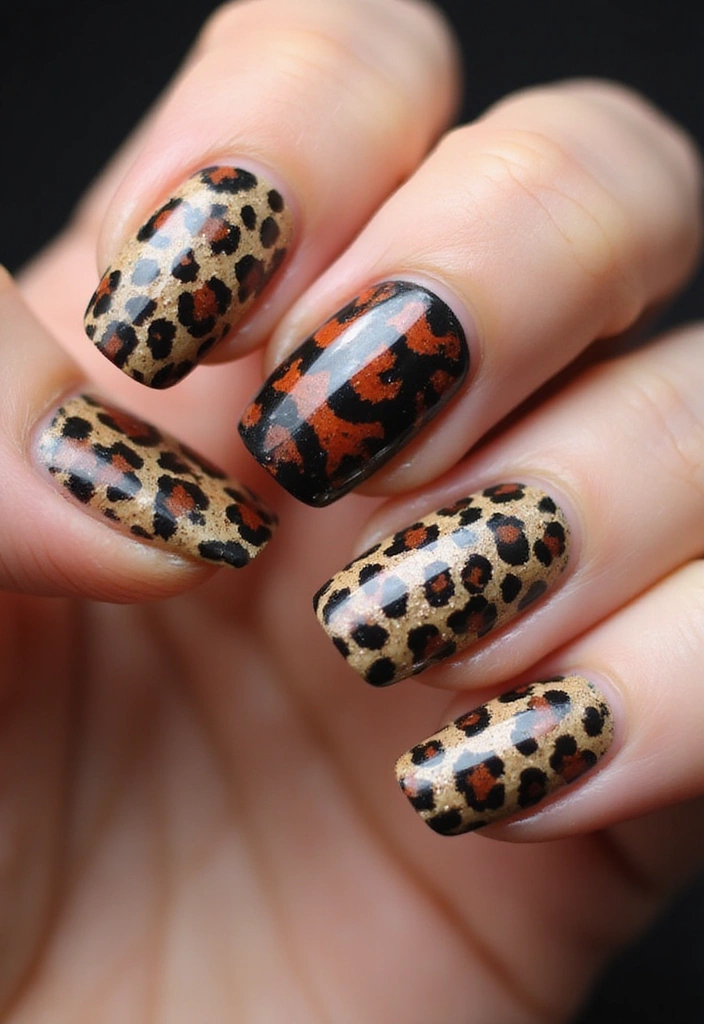
Animal print is always in style!
Choose a classic animal print design like leopard or zebra stripes. Start with a base color, and once it dries, use a dotting tool or fine brush to create the print. Finish with a glossy top coat to enhance the design and add shine. This trendy look is perfect for animal lovers!
Experiment with colors for a unique touch!
Key Tips:
– Use nail tape for straight lines and sharp edges.
– Practice a few different designs on paper first.
– Seal your design with a durable top coat.
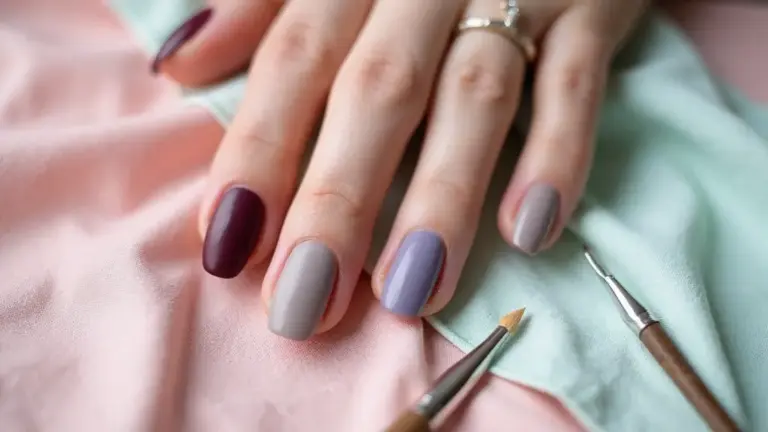
27. Minimalist Glaze
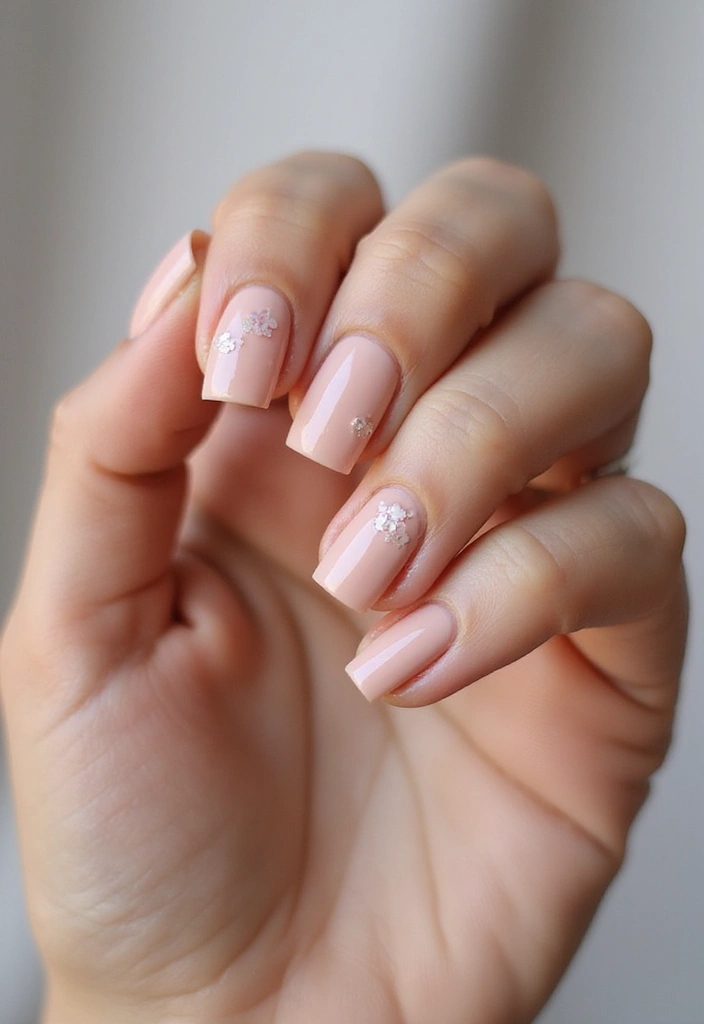
Less is sometimes more with minimalist glaze nails.
Choose a nude or soft color as your base coat, then add simple designs like lines or dots using a fine brush. Finish with a glossy top coat to create a polished look. This style is elegant and perfect for any occasion!
Minimalist designs are quick to do and easy to maintain.
Key Tips:
– Keep your designs uncomplicated for a chic look.
– Use a thin brush for precise application.
– Experiment with different placements for added creativity.
Less can be more! Embrace the beauty of minimalist glaze nails – a chic design that proves elegance lies in simplicity. With just a few lines or dots, your nails can shine in any setting!
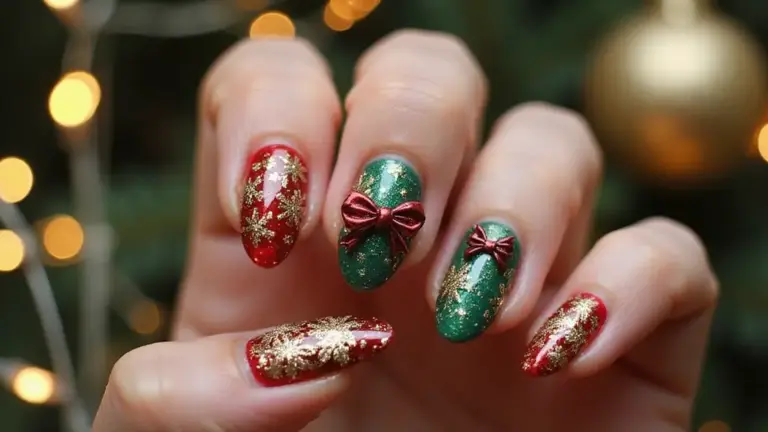
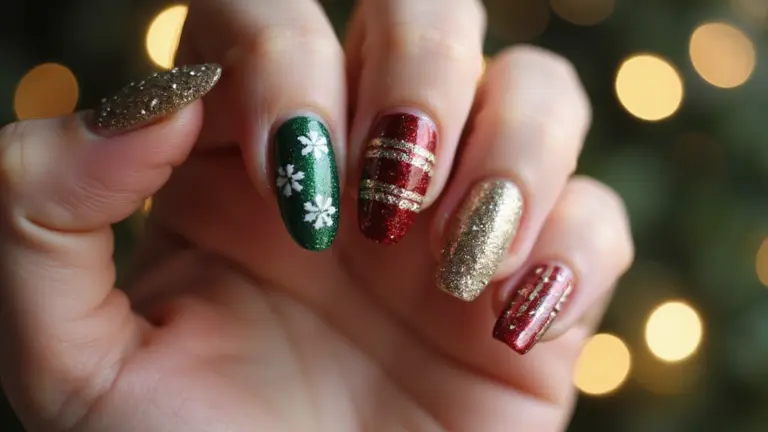
28. Holiday-Themed Glazed Nails
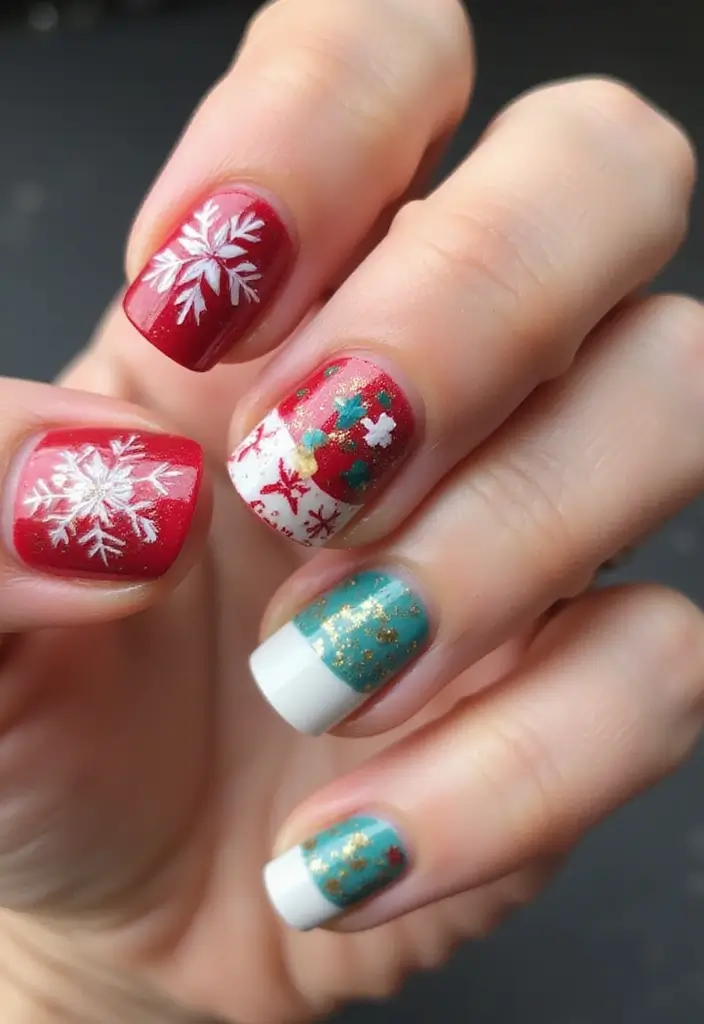
Get festive with holiday-themed glazed nails!
Start with a base coat in traditional holiday colors like red or green. Once dry, paint fun designs like snowflakes, ornaments, or candy canes. Finish with a clear glaze to add shine and protect your designs. This look is perfect for celebrating any holiday in style!
Consider adding glitter to make it even more festive.
Key Tips:
– Use a fine brush for detailed holiday designs.
– Practice designs on paper before applying to nails.
– Seal with a clear top coat for added longevity.
Conclusion
Now that you have 28 fantastic ideas for glazed finish tutorials, it’s time to get creative and start your DIY nail journey.
Whether you opt for a classic glossy look or something trendy like ombre or animal print, there’s a glazed style for everyone.
Don’t forget to enjoy the process and show off your shiny new nails!
Frequently Asked Questions
What Are the Essential Nail Care Tips for Achieving a Glossy Finish?
To achieve that stunning glossy finish, start with a clean and healthy base. Always apply a clear base coat to protect your nails and ensure better adhesion of the polish. Don’t forget to moisturize your cuticles and nails regularly! This keeps them hydrated, which is essential for a flawless manicure. Finally, finish with a high-quality glossy top coat to seal in your design and add that coveted shine!
Can I Create Glazed Nails at Home Without Professional Tools?
Absolutely! You can create beautiful glazed nails right at home using basic supplies. A good set of nail polishes, a clear top coat, and some simple tools like a dotting tool or nail brush can work wonders. Many of the DIY nail art techniques shared in our tutorials require minimal tools, just your creativity and a steady hand. You might even find that household items can help you achieve unique designs!
How Long Does a DIY Glazed Nail Manicure Last?
A DIY glazed nail manicure can last anywhere from a few days to up to two weeks, depending on the products you use and how well you take care of your nails. Using a quality base and top coat is key to longevity. Also, remember to avoid harsh chemicals and wear gloves when doing household chores to protect your beautiful nails. Regular touch-ups can also help maintain that shiny look!
What Are Some Unique Ideas for Holiday-Themed Glazed Nails?
Holiday-themed glazed nails can be super fun and festive! Try using traditional colors like red and green for a classic look, and add designs like snowflakes, ornaments, or even candy canes for a playful touch. You could also experiment with glitter glazes or ombre effects to make your nails pop during the holiday season. Check out our tutorials for step-by-step guidance on achieving these festive designs!
How Can I Achieve an Ombre Glazed Nail Look?
Achieving an ombre glazed nail look is easier than you think! Start with a base color and apply it to your nails. Once that’s dry, choose a complementary color and use a sponge to dab it onto the tips, blending downwards to create a gradient effect. Finish off with a clear glaze for that extra shine! This method can give you a trendy and chic look that’s perfect for any occasion.