25 Short & Sleek Blush Nails for Everyday Class
Blush nails are the perfect way to embrace elegance while keeping it chic and simple. This soft and subtle color not only looks great on all skin tones but also enhances your overall look without being too flashy. From minimalist designs to intricate art, these nails can serve as a fantastic canvas for your creativity.
Get ready to elevate your nail game! Whether you’re heading to a casual outing or a formal event, these 25 short and sleek blush nail designs will have you covered for every occasion. Let’s dive into this delightful collection that reflects warmth, sophistication, and a touch of flair, ensuring your manicure is always on point.
1. Simple Blush Mani
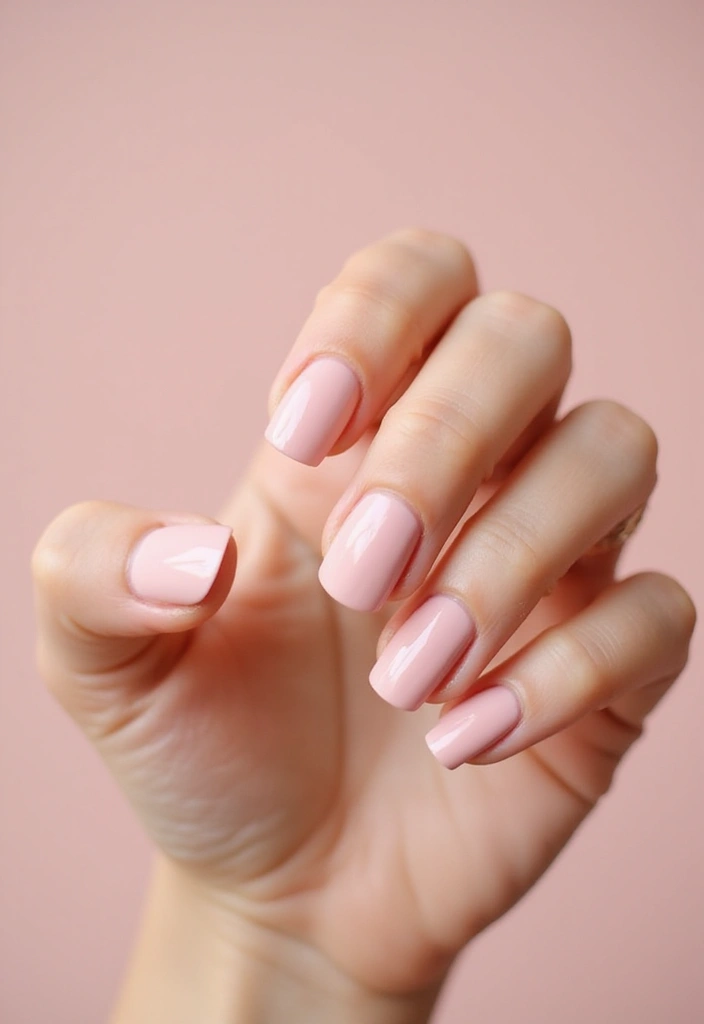
Nothing beats the elegance of a classic blush manicure. This design features a smooth, glossy finish that makes your nails look well-groomed and chic. The beauty of this look is its simplicity.
To achieve this style, start with a clean nail bed, apply a base coat, and finish with a couple of coats of your favorite blush polish. Don’t forget to seal your look with a top coat for that added shine!
for this style:
– Choose a shade that complements your skin tone for a flawless finish.
– Keep your nails short and neatly shaped for an ultra-sleek appearance.
– Maintain your manicure by applying a top coat every few days to keep the shine.
This style is perfect for daily wear, making it a go-to favorite for many!
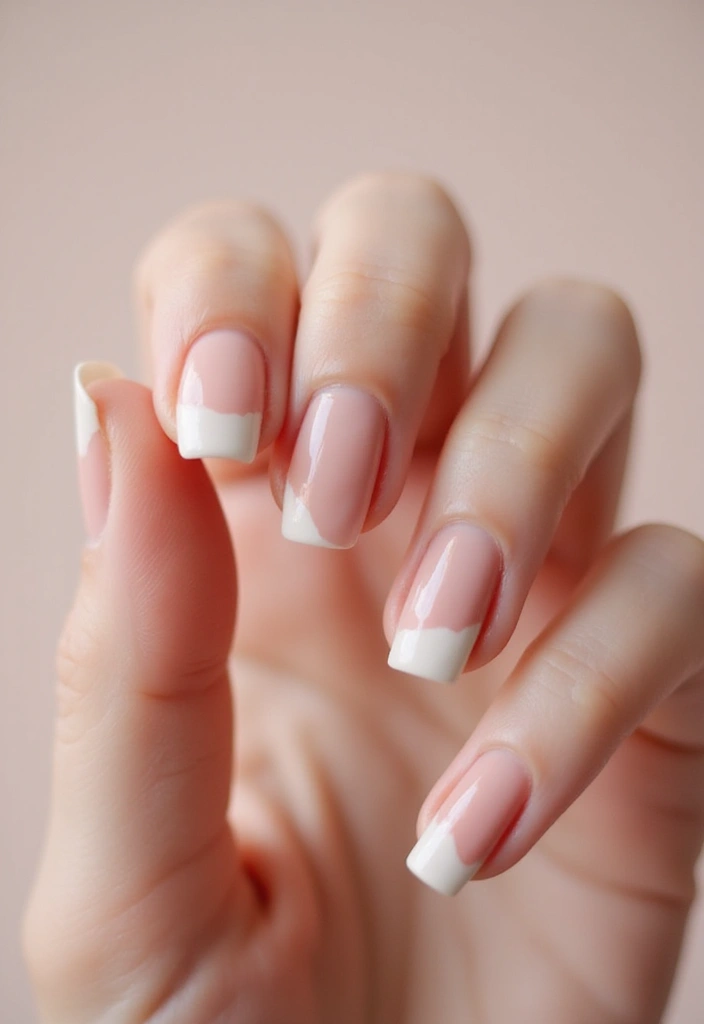
2. Blush French Tips
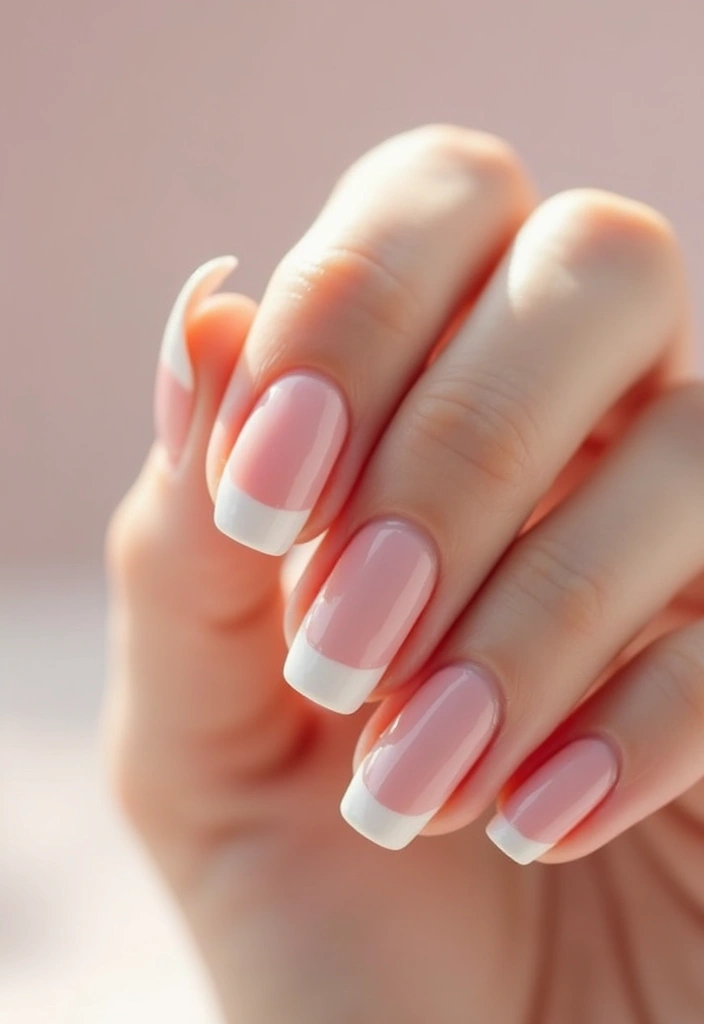
Give the classic French tip a modern twist with blush! This design features a soft blush base with a stark white tip, offering a delicate yet polished look. It’s a blend of classic elegance and contemporary charm.
To create this look, apply the blush polish as your base and use a fine brush or nail tape to apply the white at the tips. It’s the perfect balance between minimalism and sophistication.
Here’s how to perfect this style:
– Ensure your brush is dry before applying the white tips for a clean line.
– Use a matte top coat for a trendy finish.
– Experiment with varying widths of the white tip for a unique look.
This design is perfect for special occasions or even just for adding a touch of elegance to your everyday wear.
3. Blush Ombre
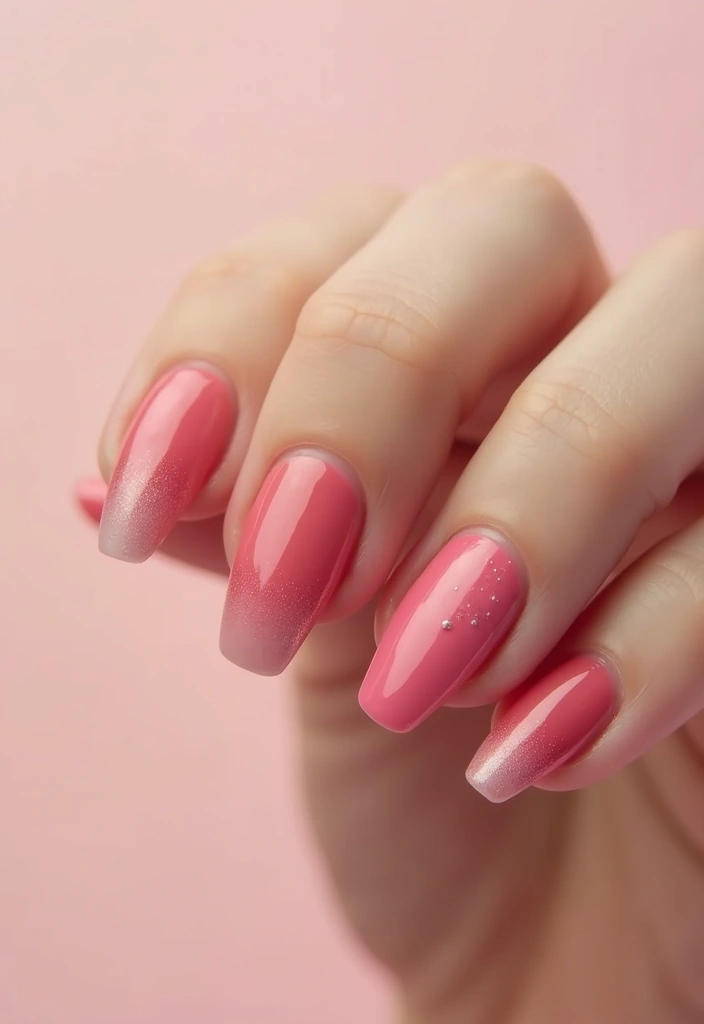
Ombre nails have continued to be in style, and a blush ombre is a soft way to incorporate this trend. Fading from a deeper blush at the cuticles to a lighter blush at the tips creates a beautiful gradient effect.
Achieving this look requires a little technique, but it’s well worth the effort! Start with a solid base coat in your deepest blush. Then, use a makeup sponge to apply the lighter shade, blending it upwards.
for this style:
– Use a latex barrier around your nails to catch any excess polish during the sponging process.
– Experiment with colors and tones of blush for a personalized ombre effect.
– Finish off with a glossy top coat to enhance the gradient look.
This design is not only trendy but also super fun to wear!
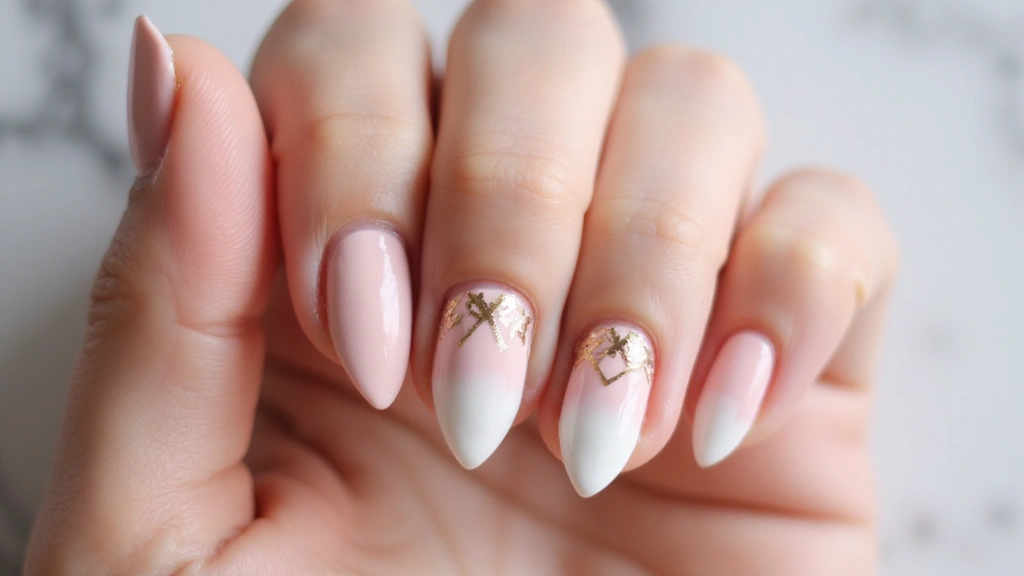
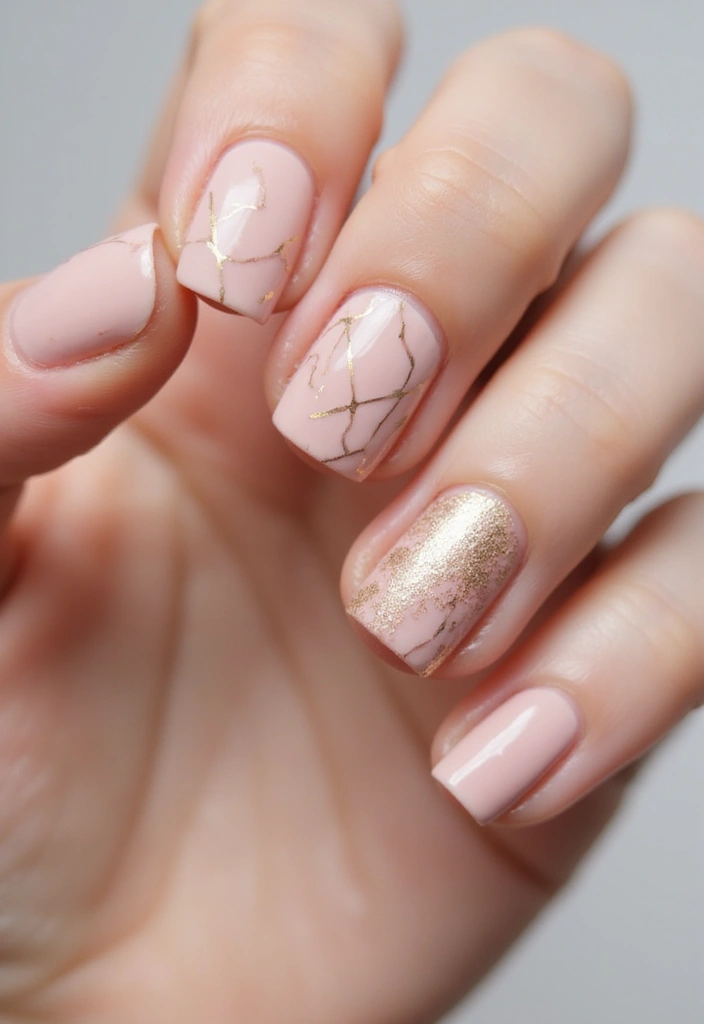
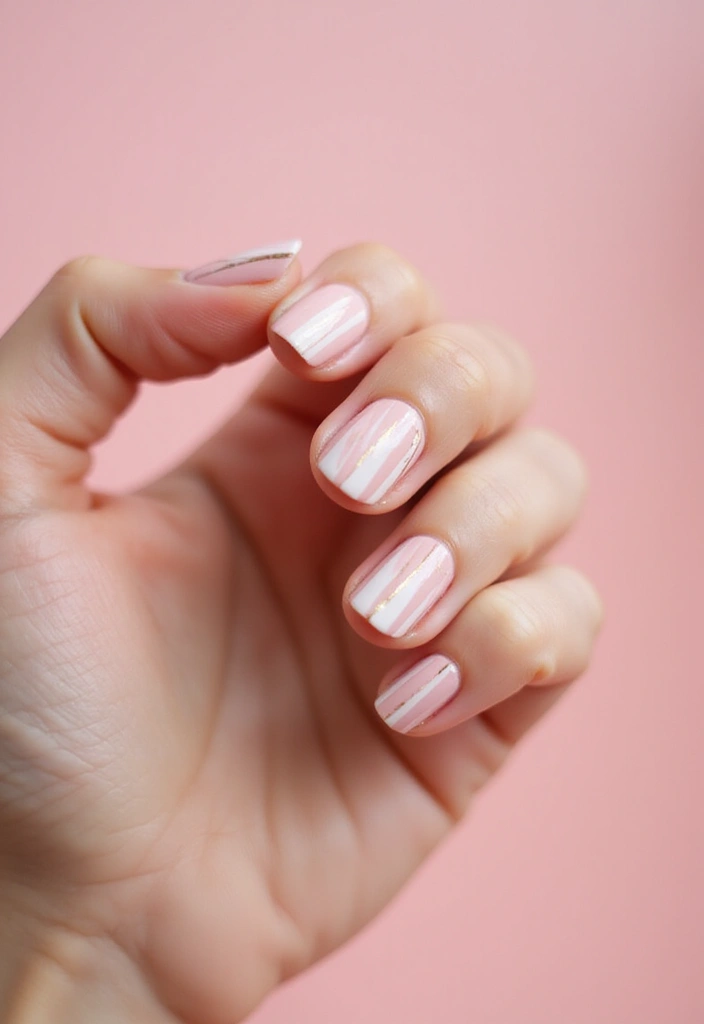
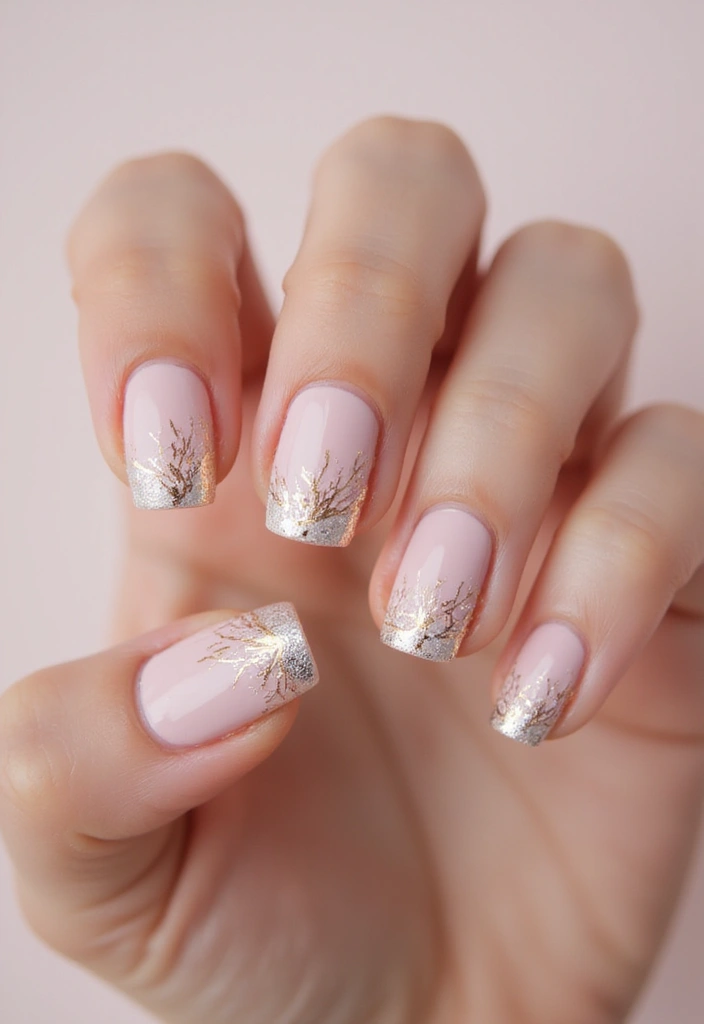
4. Blush with Gold Accents
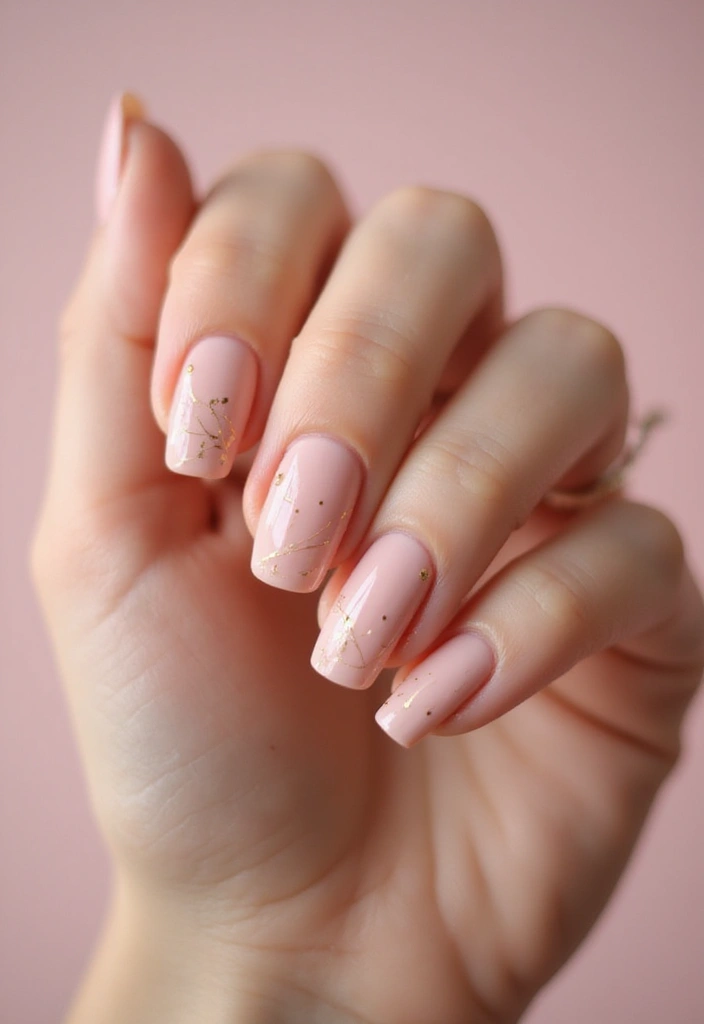
Nothing says luxury like blush nails adorned with gold accents. Whether it’s a simple gold line, dots, or even a delicate design, the combination adds a touch of glam to your look.
Start with a solid blush base. Once it’s dry, use a thin brush or nail art pen to add gold designs. This could be as simple as a diagonal line or intricate patterns, depending on your comfort level.
Here are some ideas:
– Gold stripes: Apply three thin lines at the cuticle for a chic look.
– Dots: Randomly place gold dots for a playful twist.
– Nail art stickers: If you’re not comfortable with freehand designs, stickers can be a great alternative.
This style is perfect for parties or anytime you want your nails to stand out.
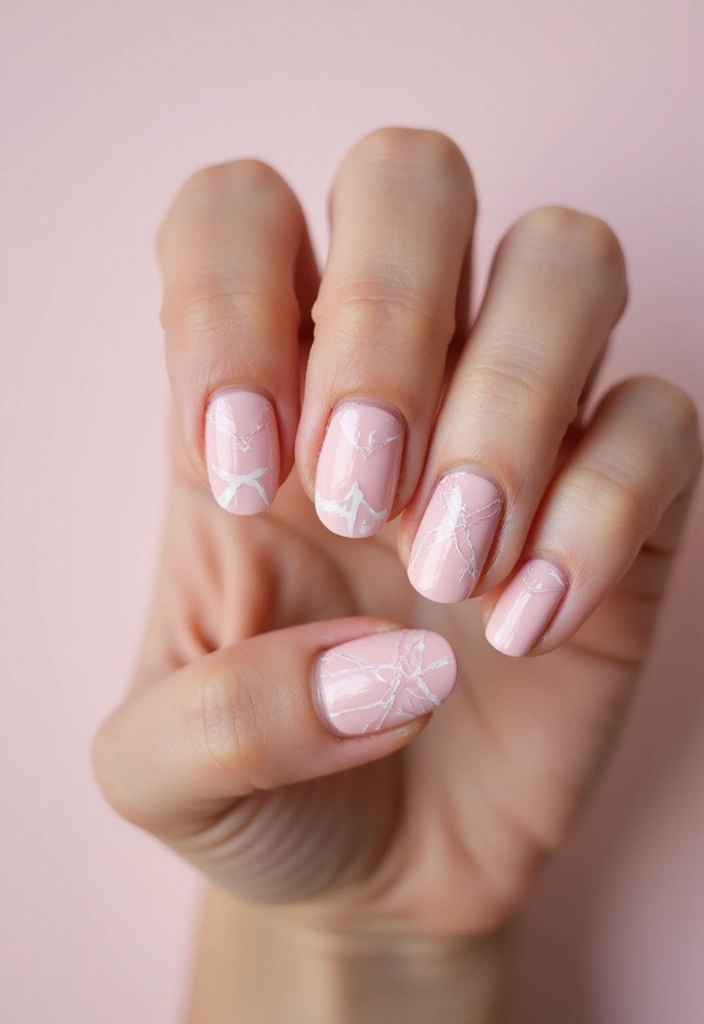
5. Blush and Marble
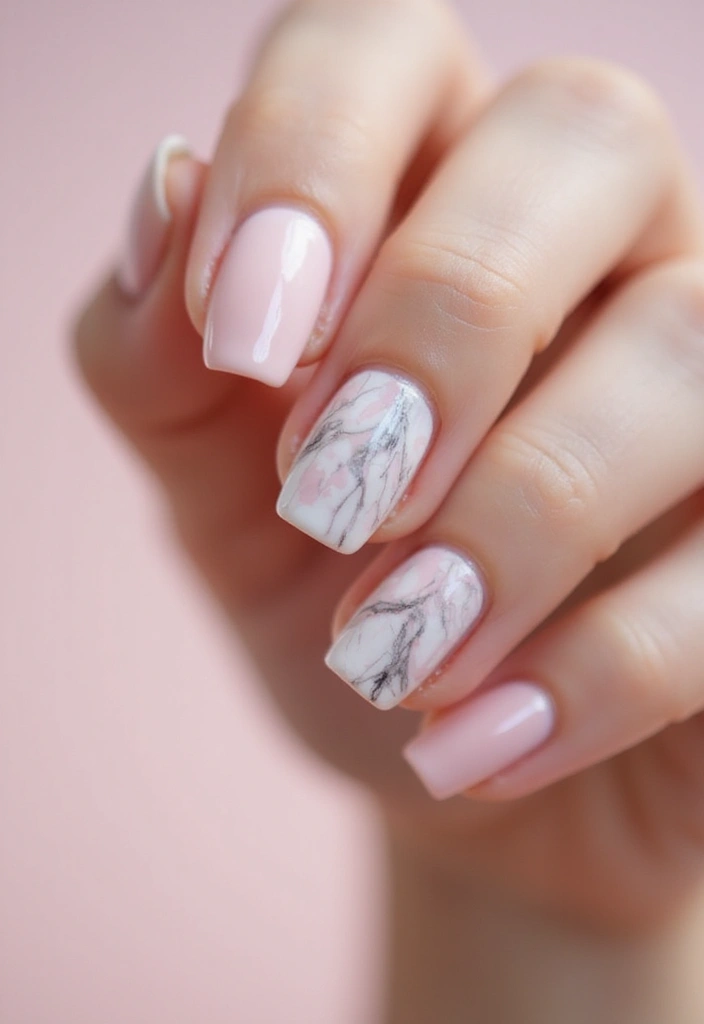
Marble nails have made their way into the beauty scene, and combining them with blush creates a sophisticated look. This design melds hues of blush with white and gray to create a stunning marble effect.
To create this look, start with a solid blush base. Then, using a small brush or a straw, apply white and gray polish in a swirly pattern. The trick is to blend without overdoing it—less is more!
for marble nails:
– Use a matte top coat for a more modern finish, or glossy for that classic touch.
– Practice on a nail wheel before applying to your nails for a perfect look.
– Incorporate tiny gold flecks for added pizzazz.
This design is sure to turn heads and is great for any occasion!
6. Blush with Glitter Fade
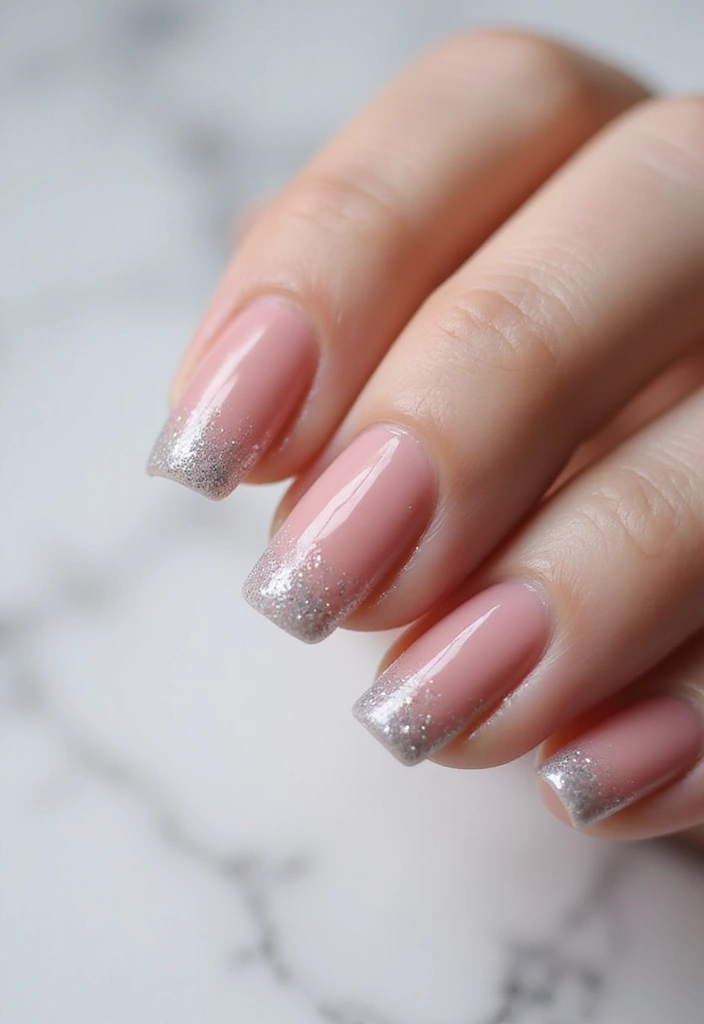
Add some sparkle to your everyday nails with a blush and glitter fade! This design features a smooth blush polish that transitions beautifully into sparkling glitter at the tips. It’s playful yet classy, perfect for any day.
To achieve this look, start with a base of blush. Once dry, apply glitter polish at the tips, slowly fading it down toward the base. You can layer it to build the intensity you desire.
Here’s how to perfect this style:
– Use a clear base glitter for a subtler effect.
– Apply a top coat to smooth out the transition and keep the glitter from feeling rough.
– Experiment with different colors of glitter for a fun twist.
This manicure is perfect for a night out or a casual brunch with friends!
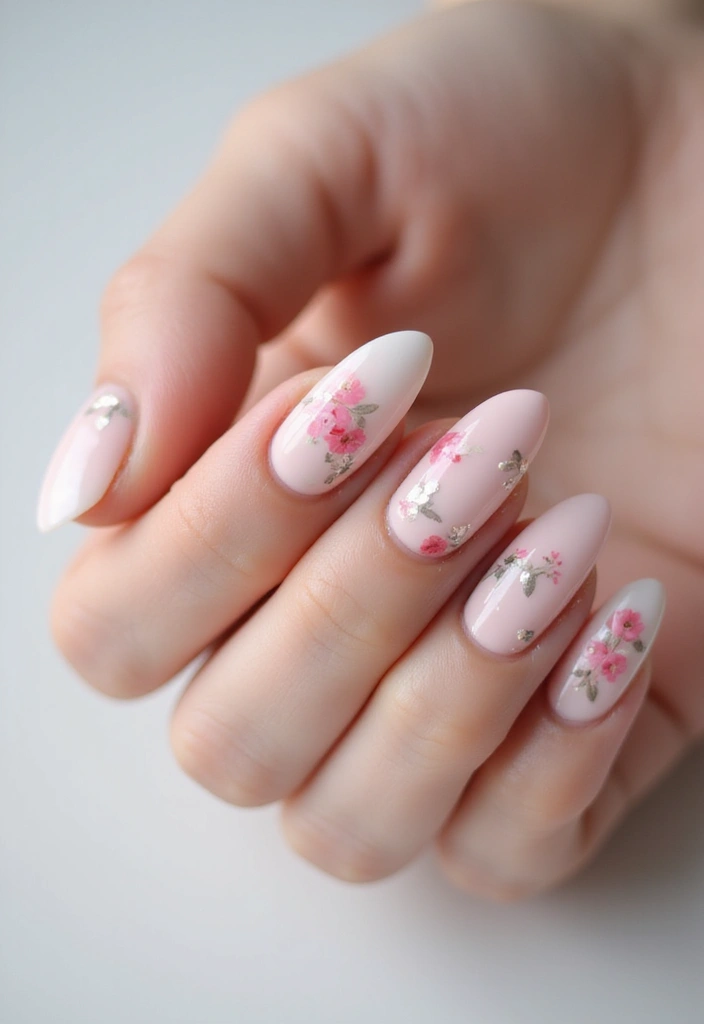
7. Blush with Floral Nail Art
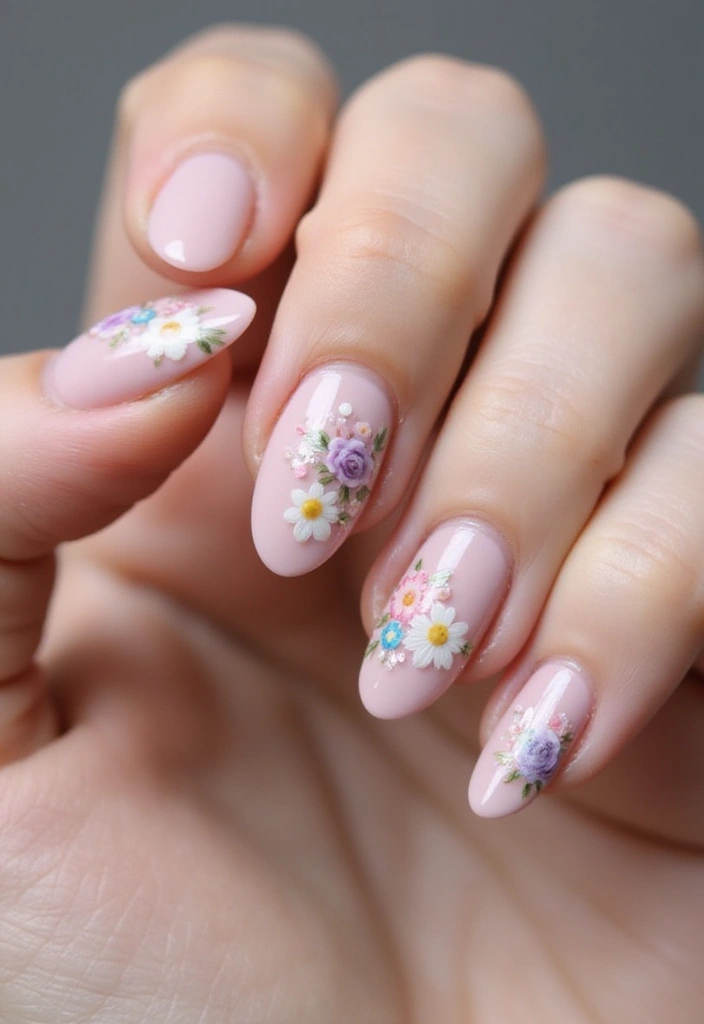
For those who love a bit of whimsy, blush nails adorned with floral nail art bring a fresh look. Delicate flowers painted on your nails can transform a simple blush into something truly special.
To create floral designs, start with your blush base. Once dry, use a fine brush or dotting tool to paint tiny flowers. Consider incorporating different colors like white, yellow, or green for leaves.
for floral designs:
– Use nail art stickers if you’re short on time or not confident in freehand painting.
– Mix and match different floral patterns for each nail for an eclectic look.
– Seal your art with a top coat to keep it looking fresh.
This design is perfect for spring and summer or any day you want to feel cheerful!
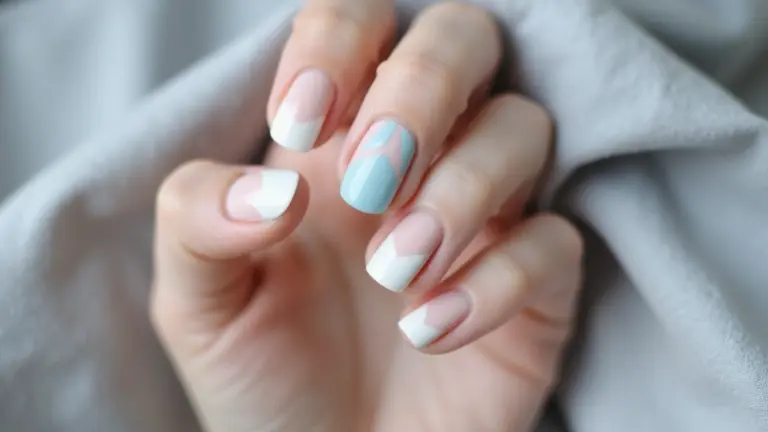
8. Blush Geometric Patterns
Geometric patterns offer a modern twist to your blush nails. With sharp lines and bold shapes, this design elevates your manicure to a fashion-forward statement.
Start by applying your blush as a base. Once dry, use nail tape to create geometric shapes, and fill them in with contrasting colors or leave them as is for a minimalist look.
Here are some design ideas:
– Triangles: Create a chic triangle pattern in different shades of blush.
– Lines: Clean lines can add a sophisticated touch.
– Negative space: Leave some parts of your nails bare for a trendy effect.
This style is perfect for those who love contemporary designs and want to express their unique style!
Elevate your everyday look! Blush geometric patterns are the perfect blend of modern chic and minimalist design. With a few simple shapes and contrasting colors, your nails can become a stylish statement piece.
9. Blush with Pearls
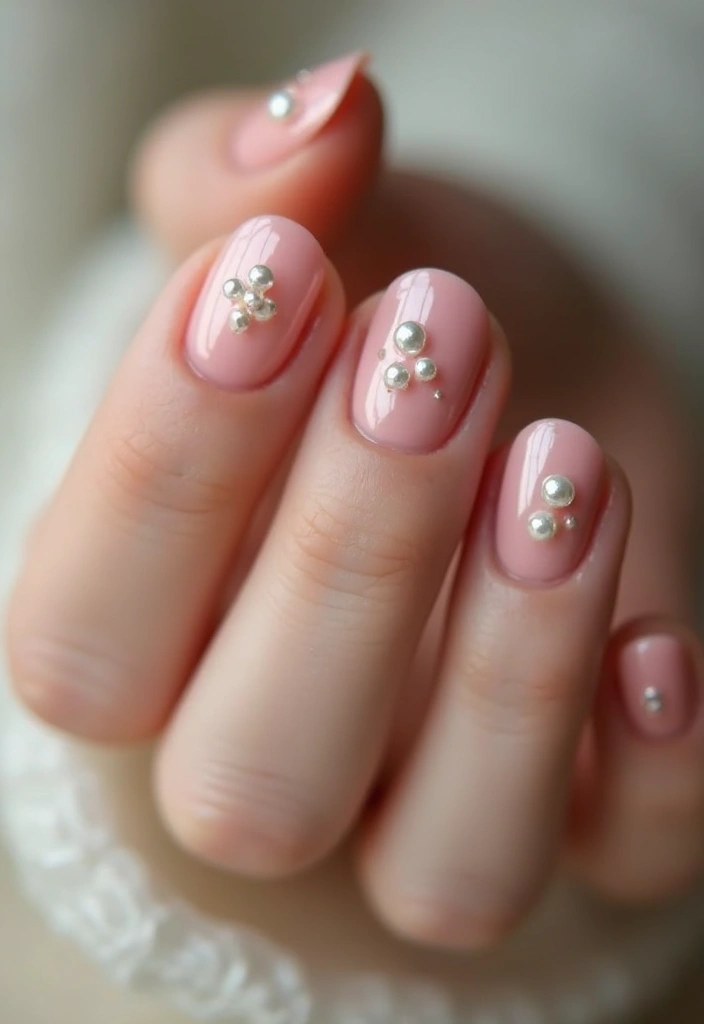
For a truly luxurious look, consider adorning your blush nails with tiny pearls or beads. This design adds a unique texture and a sophisticated touch, perfect for special events.
Start with a glossy blush base. While the polish is still wet, carefully place the pearls into the polish, pressing down lightly to secure them. Allow them to dry completely, and seal the design with a top coat.
for pearl designs:
– Choose pearls in different sizes for a more dynamic look.
– Avoid placing pearls too close to the cuticle to keep your nails looking neat.
– Ensure you have a strong top coat to avoid losing any pearls over time.
This design is perfect for weddings, parties, or any occasion where you want to dazzle!
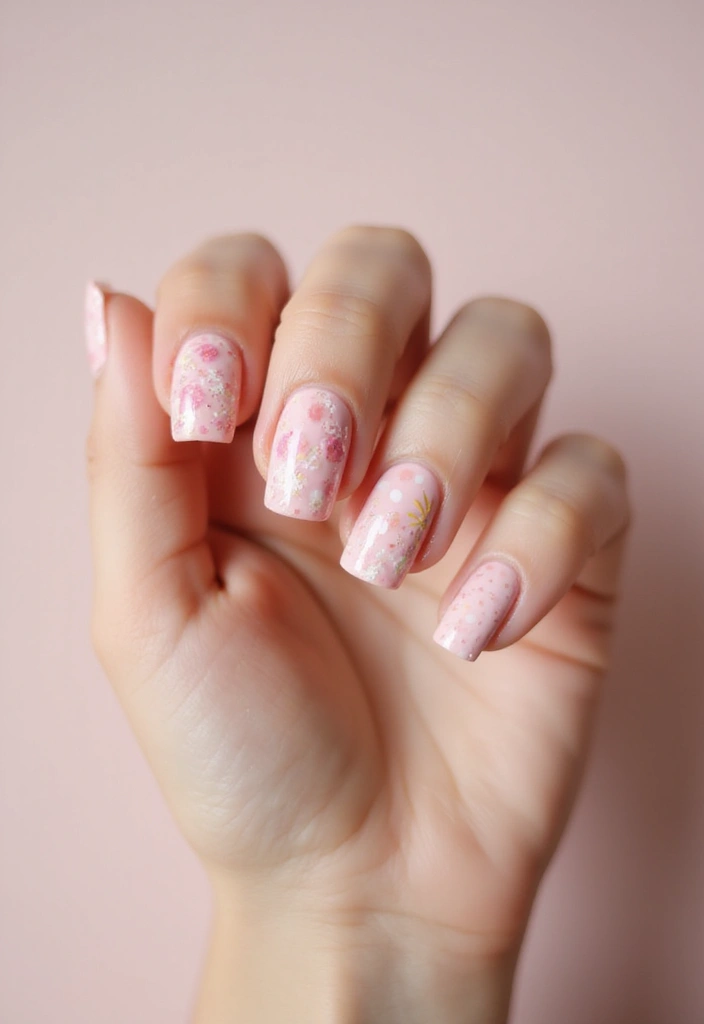
10. Blush with Dots
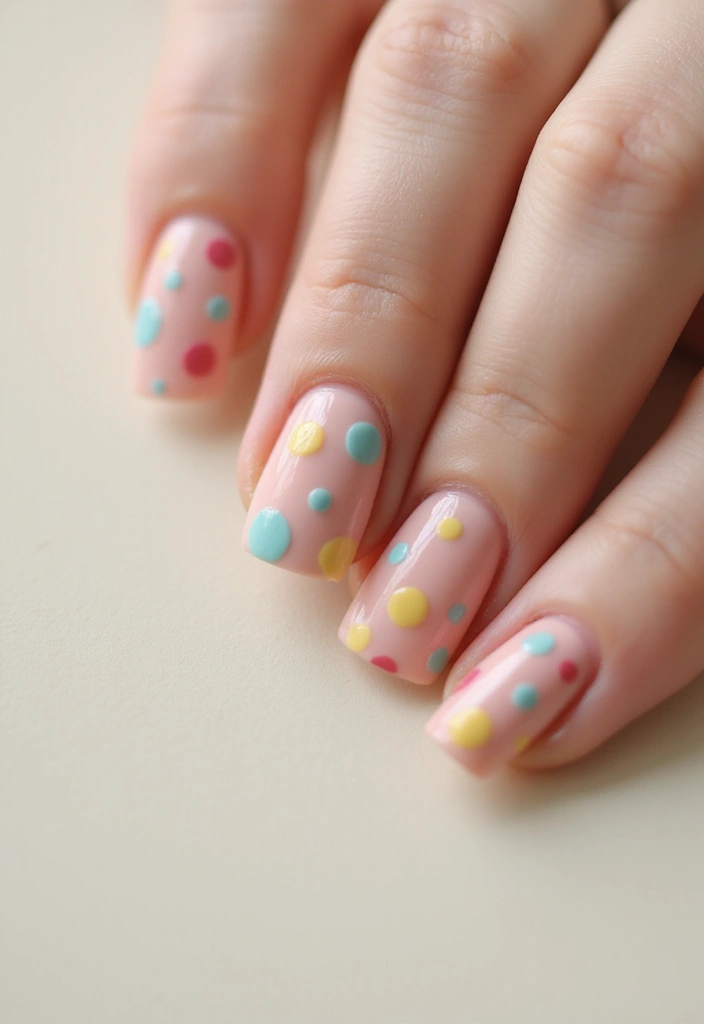
A playful way to incorporate some fun into your manicure is with dot designs! Short blush nails look adorable with various dot patterns, adding character and charm.
Start with your blush base, then use a dotting tool to create different sizes of dots in various colors. You can stick to a monochromatic scheme or go wild with colors for a more vibrant look.
for dot designs:
– Alternate colors and sizes for a playful twist.
– Ensure your base coat is completely dry before applying dots to prevent smudging.
– Incorporate dots on only a couple of accent nails for a refined look.
This chic yet playful design is perfect for everyday wear or an outing with friends!
11. Blush Stripes
Stripes are a classic nail design that can look effortlessly chic when done right! A blush background adorned with stripes can add a trendy touch to your nails.
To achieve this look, start with a blush base coat. Once dry, use a thin brush or tape to create stripes in contrasting colors like white or gold. You can opt for diagonal or vertical stripes based on your preference.
Here are some tips for stripe designs:
– Vary the thickness of the stripes for a more dynamic look.
– Use a matte top coat for a modern feel, or keep it glossy for a classic touch.
– Be sure to let each layer dry fully before adding another to avoid smudging.
This design is perfect for a casual day out, and it’s sure to turn heads!
12. Blush with Animal Print
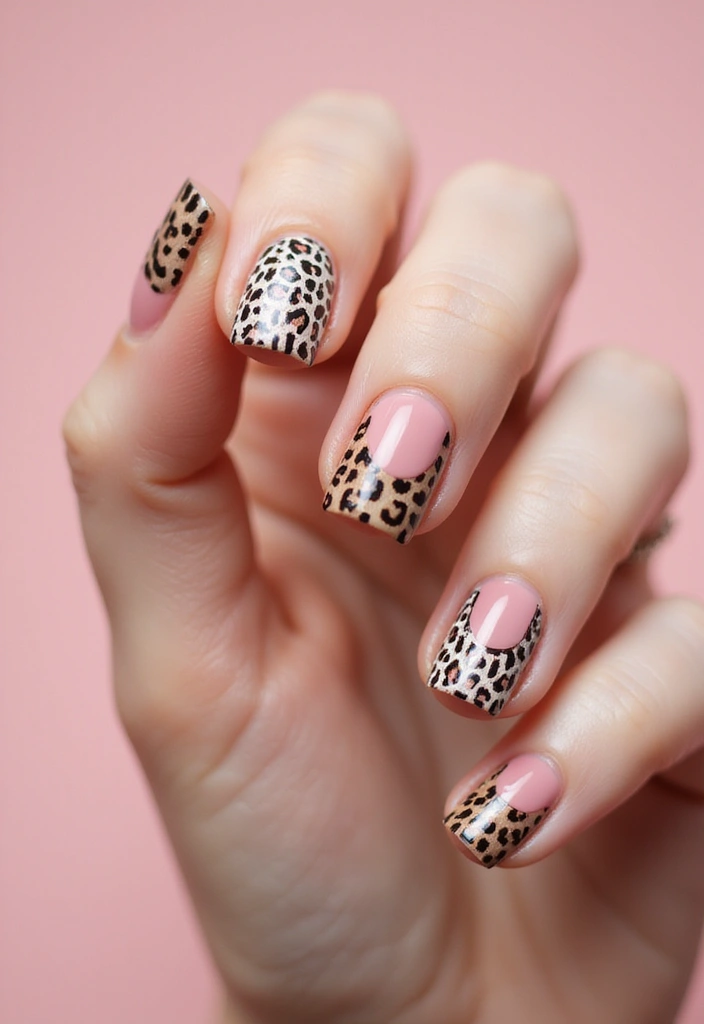
For the bold and adventurous, blush nails with animal print can add a fierce touch to your look! Whether it’s a leopard or zebra design, this style is sure to make a statement.
Begin with a solid blush base. Once dry, use a fine brush to carefully paint your animal print accents. Stick to using a few accent nails to keep the design chic and not overwhelming.
for animal print designs:
– Use black or brown for a classic look.
– Incorporate metallics for a more glamorous vibe.
– Consider rhinestones to add a touch of sparkle to the design.
This design suits those who are confident and love to showcase their unique style!
13. Blush with Negative Space
Negative space designs are a unique way to showcase your nails while embracing the blush trend. This style incorporates bare nail areas into the design, creating a fresh and modern look.
Start with a blush base, then use tape or a brush to create shapes that leave parts of your nail bare. This could be geometric shapes, stripes, or any design that appeals to you.
Here are some tips:
– Choose designs that allow for a good amount of bare space.
– Balance the blush and the negative space for a harmonious look.
– Finish with a top coat for added shine.
This minimalist design is perfect for those who love clean and modern aesthetics!
14. Blush with Confetti
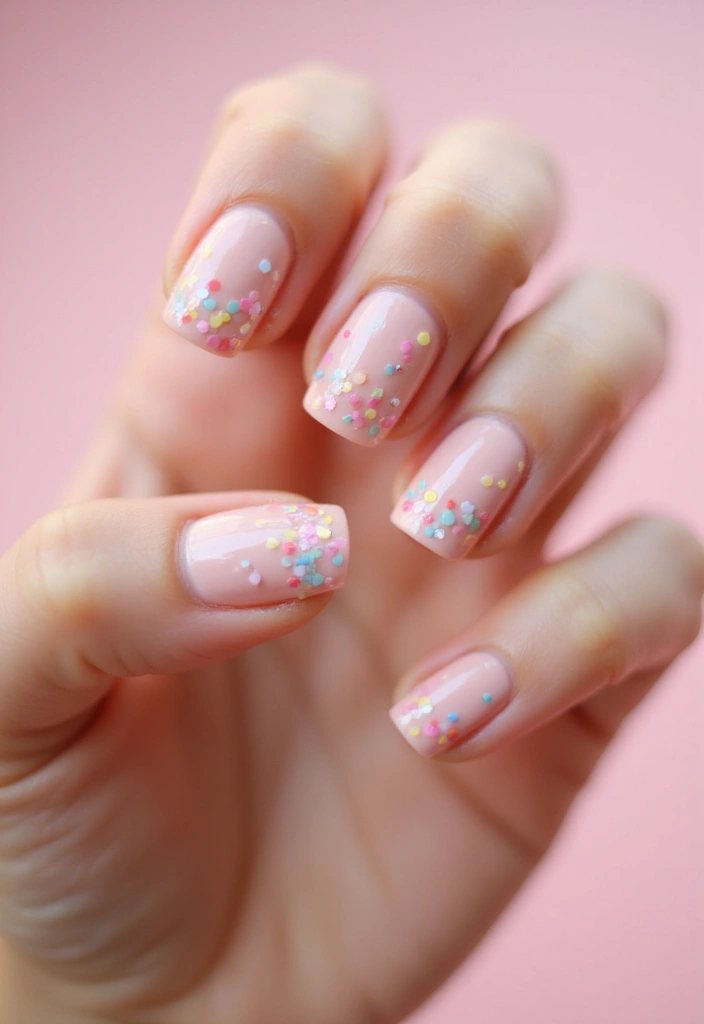
Bring joy to your nails with a confetti design! This playful look combines short blush nails with colorful confetti for a fun and festive appearance.
Start with a solid blush base. Once dry, apply clear polish and sprinkle colorful confetti onto the wet polish. Press down gently to secure it, then seal with a top coat for a smooth finish.
for confetti designs:
– Choose confetti in varying sizes for a more dynamic effect.
– Layer the confetti for extra flair.
– Ensure the confetti is distributed evenly for a balanced look.
This design is fantastic for parties or celebrations!
15. Blush with Sparkling Foil
Add a luxurious touch to your blush nails with sparkling foil accents! This design combines the elegance of blush with the glam of gold or silver foil for a stunning manicure.
Start with a blush base. Once dry, tear tiny pieces of foil and adhere them to the nail using clear polish. The foil can be randomly placed or arranged in specific patterns for a more refined look.
for foil designs:
– Use a gel base for a stronger hold.
– Layer the foil for a more dramatic effect.
– Finish with a thick top coat to protect the foil and add shine.
This style is perfect for glamorous events and special occasions!
16. Blush with Rhinestones
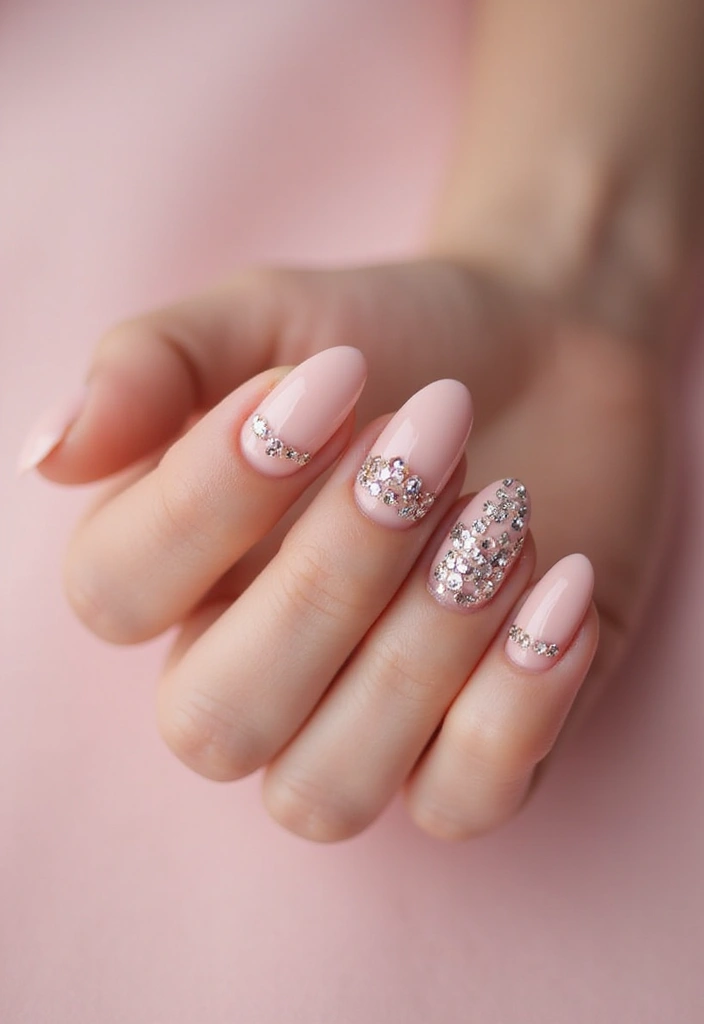
Rhinestones can add a touch of glamour and sparkle to any blush manicure! This design is perfect for those who love bling and want to elevate their everyday nails.
Begin with a solid blush base. Once dry, use nail glue to adhere rhinestones in varying sizes to your nails. You can create patterns or just place a few strategically for a more subtle look.
Here are some tips:
– Consider using different colors or sizes of rhinestones for a fun twist.
– Balance the embellishments to avoid overwhelming the blush base.
– Seal everything with a top coat for longevity.
This design is fantastic for special occasions or nights out!
Elevate your everyday blush nails with a touch of rhinestone magic! A few sparkling accents can transform your manicure from simple to stunning in no time. Remember, balance is key – let your nails shine without overwhelming them!
17. Blush Abstract Art
Get creative with your blush nails by introducing abstract art! This trendy style allows for unique expressions and creativity.
Start with a blush base, then use brushes or sponges to create abstract shapes and lines with contrasting colors. Don’t worry about being precise; the beauty of abstract is in its imperfection.
for abstract designs:
– Use a variety of colors for a vibrant look.
– Keep the blush as a base to maintain cohesion.
– Seal with a top coat for a smooth finish.
This design is perfect for artistic souls and those who love to express themselves uniquely!
18. Blush with Lace Designs
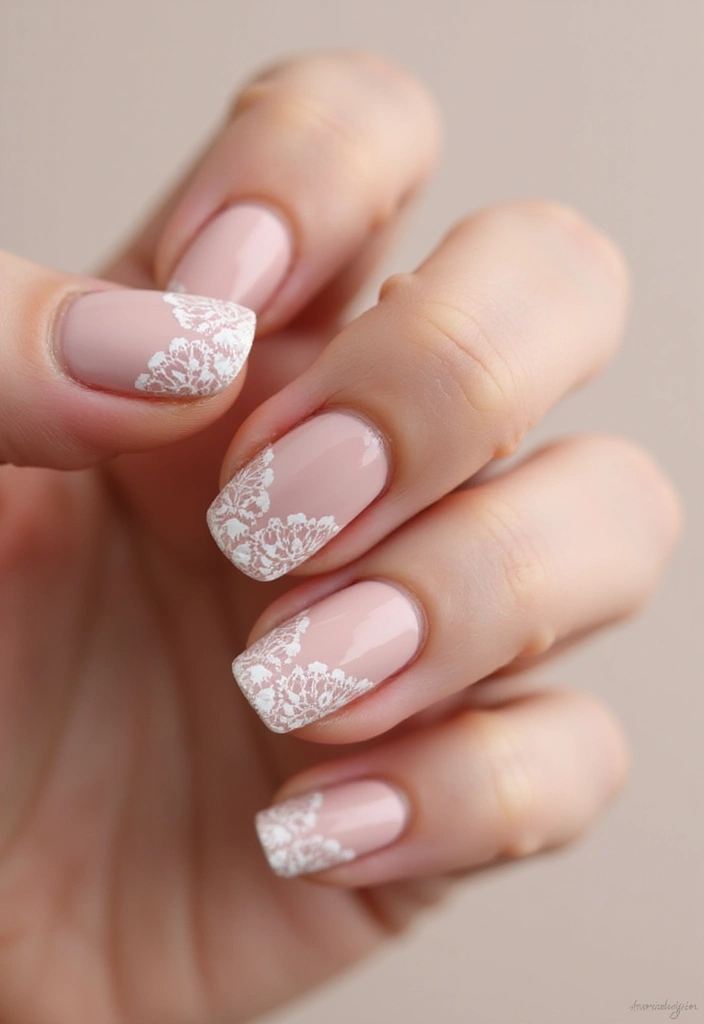
Lace designs can bring a touch of romance to your blush nails. This delicate look is perfect for those special moments where you want your nails to stand out.
Begin with a solid blush base. Then, using a thin brush, create lace patterns or use lace nail art stickers for an easier alternative.
for lace designs:
– Use white or silver for a classic lace effect.
– Apply carefully to ensure neat lines.
– Seal your design with a top coat to keep it intact.
This design is perfect for bridal showers or elegant events!
19. Blush with Color Block
Color blocking is a trendy and fun way to play with different shades while keeping it cohesive. Utilizing blush along with other colors can create a striking design.
Start with a blush base coat, then tape off sections and fill in with contrasting colors. The key to this design is sharp lines and neat sections.
for color block designs:
– Use a mix of matte and glossy finishes for added interest.
– Choose colors that complement each other for the best effect.
– Be patient with the tape application to ensure clean lines.
This design is perfect for those who enjoy bold and modern aesthetics!
Color blocking is like a canvas for your nails; with a blush base and bold hues, you’ll create stunning art that’s both chic and playful. Dive into creativity and let your nails do the talking!
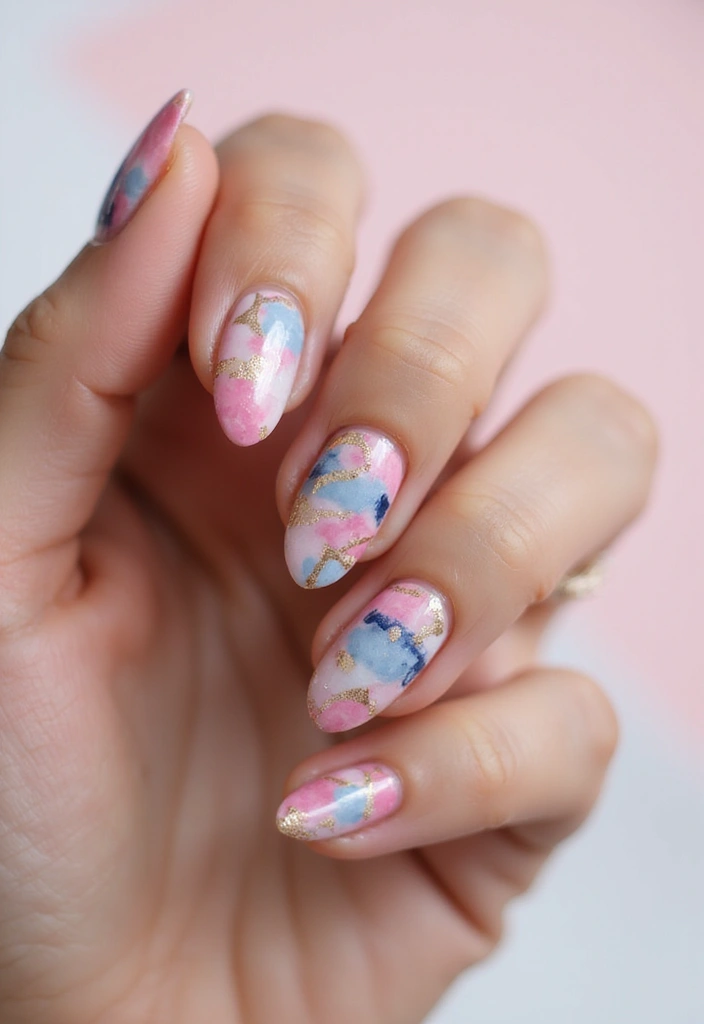
20. Blush with Watercolor Effect
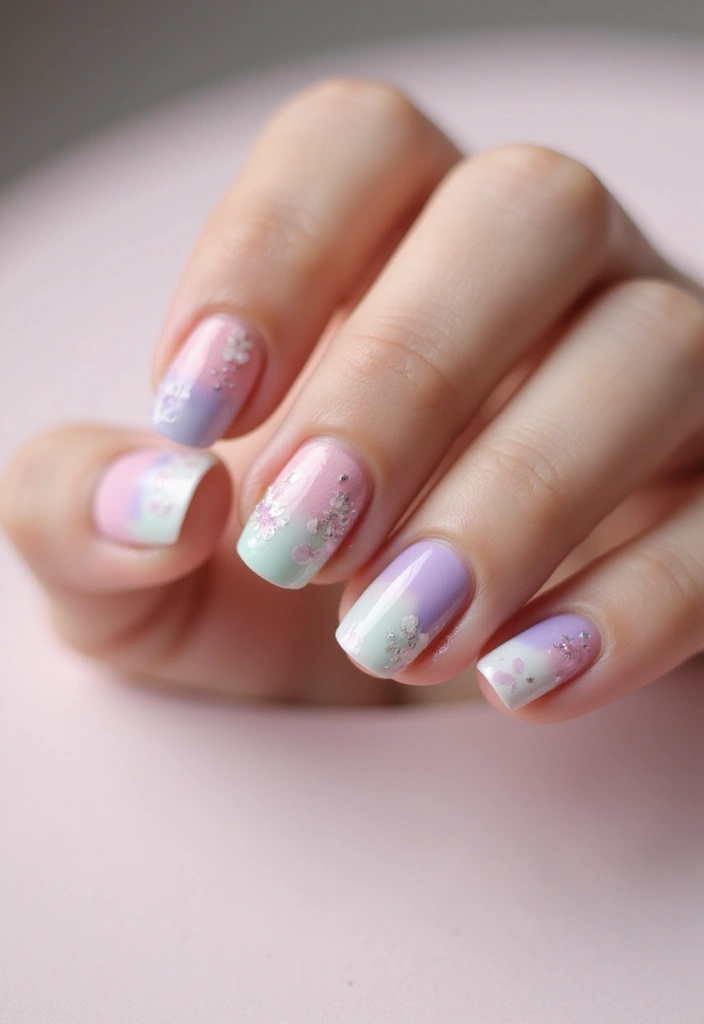
Watercolor effects can bring a dreamy and artistic vibe to your nails. This soft look can complement the blush color beautifully.
To achieve this effect, start with a blush base. Then, using a wet brush, apply diluted polish in soft strokes to create a watercolor effect. Blend the colors lightly to mimic the look of watercolor art.
for watercolor designs:
– Use pastel colors for a soft and romantic look.
– Apply a matte top coat for a more modern twist.
– Experiment with different brush techniques for varied effects.
This design is perfect for artistic individuals who love to express creativity on their nails!
21. Blush with Jewel Tones

Incorporate jewel tones with blush for a striking contrast! This design features deep colors combined with the subtlety of blush, creating an eye-catching effect.
Start with a blush base, then layer jewel tone colors like emerald, sapphire, or ruby in accent patterns or designs. You can use stickers or freehand for added creativity!
Here are some tips:
– Keep the jewel tones to a few accent nails for a balanced look.
– Use metallics for a luxurious touch.
– Seal your design with a clear top coat to maintain shine!
This design is perfect for those who want a blend of subtlety and boldness!
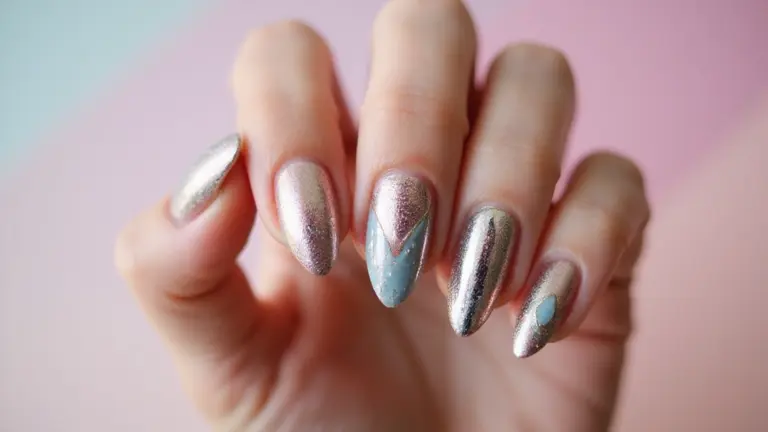
22. Blush with Metallic Tips
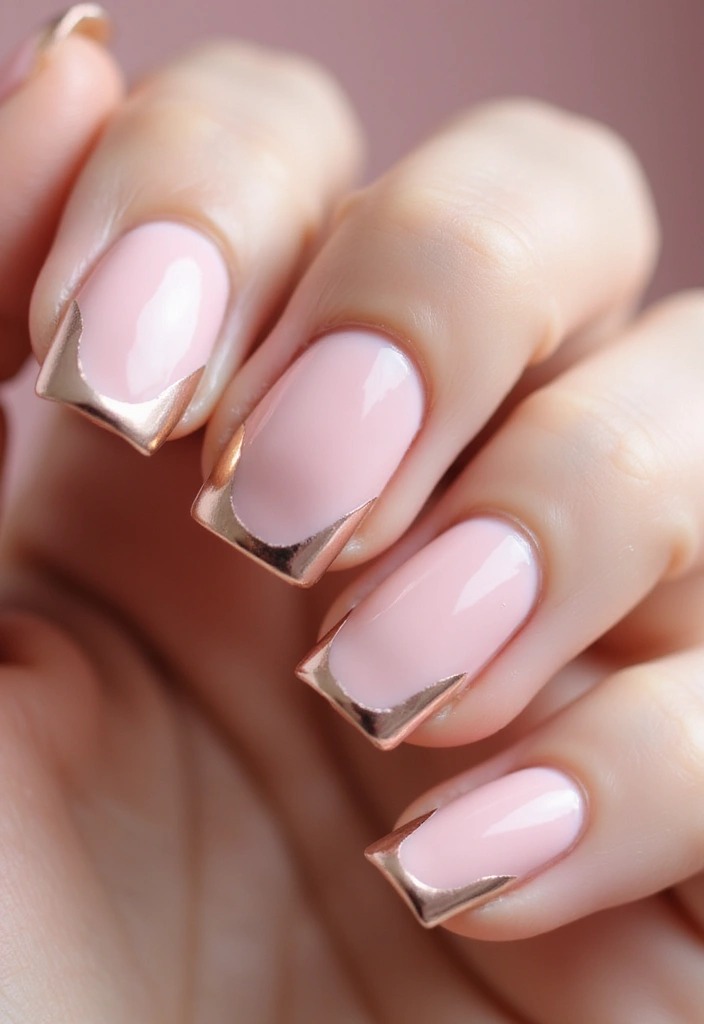
A chic way to elevate your blush manicure is by adding metallic tips! This design presents a modern twist on the classic French tip, using metallic polish to create eye-catching contrast.
To create this look, start with a solid blush base. Then, use tape or a brush to apply metallic polish at the tips in the desired shape. This could be a straightforward line or a more artistic design.
for metallic designs:
– Use a high-quality metallic polish for the best finish.
– Make sure the blush base is completely dry before applying metallic tips.
– Seal everything with a top coat for longevity.
This stylish design is perfect for any occasion, adding a touch of modern elegance!
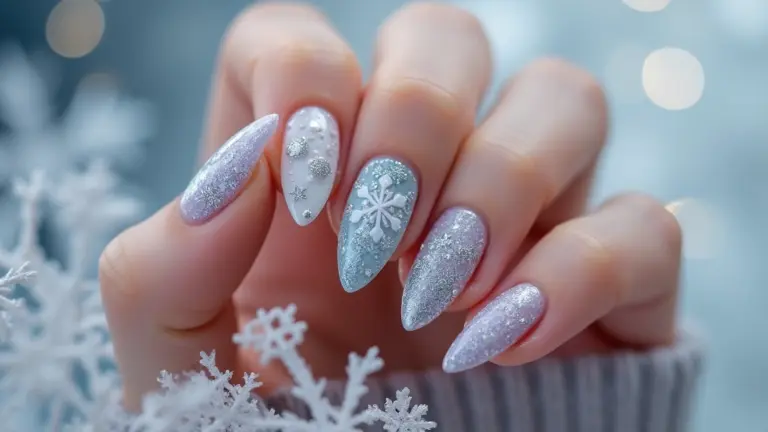
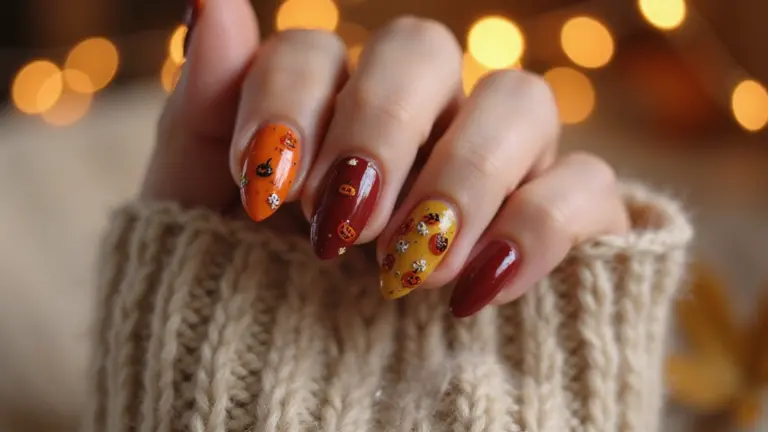
23. Blush with Seasonal Designs
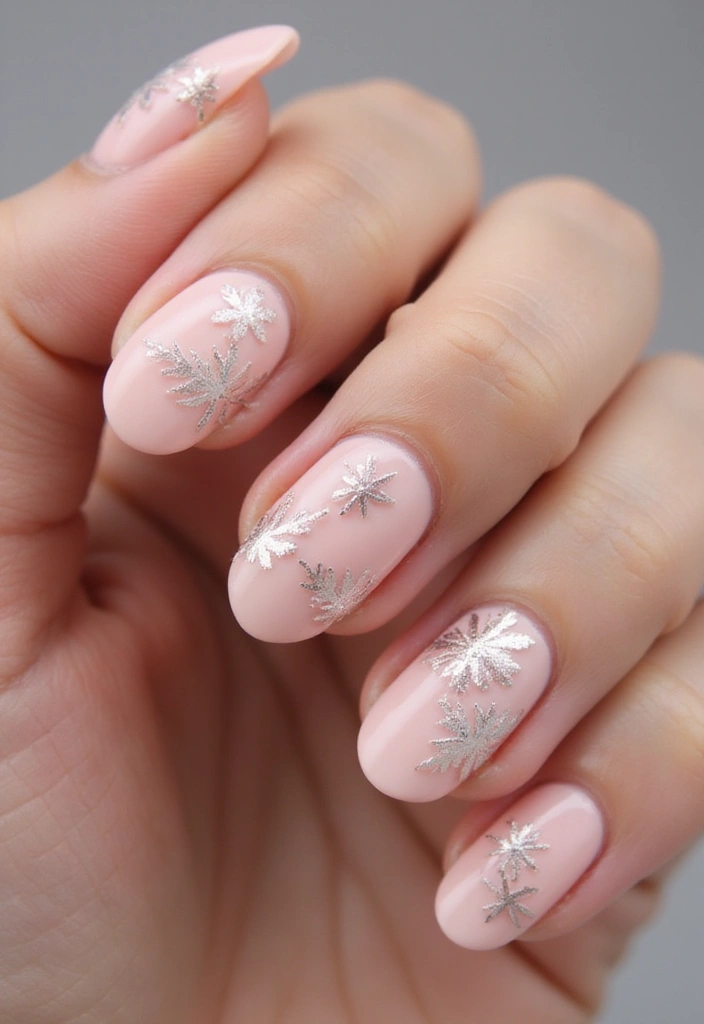
Change up your blush nails with seasonal designs! Whether it’s fall leaves, winter snowflakes, or spring blossoms, incorporating seasonal elements can add a festive touch to your blush base.
Begin with your preferred blush base. Once it’s dry, paint or use stickers to add your seasonal designs, allowing for creativity with colors and shapes.
for seasonal designs:
– Stay true to the color palette of the season for a cohesive look.
– Choose designs that resonate personally with you.
– Finish with a top coat to enhance the shine and protect the art.
This design is perfect for embracing the joyous spirit of each season!
24. Blush with Layered Textures
Textured nails can add depth and interest to your blush manicure! This design combines different textures such as matte, glossy, or even sand finishes to create a layered effect.
Start with a blush base, then introduce different textures using various top coats or finishes. You can also add embellishments or create patterns using different techniques.
for textured designs:
– Choose textures that contrast yet complement each other for the best effect.
– Ensure each layer is fully dry before applying the next for smooth results.
– Experiment with different combinations for a unique look.
This design is perfect for those who love to play with textures!
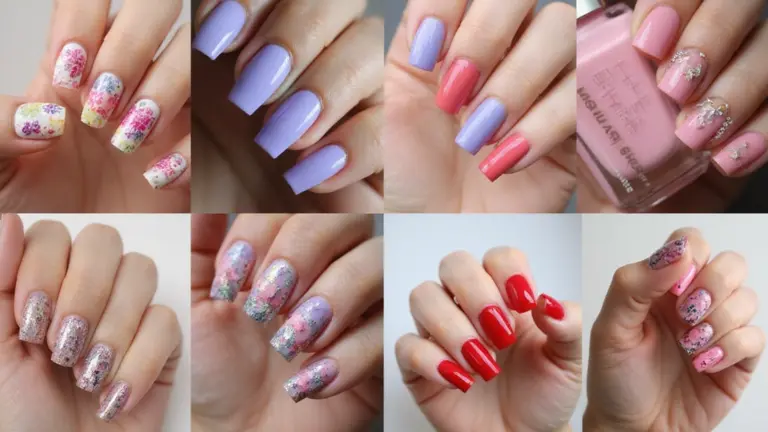
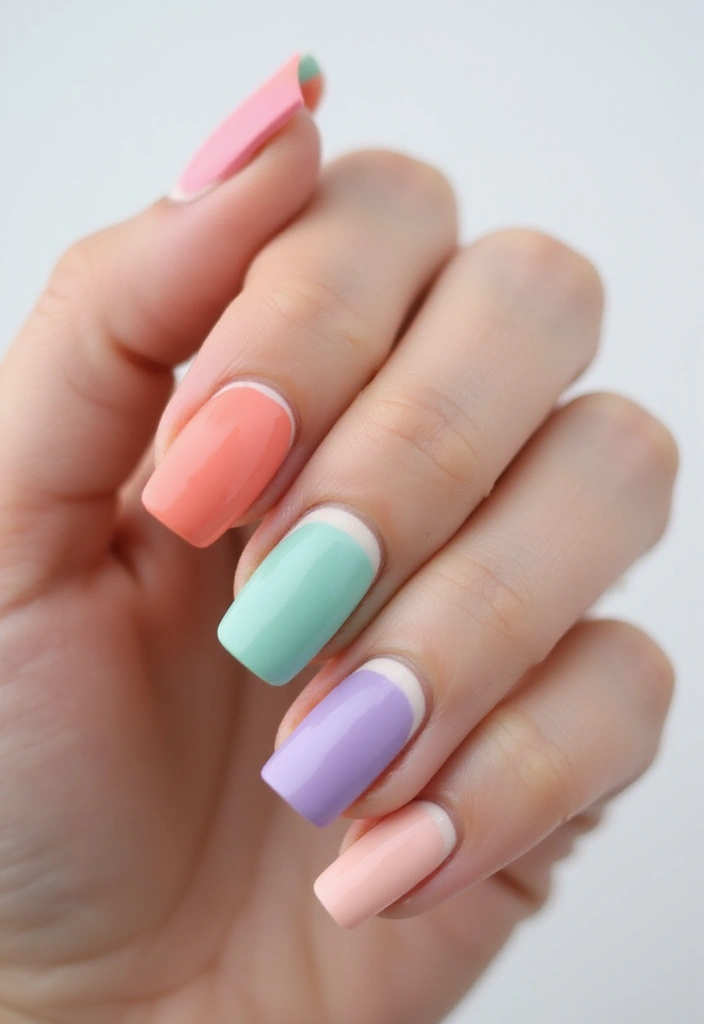
25. Blush with Mismatched Designs
Don’t be afraid to mix things up! Mismatched designs can be a fun way to showcase your personality. Use different techniques and styles on each nail while keeping the blush base consistent.
Start with a solid blush base. For each nail, you can opt for unique styles such as stripes, dots, or florals, ensuring variety. The key is to maintain the color theme while experimenting with designs.
for mismatched designs:
– Limit the number of contrasting elements to avoid chaos.
– Keep a consistent color theme for cohesiveness.
– Have fun with it! Mismatched nails should reflect your personality.
This design is perfect for those who want a creative and playful manicure!
Embrace the beauty of mismatched designs! A solid blush base lets your creativity shine—experiment with stripes, dots, and florals to reflect your unique style while keeping it classy.
Conclusion
Short blush nails are not just about being trendy; they’re also about expressing who you are in a subtle yet impactful way. From classic designs to modern styles, this color is incredibly versatile, making it suitable for any occasion.
Whether you prefer something sparkly, simple, or textured, there’s a blush design that’ll suit your mood and style. Embrace these 25 ideas and let your nails do the talking, because a good manicure can brighten your day!
Frequently Asked Questions
What are the best blush nail designs for everyday wear?
For everyday elegance, consider styles like the Simple Blush Mani for a classic look or the Blush French Tips for a modern twist. Both designs are chic and versatile, perfect for any occasion. You can also try the Blush Ombre for a soft gradient effect or add a bit of sparkle with Blush with Glitter Fade.
How can I maintain my blush nails for a longer-lasting manicure?
To keep your blush nails looking fresh, start with a good quality base coat to protect your nails. Regularly apply a top coat to seal your design and enhance shine. Avoid exposure to harsh chemicals and wear gloves when doing chores. Additionally, moisturizing your hands and nails can prevent chipping and keep your manicure looking flawless.
Are blush nails suitable for all skin tones?
Absolutely! Blush nails are incredibly versatile and complement a wide range of skin tones. The soft, neutral hue enhances your natural beauty without overwhelming your look. Whether you’re fair, medium, or deep-toned, blush can add a touch of elegance and sophistication to your manicure.
What nail shapes work best with blush nail designs?
Blush nails look stunning on various nail shapes, but short and sleek styles truly shine with this color. Consider options like oval or square shapes for a modern and chic appearance. These shapes not only complement the blush hue but also enhance the overall elegance of your manicure.
Can I create nail art on my blush nails?
Definitely! Nail art can elevate your blush nails to the next level. You can experiment with designs like floral patterns, geometric shapes, or even glitter accents. Just make sure to use a steady hand and quality tools to achieve the best results, and let your creativity shine!