30 Step-by-Step Watercolor Nail Art You Can Do At Home
Watercolor nail art is all about vibrant colors and creative techniques that give your nails an artistic twist. It allows you to express your individuality while experimenting with easy-to-follow methods that are perfect for beginners. Whether you’re prepping for a night out, a casual day at home, or simply want to indulge in some self-care, these DIY nail art ideas will inspire you to unleash your inner artist.
In this exploration of watercolor nail designs, we’ll dive into a delightful array of techniques that cater to every style preference. From soft pastels to bold splashes, the possibilities are endless, and all of them can be masterfully created right from the comfort of your own home. Grab your favorite nail polishes, a brush, and some patience, as we’re about to transform your nails into stunning works of art that will surely turn heads.
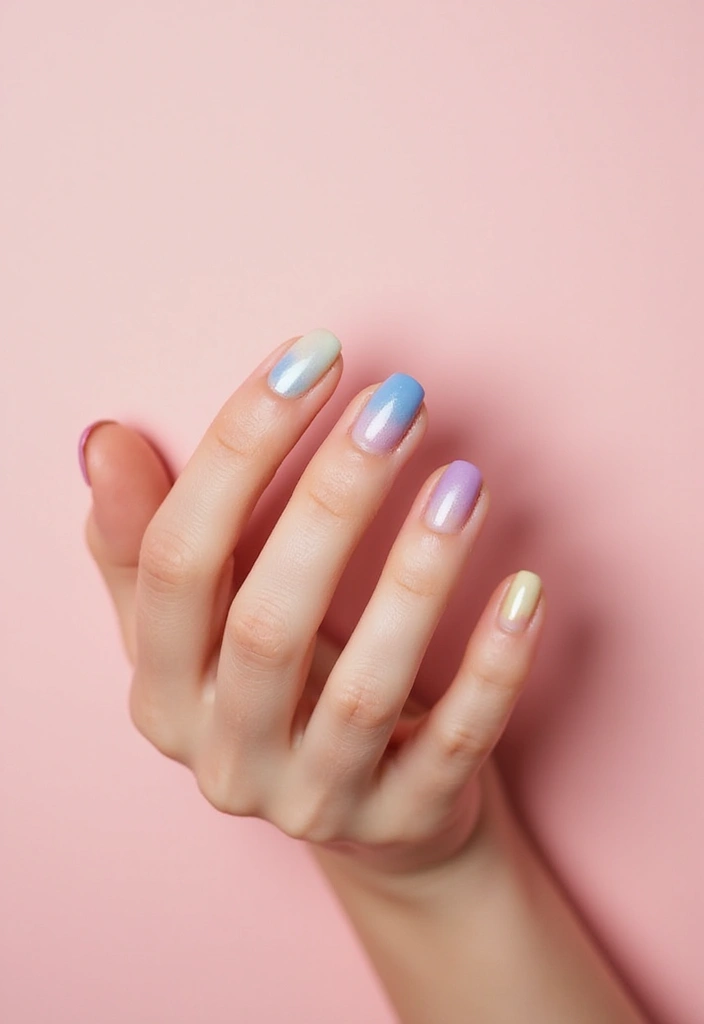
1. Pastel Watercolor Waves
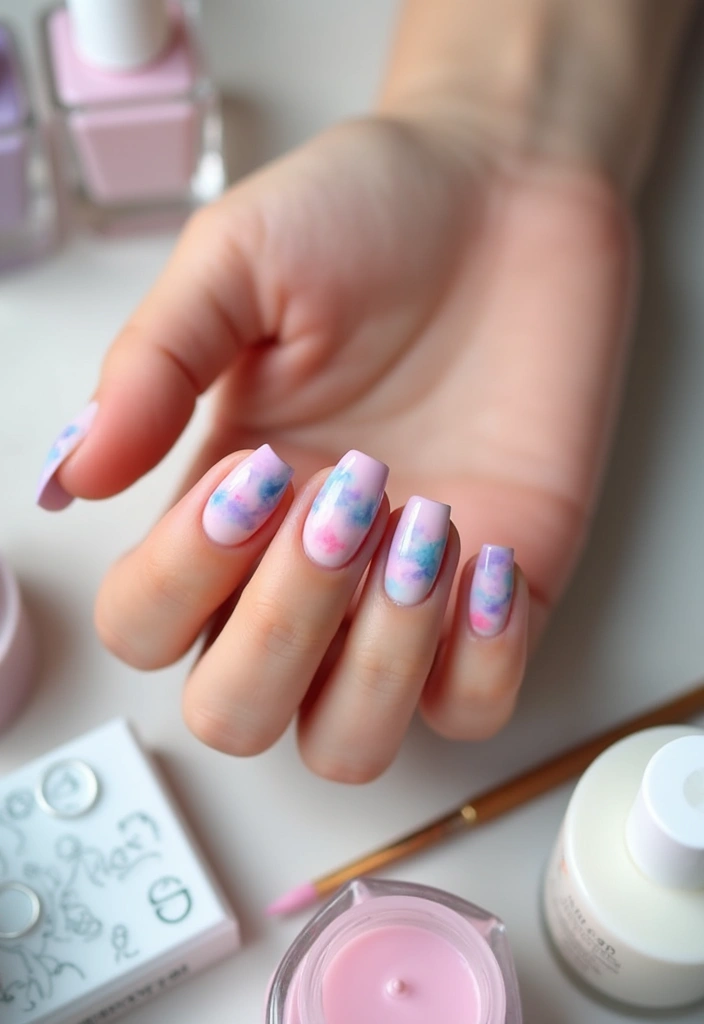
Pastel colors are a staple for a reason! They create a calming, soft effect that’s perfect for a gentle watercolor look. Start with a base coat in a light nude or white to help your pastels pop. Using a small brush or a sponge, dab on light shades like baby pink, sky blue, or soft lavender, layering them to create delicate waves. This design is perfect for spring or summer and is incredibly versatile.
– Tip: Use a makeup sponge for a smoother blend of colors.
– Trick: Apply a top coat with a little shimmer for an extra sparkle.
– This design is easy to customize based on your favorite colors or the season, whether you want vibrant tones or muted hues!
2. Layered Color Wash
Create a layered color wash effect on your nails for a soft, elegant look! Start with a base color, then use a dry brush technique to apply additional layers of colors, allowing some of the base to show through. This technique creates a watercolor wash effect that’s both subtle and stunning.
– Tip: Choose colors that harmonize well together for a beautiful blend.
– Trick: A glossy top coat adds shine and accentuates the layered effect!
– This design is perfect for a chic, understated look that can be worn on any occasion!
3. Soft Floral Watercolor
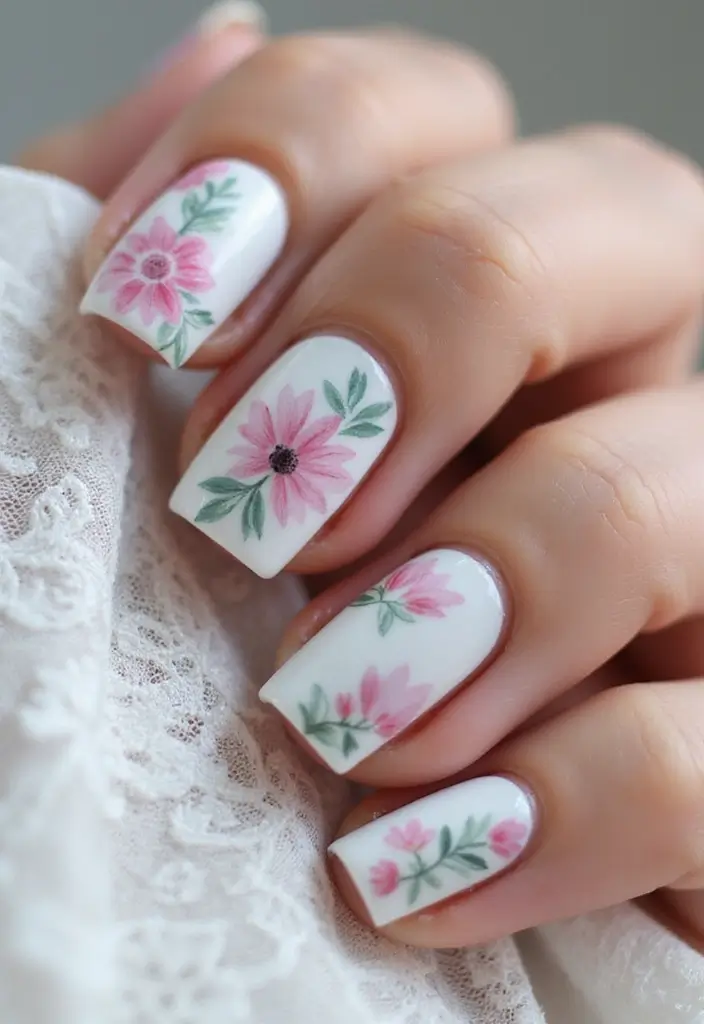
Nothing says elegance quite like floral designs. To create a soft floral watercolor look, start with a pale pink or peach base. Once dry, use a fine brush to create delicate flower shapes using a mix of bold and pastel colors. Blend the edges gently to achieve that soft, dreamy watercolor effect.
– Tip: Use a dotting tool for the flower centers to add a touch of contrast.
– Trick: A matte top coat can enhance the watercolor effect by softening the finish.
– This nail art style is feminine and perfect for weddings or special occasions, adding a subtle charm to your overall appearance.
4. Edgy Splatter Art
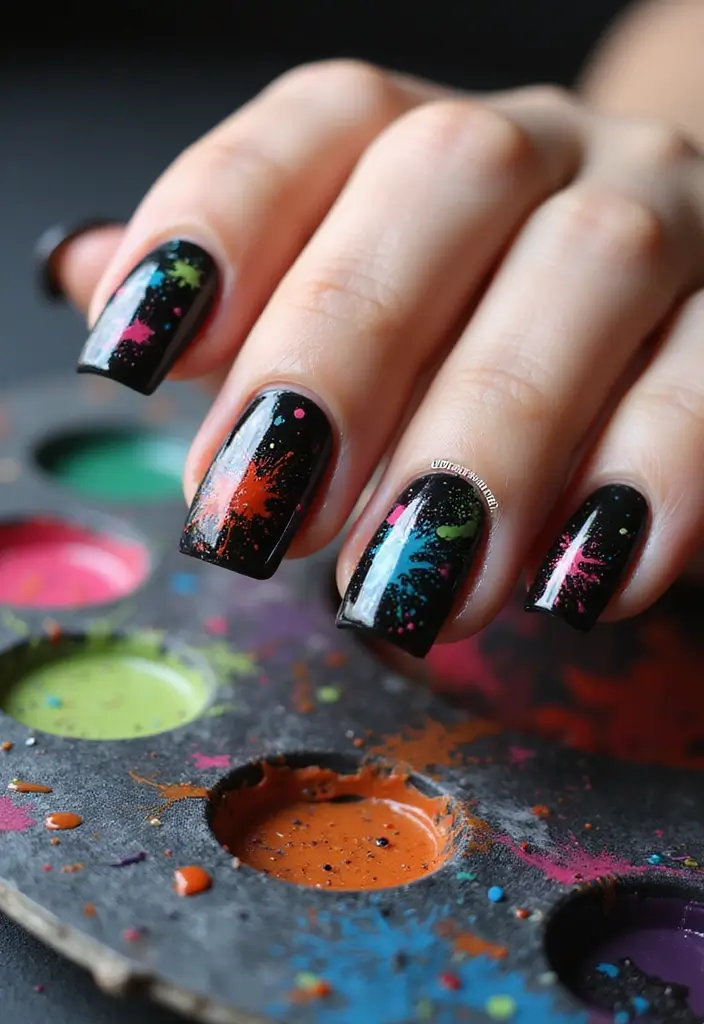
If you’re feeling a little rebellious, why not try an edgy splatter art design? Start with a black or dark gray base coat. Once that’s dry, use a small brush to flick on bright colors like neon pink, electric blue, and fluorescent yellow. The key is to be random and playful, letting the colors splatter and create a chaotic yet beautiful composition.
– Tip: Protect your workspace with some newspaper or an old cloth while splattering.
– Trick: For added dimension, layer the splatters by letting one color dry before adding another.
– This design is perfect for making a bold statement, ideal for concerts or casual outings with friends!
5. Subtle Ombre Effect
Ombre is a classic choice that never goes out of style. To achieve a watercolor ombre effect, select two or three harmonizing colors. Start with a base coat of your lightest shade, then use a sponge to dab on the darker colors, blending them for that beautiful gradient. It’s simple yet chic!
– Tip: Use a clean makeup sponge for the best blending results.
– Trick: Adding a touch of white polish at the tips will enhance the ombre effect.
– This versatile technique works for any occasion and can easily be adjusted to fit different themes and colors, making it a favorite among nail art enthusiasts.
6. Geometric Watercolor Shapes
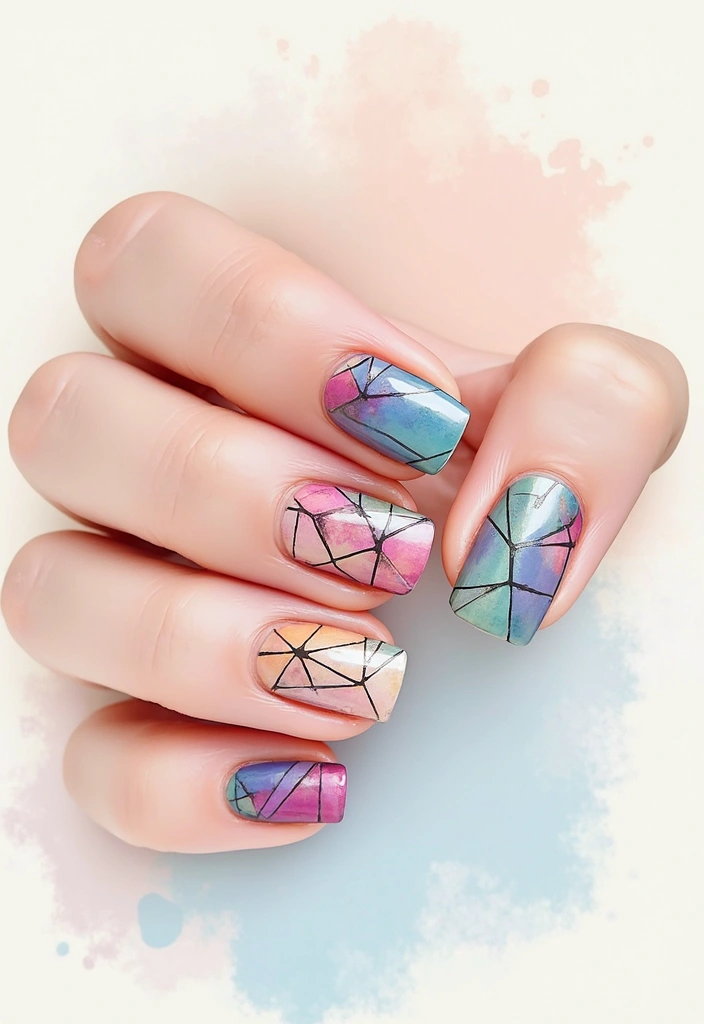
For the modern art lover, geometric shapes in watercolor style offer a chic and contemporary look. Begin with a white base, then use painter’s tape to form different shapes like triangles and squares. Fill these shapes with various watercolor shades, letting them blend where they intersect.
– Tip: Make sure to remove the tape while the polish is still wet for clean lines.
– Trick: Adding a glossy top coat can give your design a polished finish, enhancing the watercolor effect.
– The geometric look is perfect for any time of the year, adding a bold flair to your style while remaining classy and sophisticated.
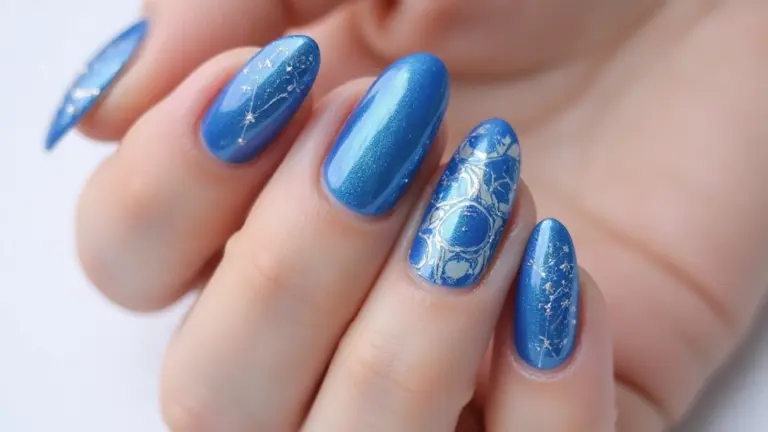
7. Dreamy Galaxy Nails
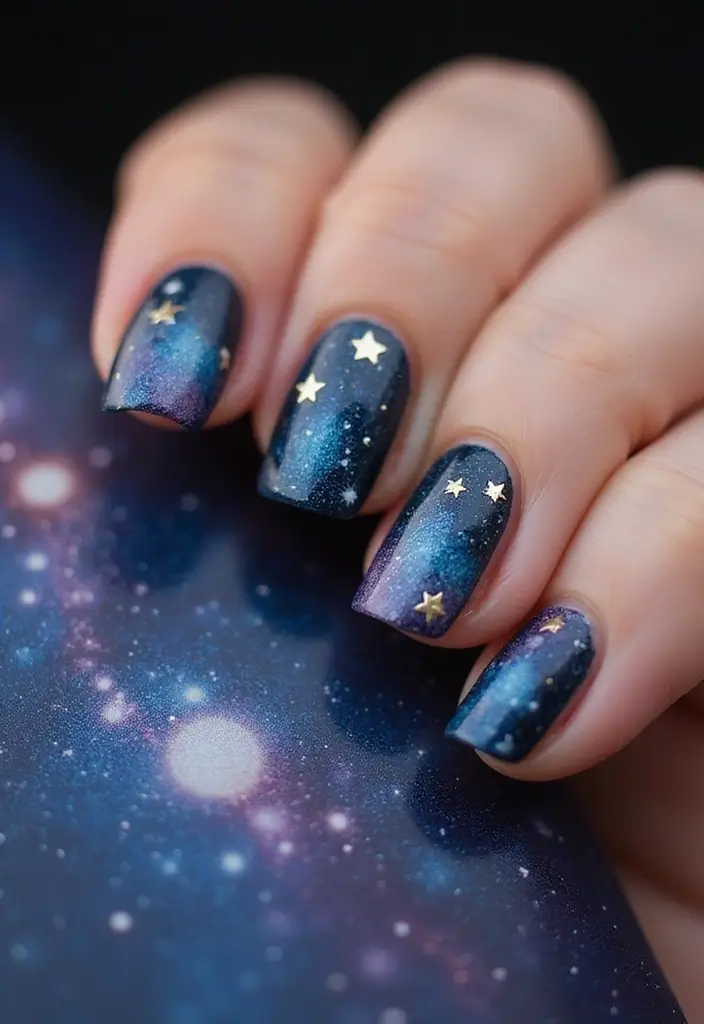
Embrace the cosmos with dreamy galaxy nails! Start with a black or deep navy base coat. Using a sponge, dab on colors like purple, blue, and white to create stars and clouds reminiscent of a beautiful night sky. Blend them carefully to keep a cohesive look while adding tiny dots for stars.
– Tip: Use a small brush for delicate star details to maintain the galaxy theme.
– Trick: Adding a matte top coat gives a unique twist and enhances the cosmic vibe.
– This design is perfect for stargazers and adds a touch of magic to any outfit, especially for nighttime events!
8. Colorful Abstract Art
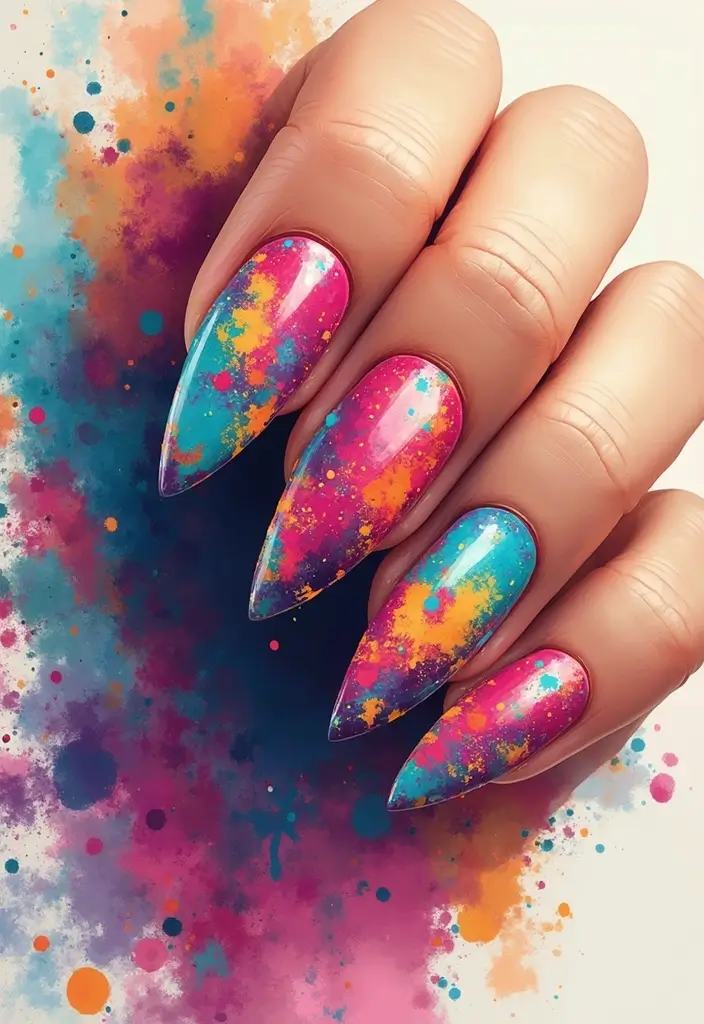
End your watercolor nail art journey with colorful abstract designs! Start with a light base, then use a brush to create random shapes and splashes in your favorite colors. There are no rules—just creativity!
– Tip: Let each color dry before adding new elements for a neat finish.
– Trick: Use a glossy top coat to add vibrancy and shine to your abstract designs.
– This design allows for complete personal expression, making each set of nails uniquely yours, perfect for showcasing your artistic side!
9. Elegant Marble Effect
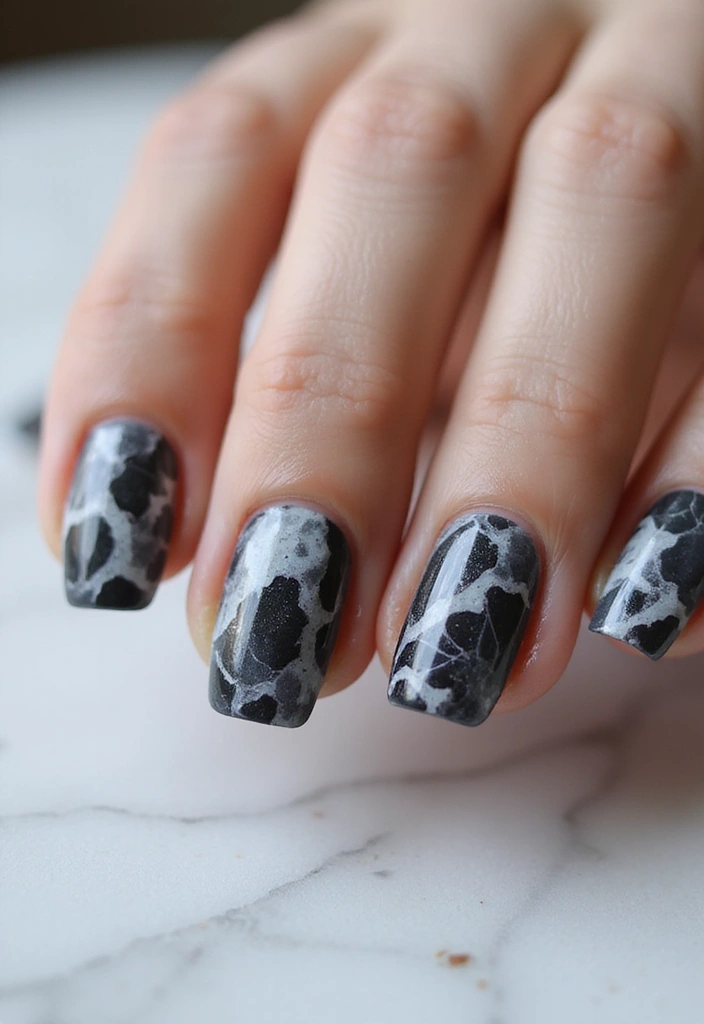
Marble nail art adds a touch of sophistication to your look. Start with a white or light-colored base. Using a thin brush, apply black or gray lines, then use a dotting tool to swirl and blend the colors to mimic the flow of marble. This design is elegant and perfect for formal occasions.
– Tip: Use a clean brush for swirling to ensure crisp lines without muddying the colors.
– Trick: A matte top coat can give a chic finish, enhancing the marble-like effect.
– This timeless design works beautifully with any color scheme and is sure to impress!
10. Whimsical Doodle Designs
For a fun and quirky touch, try whimsical doodle designs! Start with a base of any color you love. Once dry, use a thin brush or nail art pens to create simple doodles like hearts, stars, and swirls. Feel free to mix and match colors and doodle styles for a playful look.
– Tip: Keep your lines thin to maintain a delicate doodle effect.
– Trick: Add tiny dots or sparkles to enhance the whimsy of your design.
– This design is all about personal expression and is great for casual settings or fun outings with friends!
Unleash your creativity with whimsical doodles! Every swirl and sparkle is a chance to express yourself – so grab your brush and let your imagination run wild!
11. Color Block Technique
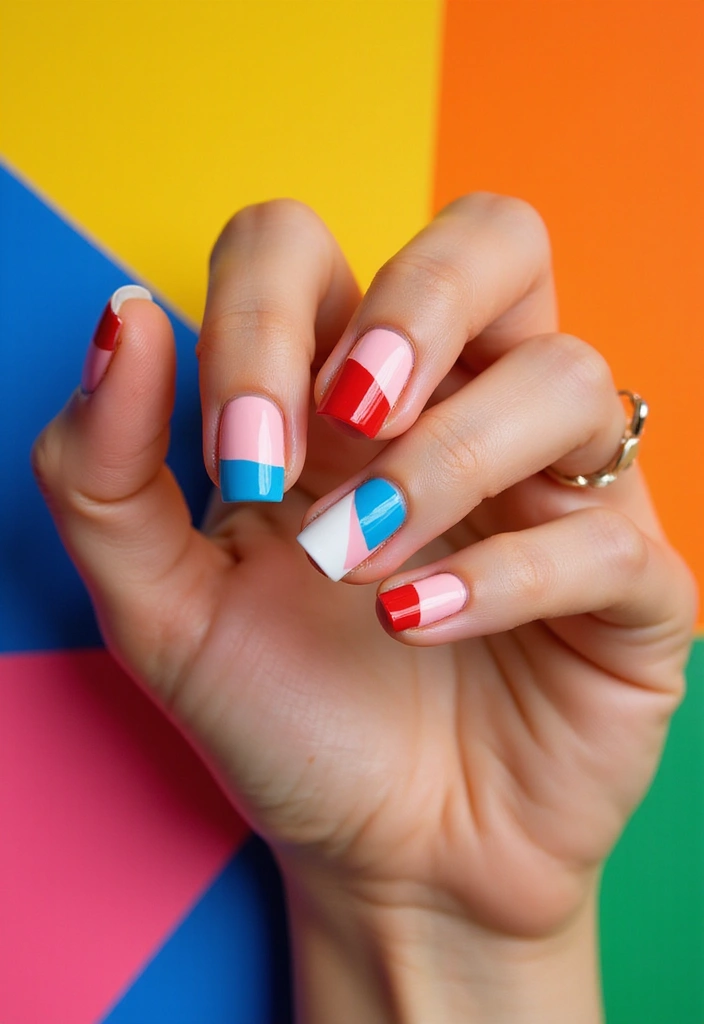
The color block technique is a bold and straightforward way to create eye-catching designs! Start with a white or nude base and use tape to section off different areas of your nails. Fill each section with bright, contrasting colors. This approach offers a modern and artistic vibe.
– Tip: Wait until each section is dry before applying tape to avoid smudging.
– Trick: Use a glossy top coat to enhance the vibrancy of the colors.
– This design is perfect for those who love a clean, trendy aesthetic that stands out in every setting.
12. Sunset Horizon
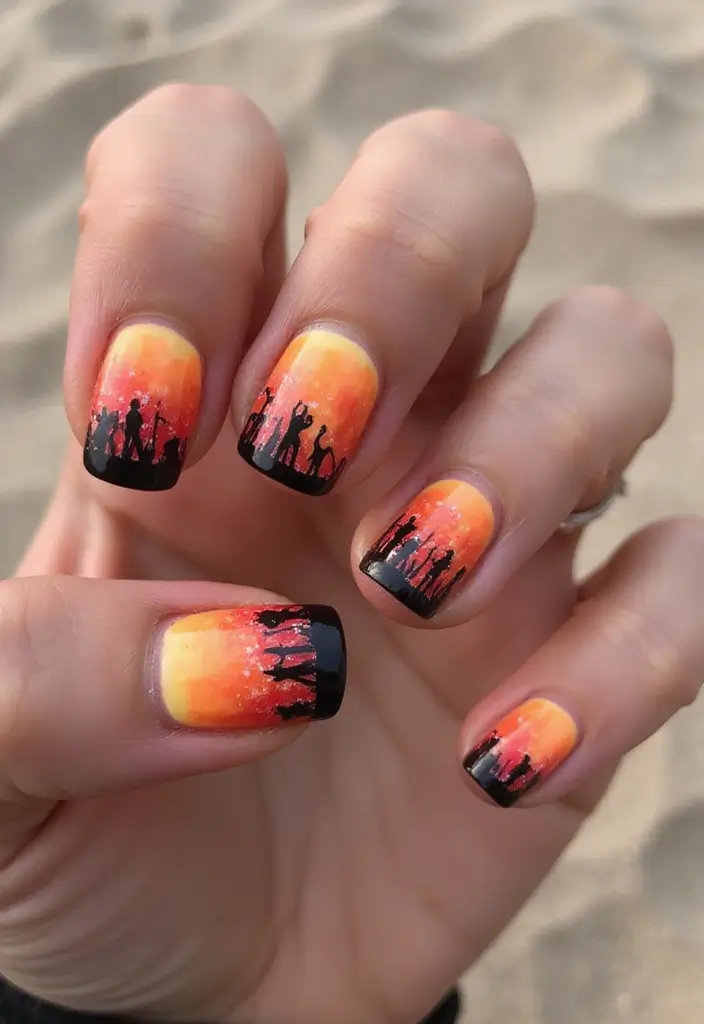
Capture the essence of a summer evening with the sunset horizon design. Start with a gradient base of warm colors like yellow, orange, and pink, transitioning from the cuticle to the tip. Once you have your base, use a thin brush to add silhouettes of palm trees or birds for that tropical feel.
– Tip: Blend the colors while they are still wet for a smooth gradient effect.
– Trick: A matte top coat can enhance the sunset vibe and give it a softer finish.
– This design transports you to a serene sunset, making it ideal for summer days or tropical getaways!
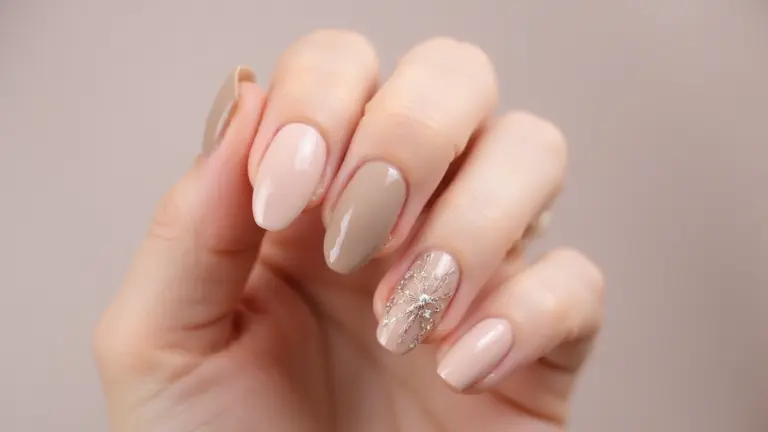
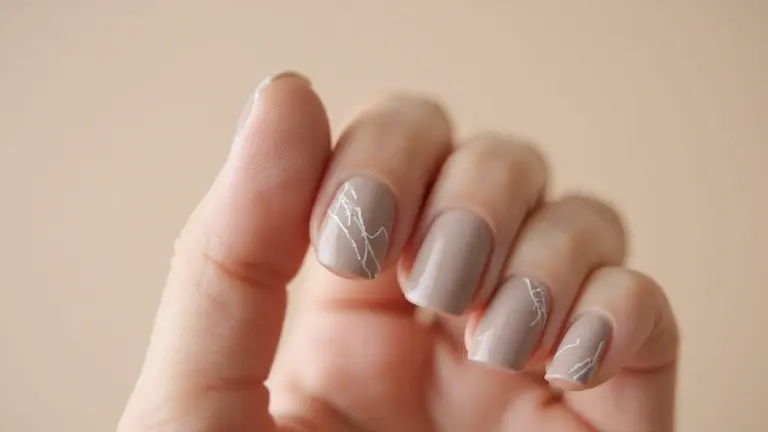
13. Minimalist Lines
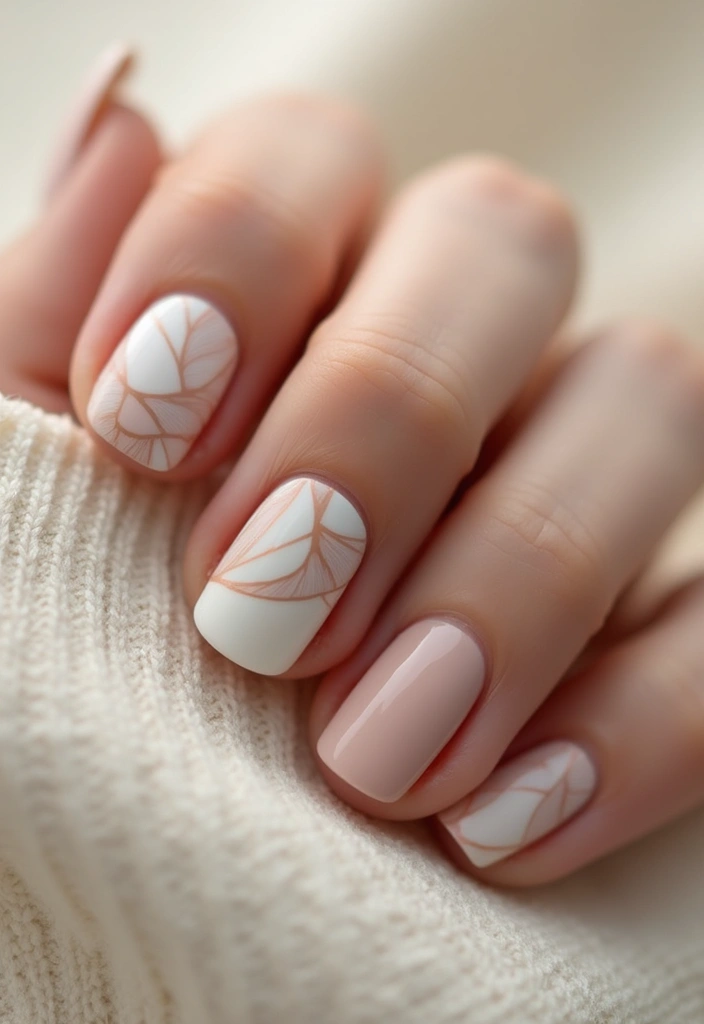
For a chic and modern look, minimalism is key. Start with a nude or light pastel base. Using a thin brush or nail art pen, draw simple lines or shapes on each nail. This design focuses on clean lines and negative space, creating a sophisticated style that’s perfect for any occasion.
– Tip: Keep your designs balanced for a professional look.
– Trick: Use contrasting colors for the lines to make them pop against the base.
– This style is great for work environments or formal events, where you want your nails to look effortlessly elegant.
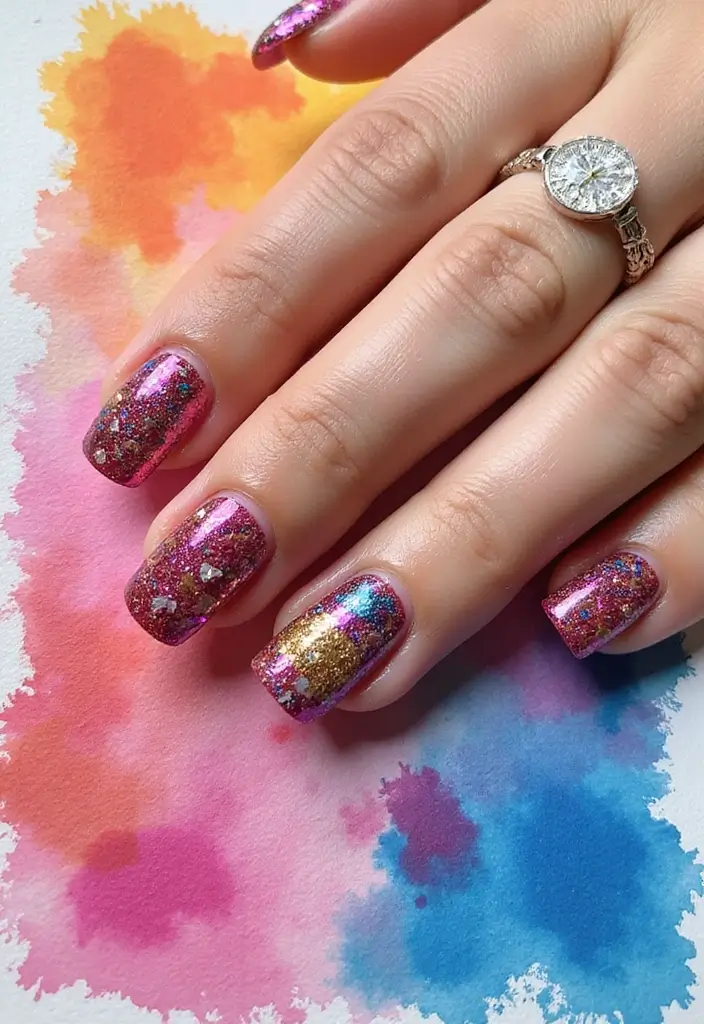
14. Glitter Watercolor
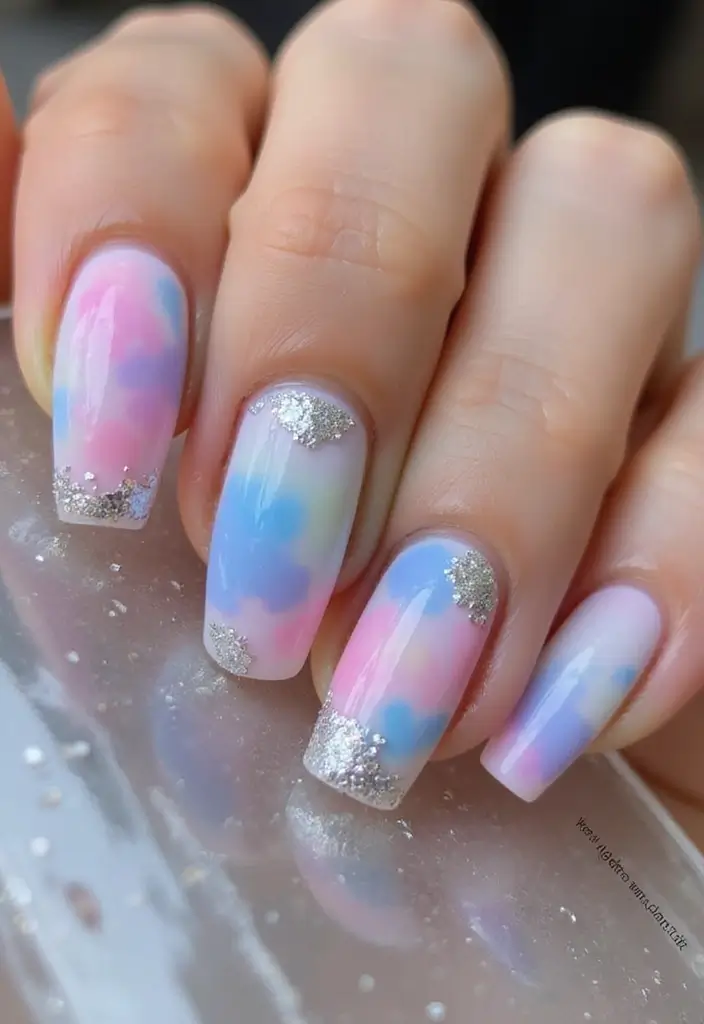
Add a touch of sparkle to your watercolor design with glitter accents! Start with a soft pastel or white base, then apply watercolor techniques with your favorite colors. Once dry, apply glitter polish over parts of your design for a sparkling finish.
– Tip: Use a glitter top coat for a more uniform sparkle.
– Trick: Focus the glitter on tips or specific areas for a glamorous yet subtle effect.
– This design is fabulous for parties or special occasions, ensuring your nails shine as bright as your personality.
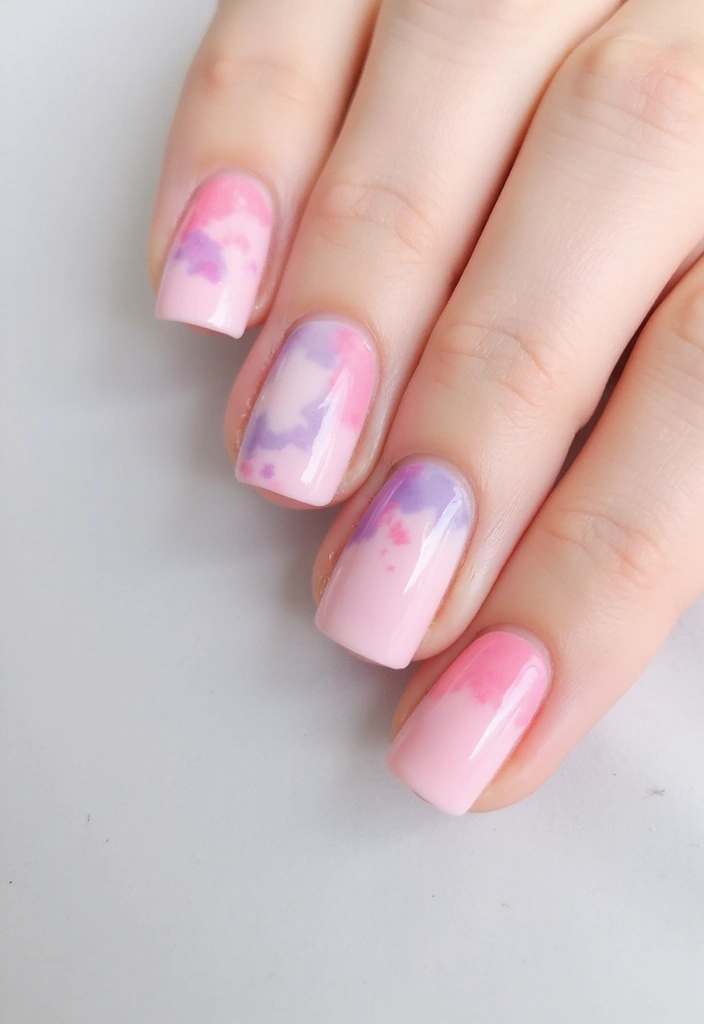
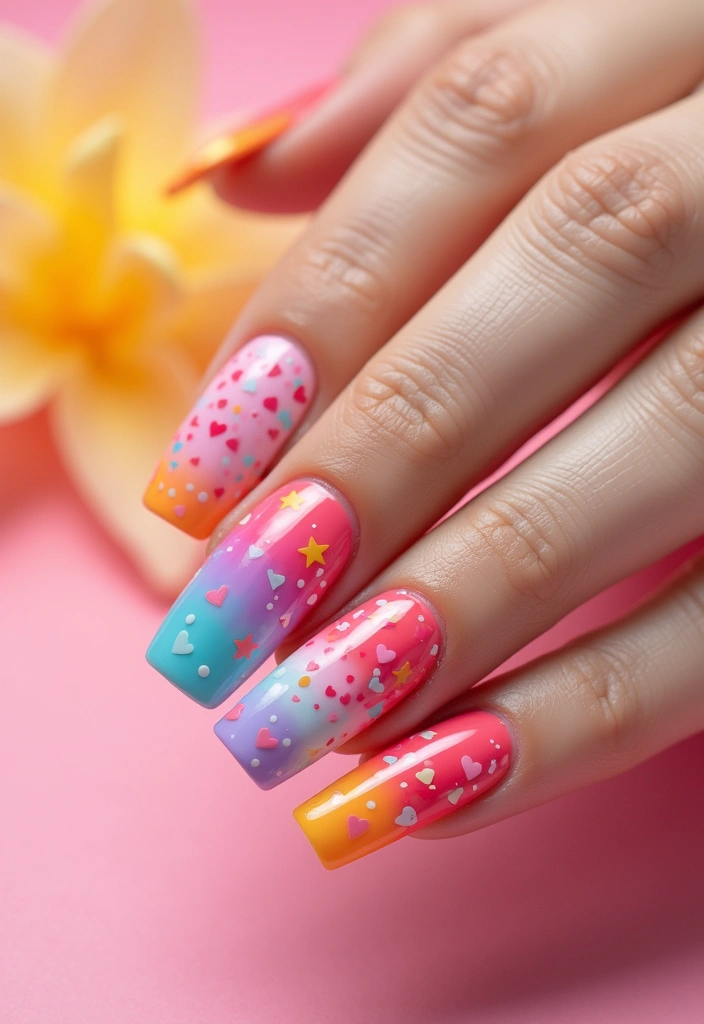
15. Soft Gradient Hearts
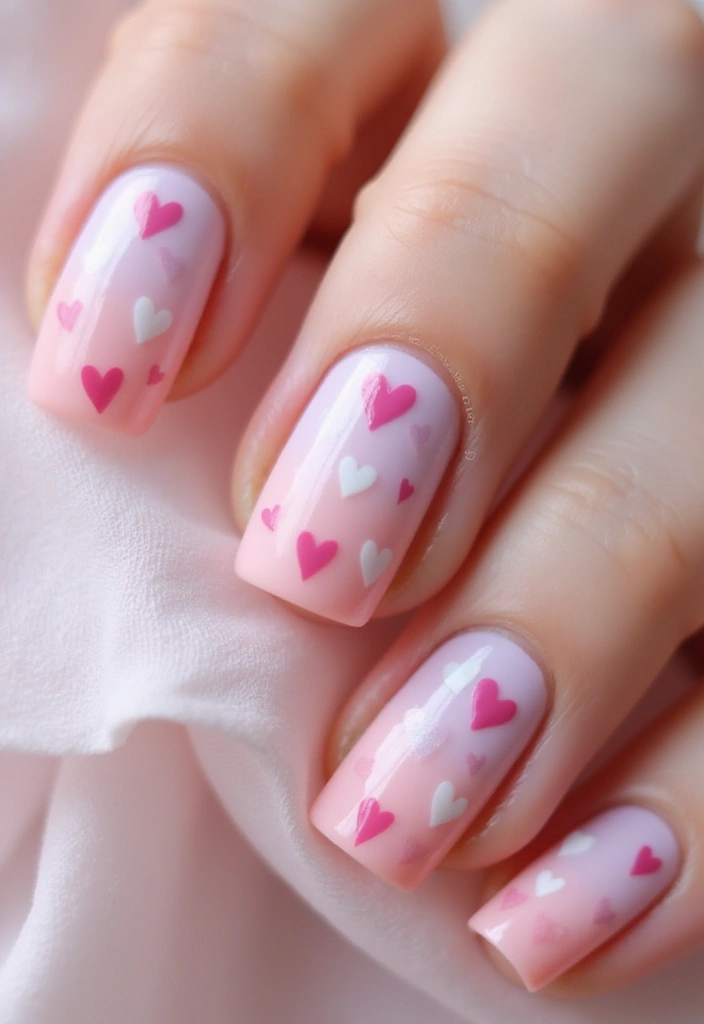
Express your love with soft gradient hearts! Start with a pastel base and use a fine brush to paint simple heart shapes at the base of each nail. Blend two or more shades for a romantic gradient effect within the hearts.
– Tip: Use a dotting tool to create perfect heart shapes.
– Trick: A glossy top coat will enhance the design and give it a shiny finish.
– This adorable design is perfect for Valentine’s Day or just to celebrate love any time of the year!
16. Candy Swirls
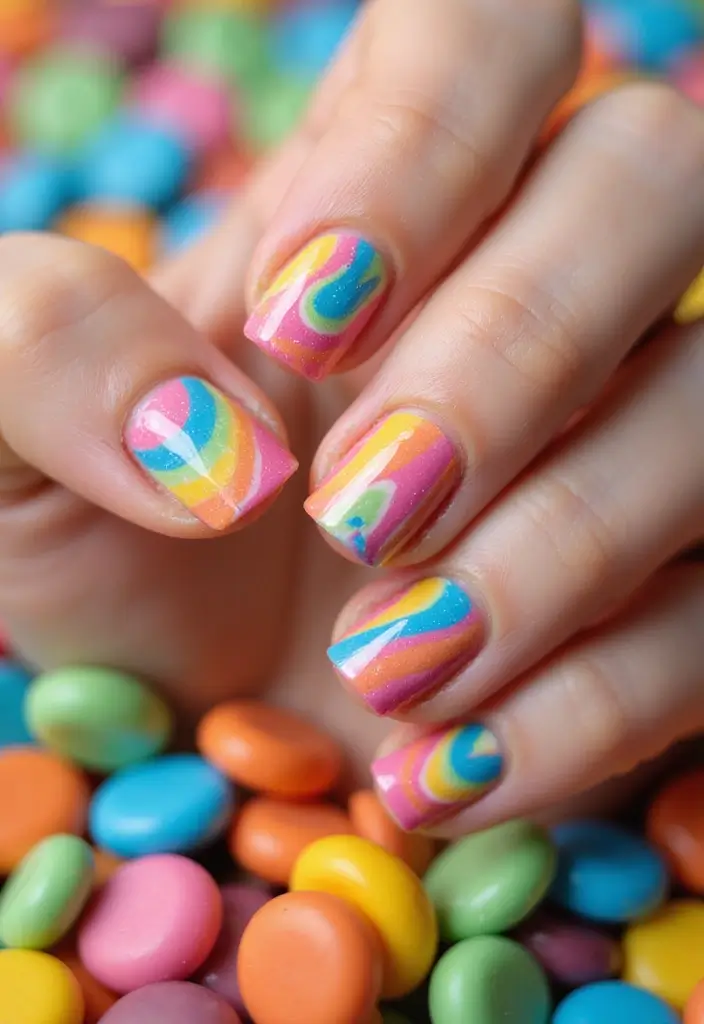
Channel your inner child with candy swirl nail designs! Begin with a white or light pink base. Then, using a small brush, create swirling patterns in bright colors like red, yellow, and blue. This playful design is reminiscent of your favorite candies and is sure to bring a smile.
– Tip: Layer colors while wet to blend them better for a more dynamic look.
– Trick: Add some shimmer polish for a sweet sparkle that captures the candy essence.
– Perfect for fun outings or just to brighten your day, these candy swirls will definitely be a conversation starter!
17. Accessorized Watercolor
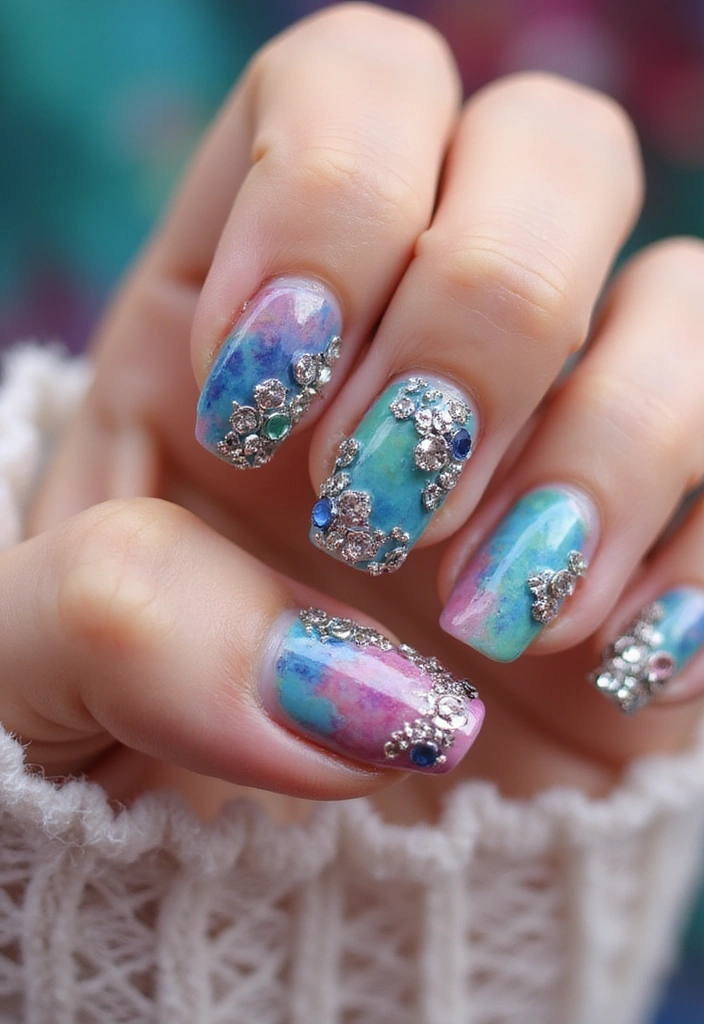
Take your watercolor nails to the next level by adding accessories! Begin with your favorite watercolor design as a base. Once dry, use nail art studs, pearls, or gems to embellish specific areas. This will elevate your design and add a touch of luxury.
– Tip: Use a clear top coat to secure your accessories in place.
– Trick: Apply the accessories while the top coat is still tacky for better adherence.
– This design is perfect for special events where you want your nail art to dazzle!
Elevate your DIY watercolor nails with a sprinkle of luxury! A few gems or pearls can transform your design into a showstopper for any special occasion. Remember, a clear top coat is your best friend for keeping those beauties secure!
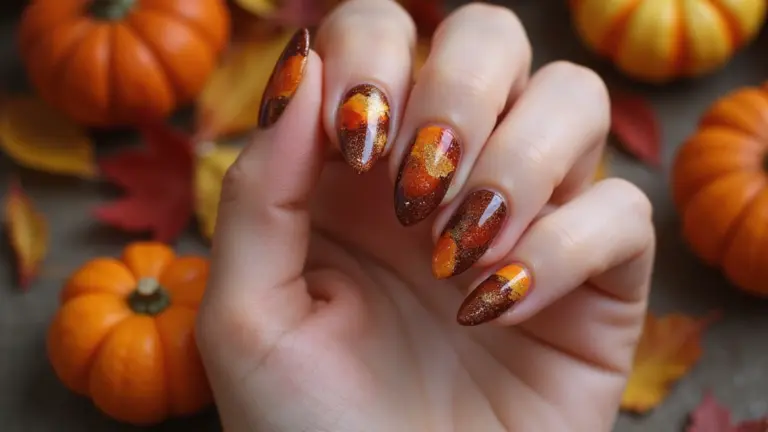
18. Seasonal Leaves
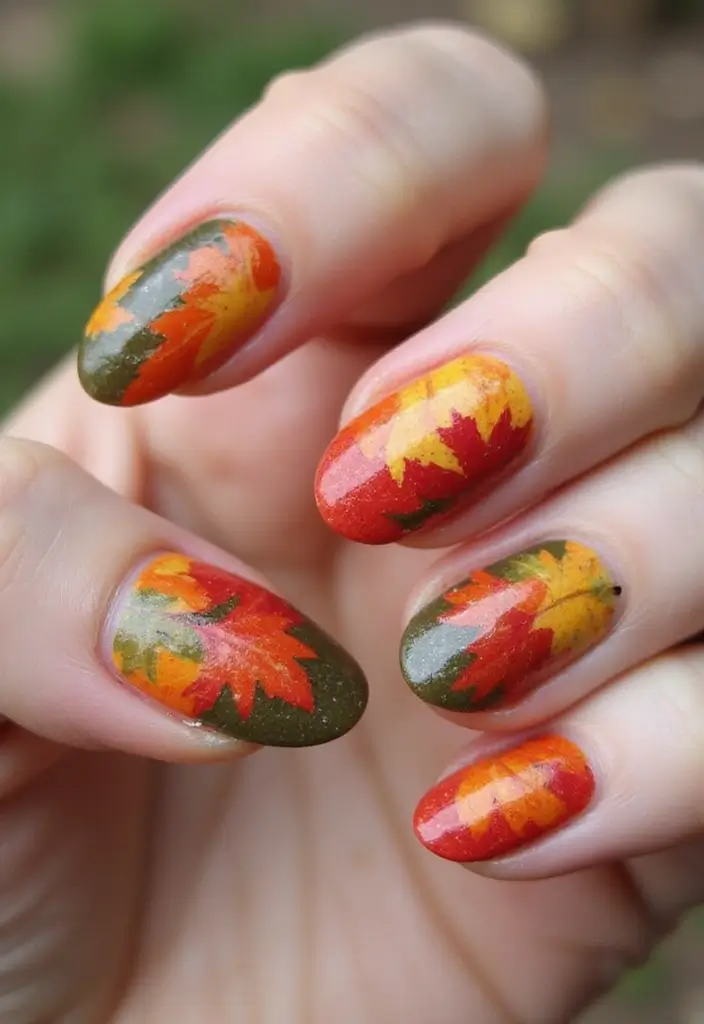
Celebrate the changing seasons with a seasonal leaf design. Start with a neutral base, then paint on leaves in warm hues for fall, cool tones for winter, or vibrant colors for spring and summer. The watercolor effect brings a lovely softness to each leaf.
– Tip: Use a fine brush for detailed leaf veins to add realism.
– Trick: Apply a matte top coat for a more natural look.
– This design adapts beautifully to the current season, making it a staple in any nail artist’s repertoire.
19. Watercolor Butterfly
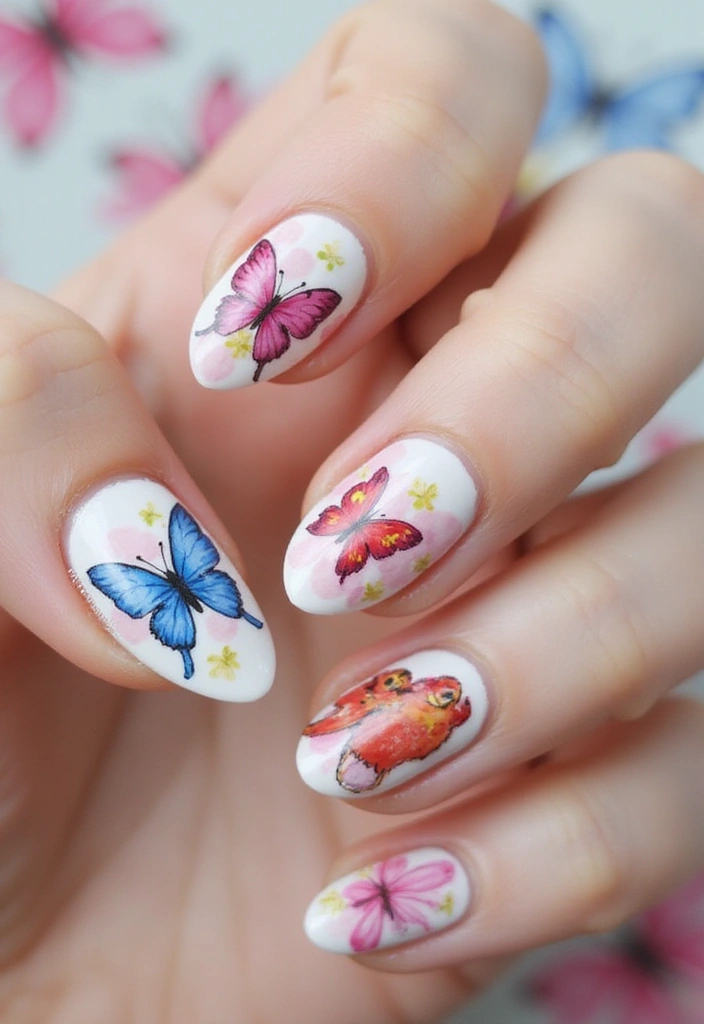
Butterflies symbolize beauty and transformation, making them perfect for nail art! Start with a light base color and use a thin brush to paint butterfly shapes with watercolor effects. Blend colors for the wings, creating a soft and delicate appearance.
– Tip: Layer colors to achieve the depth seen in real butterfly wings.
– Trick: A glossy top coat will make your butterflies pop and look more lifelike.
– This design is not only pretty but also carries meaningful symbolism, making it great for personal expression!
20. Watercolor Fish Scale
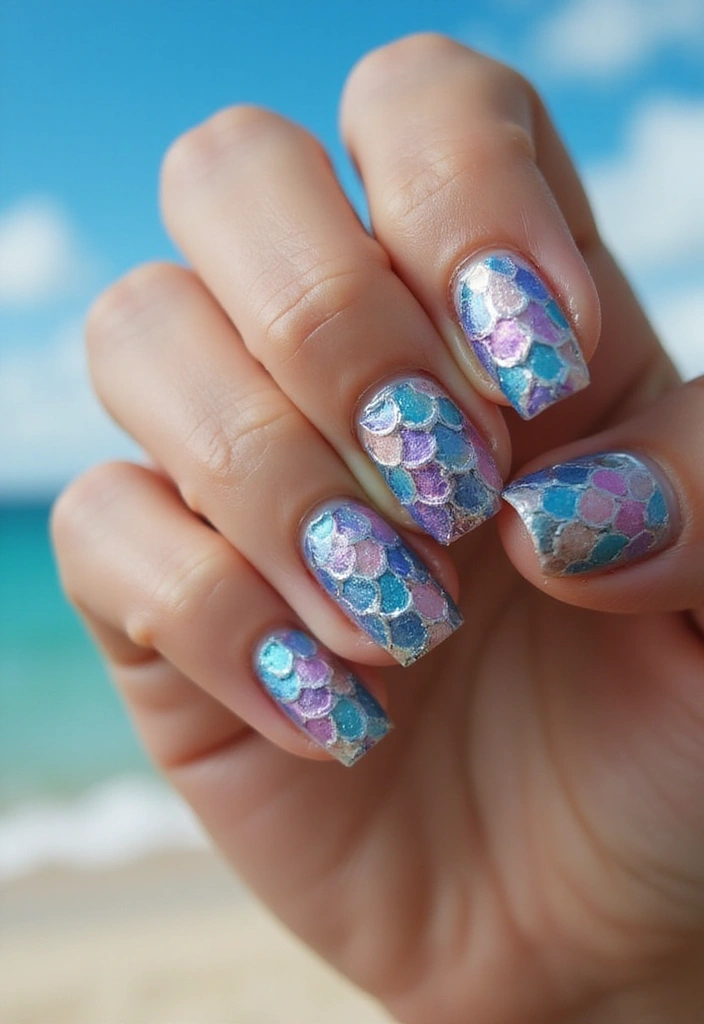
Fish scale patterns are trendy and unique, adding texture to your nails. Start with a light blue or aqua base. Using a dotting tool, create overlapping semi-circles in varying colors, mimicking fish scales. This design gives a playful and sea-inspired look.
– Tip: Try using iridescent colors for a shimmering effect that resembles real scales.
– Trick: A glossy top coat will make the scales shine brighter!
– This whimsical design is perfect for summer or ocean-themed events, embodying the spirit of the sea!
21. Mixed Media Watercolor
Mixing various media in your nail art can create a stunning effect! Start with a watercolor base and layer on other elements like foils, glitter, or even dried flowers. This eclectic approach brings depth and intrigue to your design.
– Tip: Ensure each layer is dry before adding the next for neatness.
– Trick: Use a clear top coat to seal all elements securely.
– This design is incredibly versatile and allows for personal creativity, making it a fun project for weekends or special occasions!
22. 3D Watercolor Flowers
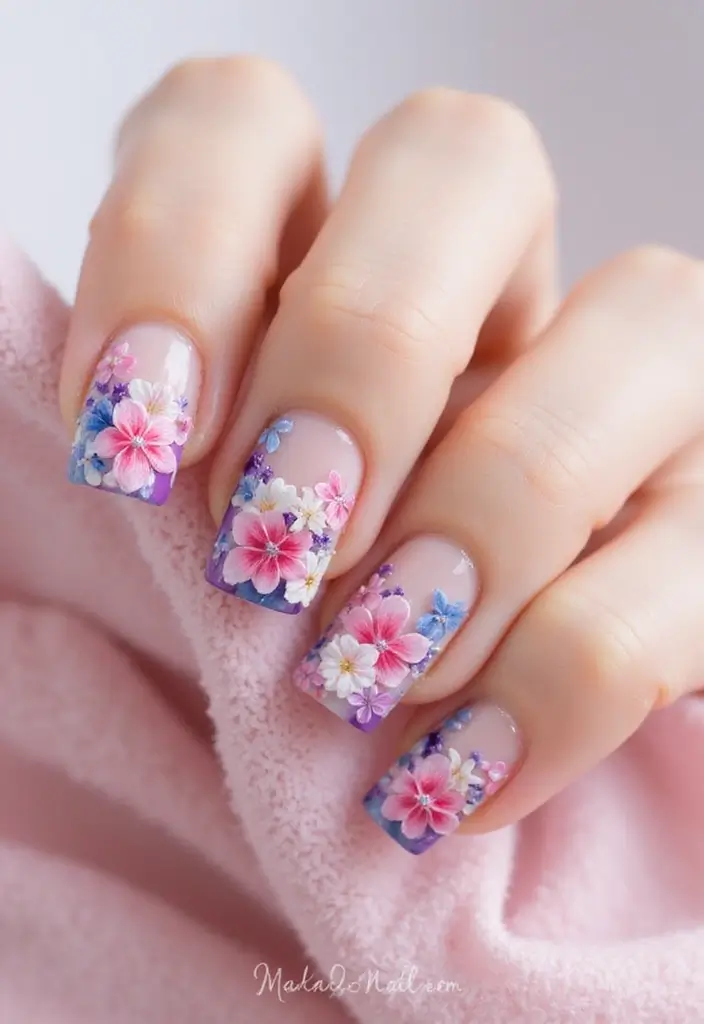
Take floral designs to the next dimension with 3D elements! Start with a base coat of your choice, then use acrylic paint or a gel to create raised flowers atop your watercolor background. This design adds a stunning layer of depth and texture.
– Tip: Use a fine brush for intricate petal details.
– Trick: A matte top coat will enhance the 3D effect.
– Perfect for weddings or special occasions, this design will surely impress anyone who sees it!
Elevate your nail art game! 3D watercolor flowers aren’t just a design — they’re a stunning statement. With a little practice and the right tips, you can create floral masterpieces that’ll turn heads at any event!
23. Tribal Patterns
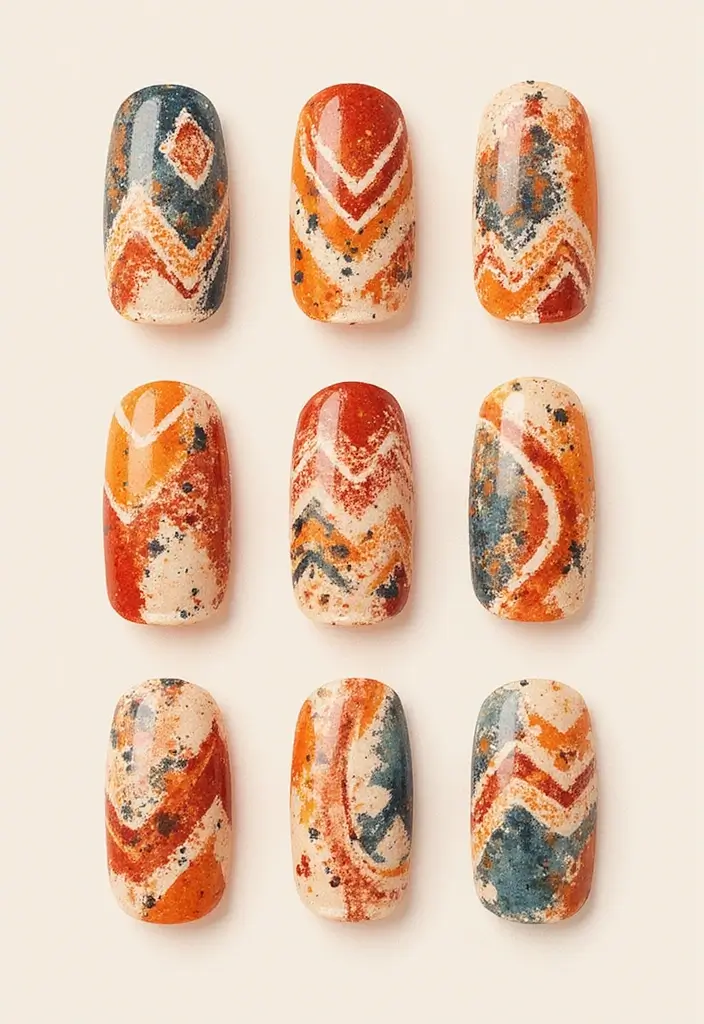
Make a statement with tribal patterns in watercolor style. Start with a white or beige base coat, then use a fine brush to create tribal designs with earthy tones. This style brings an edgy and unique vibe to your nails.
– Tip: Research tribal patterns for inspiration and authenticity.
– Trick: Use a matte top coat for an organic look.
– This design is perfect for those who embrace culture and creativity in their style!
24. Sweet Treats
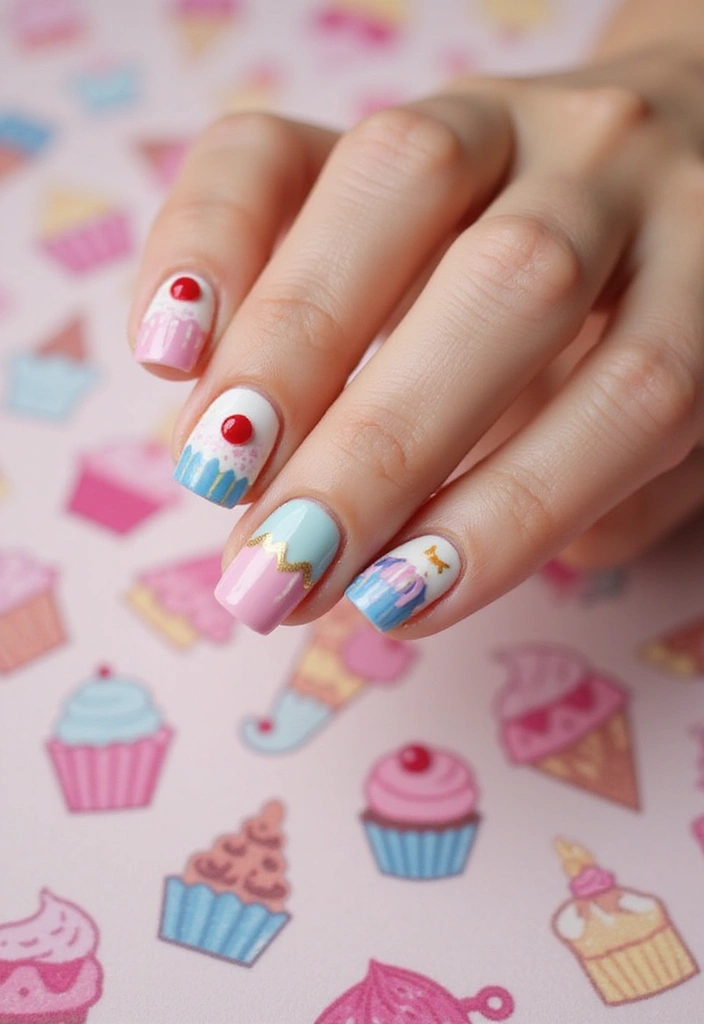
Indulge your sweet tooth with a dessert-inspired mural on your nails! Start with a pastel base and use a fine brush to paint tiny cupcakes, candy, or ice cream designs. This fun nail art is perfect for summer parties or celebrations!
– Tip: Use a dotting tool for small details like sprinkles.
– Trick: Add a glossy top coat for added sweetness!
– This playful design will surely evoke smiles and compliments wherever you go!
25. Artistic Brush Strokes
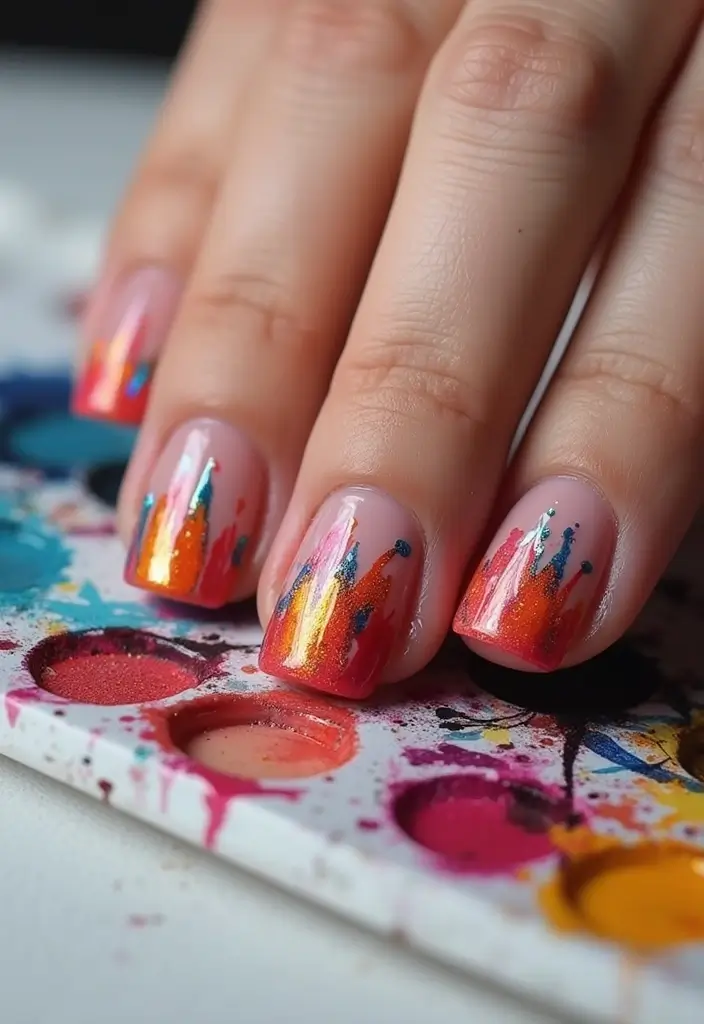
Emulate fine art with brush strokes on your nails! Start with a nude or white base and use a variety of colors to create bold strokes across your nails — think Van Gogh or Monet vibes. This artistic approach is perfect for those looking to express their creativity!
– Tip: Use a flat brush for varied stroke widths.
– Trick: Layer and blend your strokes for a more dynamic effect.
– This design is great for art lovers and adds a unique touch to any look!
26. Celestial Theme
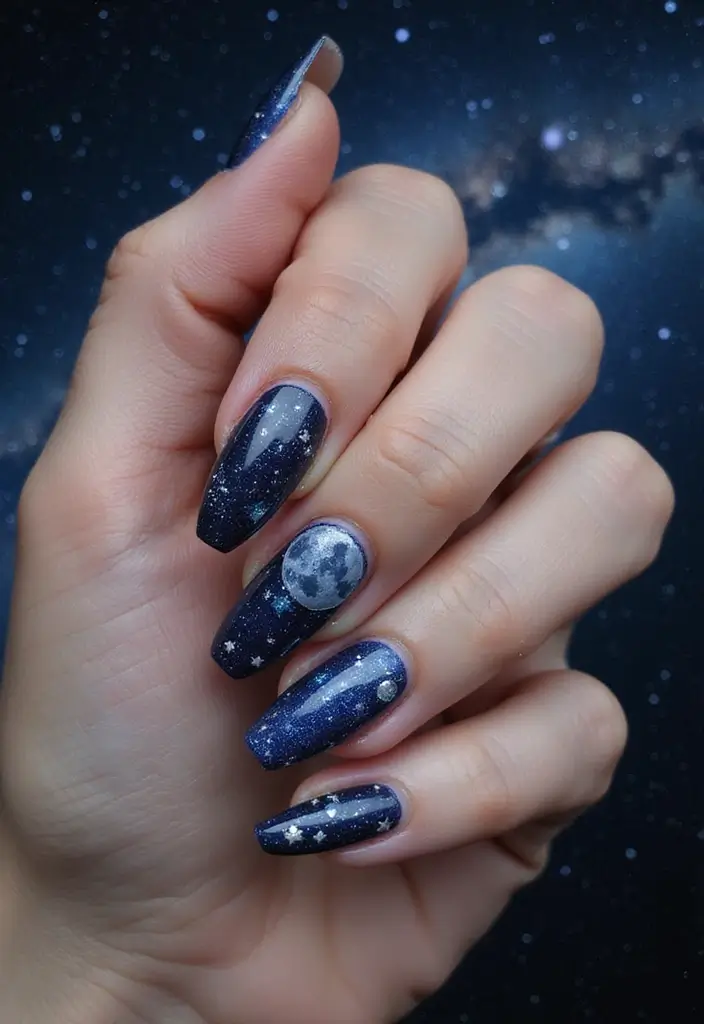
Channel the celestial with stars, moons, and planets on your nails! Start with a dark base like navy or black, and use tiny dots and shapes to represent celestial bodies in watercolor hues. This design is perfect for those who love astrology and the night sky.
– Tip: Use a thin brush for detailed work on small elements.
– Trick: A glossy top coat will make your celestial elements shine bright!
– This enchanting design will transport you to outer space, making it a favorite for night outings or stargazing events!
27. Whimsical Candy Cane
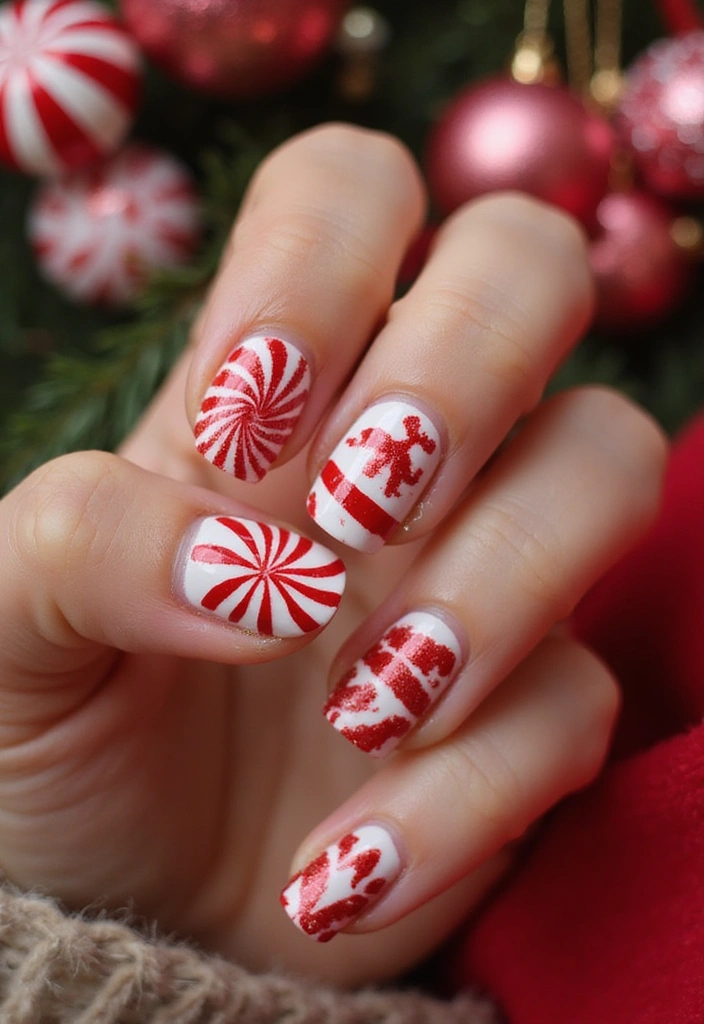
Get ready for the holidays with whimsical candy cane nails! Start with a light red or white base coat, then use a brush to create alternating stripes of red and white. Add a soft green for a mint accent!
– Tip: Use a fine brush for clean stripe work.
– Trick: A matte top coat can give your design a cozy feel.
– Perfect for festive gatherings or holiday celebrations, these candy cane designs will spread joy and cheer!
28. Watercolor Pebble Effect
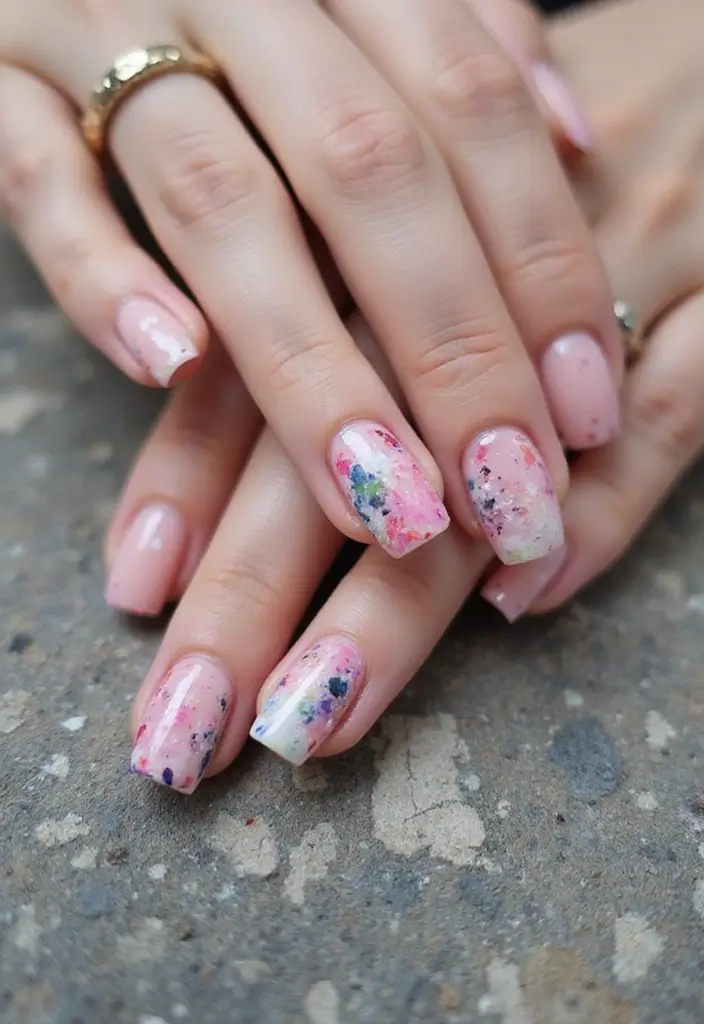
Create a unique texture with a watercolor pebble effect! Start with a light base coat, then use a dotting tool to layer spots of colors that mimic pebbles. Blend them carefully for a smooth finish, giving your nails an abstract and natural appearance.
– Tip: Experiment with colors that complement each other for a cohesive look.
– Trick: A glossy top coat will heighten the natural effect, making it look polished and clean.
– This design is perfect for nature lovers or anyone looking for something different!
29. Floral Wreath
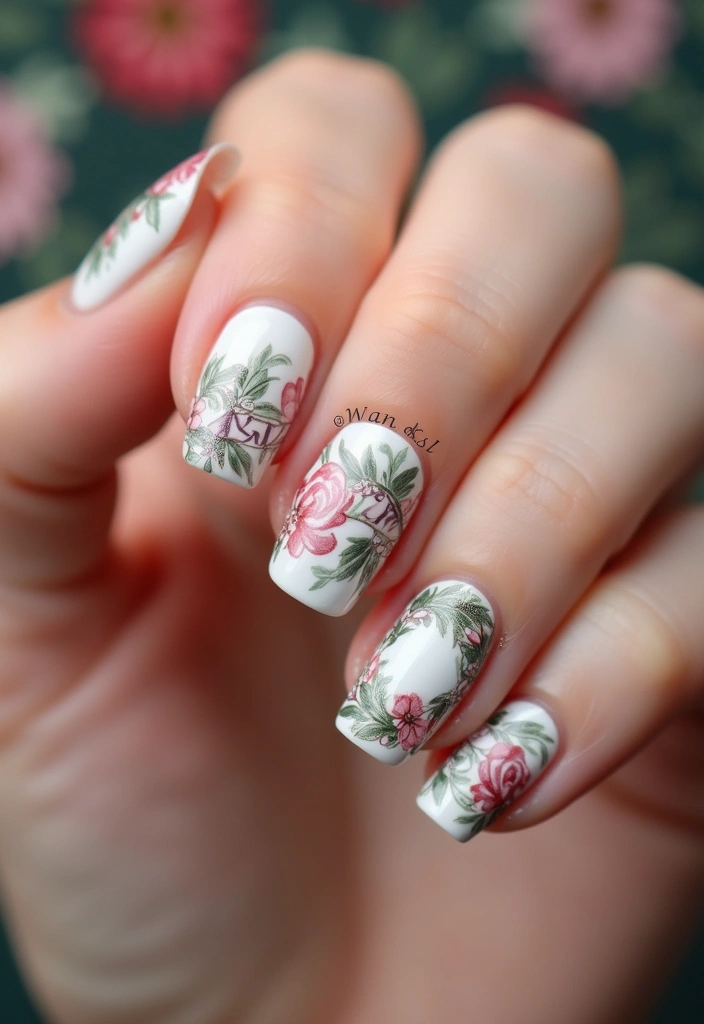
Recreate nature’s beauty with a floral wreath design! Start with a pastel or white base and use a fine brush to paint a circular wreath of flowers and leaves around the cuticle area. This charming design is perfect for spring!
– Tip: Use smaller brushes for intricate details.
– Trick: A glossy top coat enhances the floral vibrancy and freshness.
– This design is sweet and romantic, perfect for anyone wanting to embrace the beauty of nature!
30. Watercolor Clouds
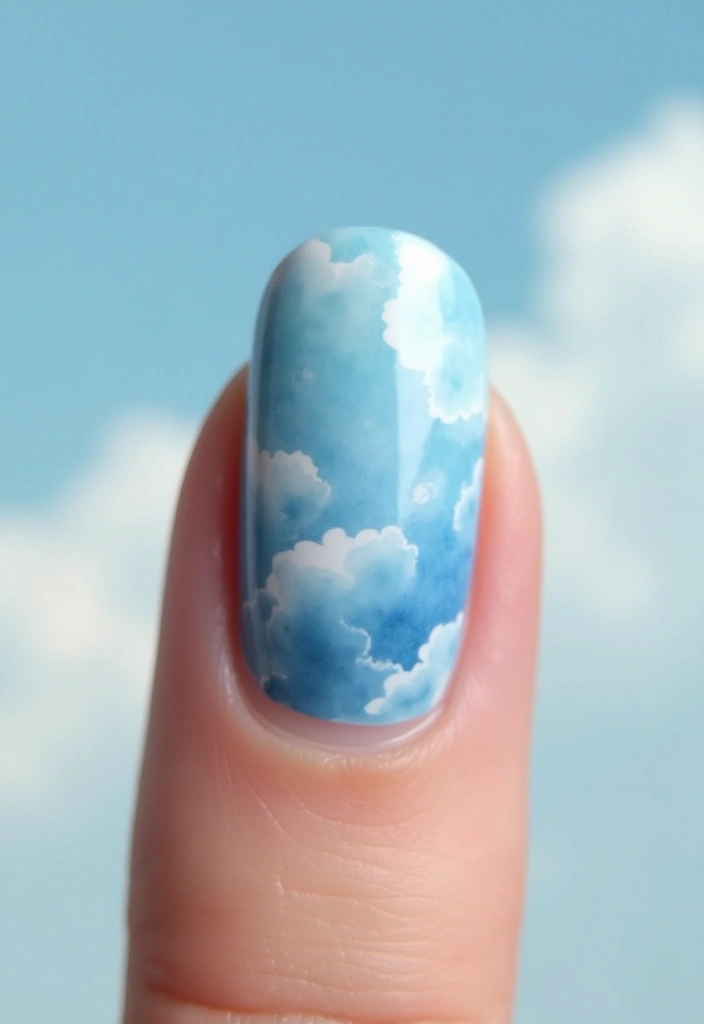
Bring a piece of the sky to your nails with a watercolor cloud design! Start with a light blue base and, using a sponge, apply white to mimic fluffy clouds. You can add hints of lavender or pink for a sunset touch.
– Tip: Blend the colors while still wet for a soft, dreamy effect.
– Trick: A matte top coat will keep the clouds looking soft and fluffy.
– This design is light and airy, perfect for those looking to express a calm, serene vibe!
Create your own little sky on your nails! With a blend of soft blues and fluffy whites, you can express serenity and calm in a single stroke. Let your nails tell a tranquil story!
Conclusion
Watercolor nail art brings a world of creativity right to your fingertips! With these 32 vibrant designs, you can experiment and explore various techniques, embracing your artistic flair. Whether you lean towards soft pastels or bold colors, there’s something in this list for everyone. Try them out at home, and don’t be afraid to mix and match ideas to make each design uniquely yours!
Frequently Asked Questions
What materials do I need to start with watercolor nail art at home?
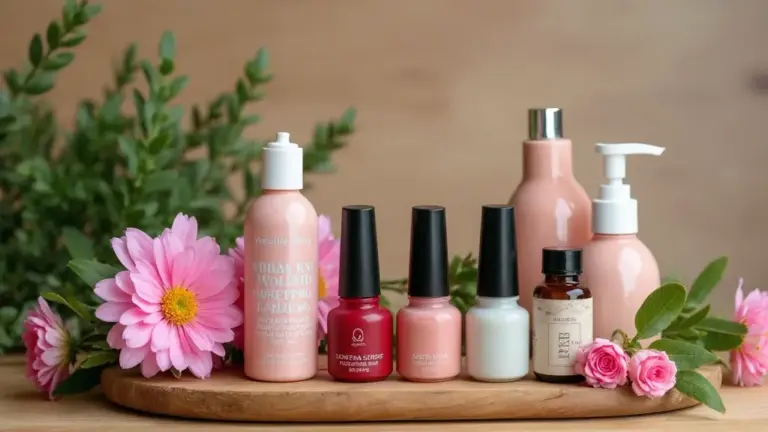
Getting started with watercolor nail art is easier than you might think! You’ll need some basic materials: a base coat, various watercolor nail polish colors, a fine brush, a sponge, and a top coat to seal your beautiful designs. You might also want some nail art tools like dotting tools or painter’s tape for creating unique patterns. Don’t forget a good nail polish remover for any mistakes!
How do I ensure my watercolor nail art lasts longer?
To make your watercolor nail art last, start with a solid foundation! Apply a base coat to protect your nails and help the polish adhere better. After creating your design, finish with a top coat for added shine and durability. Also, consider avoiding prolonged exposure to water and harsh chemicals, and remember to apply cuticle oil regularly to maintain healthy nails.
Are watercolor nail designs suitable for all nail types?
Absolutely! Watercolor nail designs are versatile and can work beautifully on all nail types, whether they’re natural, acrylic, or gel. Just ensure that your nails are clean and well-prepped before starting. If you have shorter nails, consider opting for smaller, simpler designs to keep them looking chic and polished!
Can I mix different watercolor techniques in one nail art design?
Yes, mixing different watercolor techniques can create a stunning, layered effect! Feel free to combine techniques like ombre, splatter, and floral designs to express your creativity. The key is to start with a base and let each layer dry before adding the next, ensuring that your masterpiece comes together beautifully!
What are some tips for beginners trying watercolor nail art for the first time?
If you’re new to watercolor nail art, start with simple designs that don’t require too much precision, like pastel waves or soft gradient hearts. Practice makes perfect, so don’t be afraid to experiment! Use a sponge for blending colors and keep some nail polish remover handy for quick fixes. Most importantly, have fun and let your creativity shine!